
How to add a Print Template
Brief Overview
Print Templates allow you to send a Designer product directly to a printer or output folder from within a job. Once your Designer product is created, you can attach it as a Print Template inside the job settings and use it when printing individual subjects.
Print Templates are a great way to send proof flyers to a folder, test product designs before attaching them to price sheets, or print school service items like ID Cards.
Print Templates are a great way to send proof flyers to a folder, test product designs before attaching them to price sheets, or print school service items like ID Cards.
Setup / Configuration
1. Create Your Designer Product
Before adding a Print Template, you must first build the product you want to print.
Open Designer
Create the layout or product you want to use for printing
Sync your design
Learn more here: Getting Started with Designer
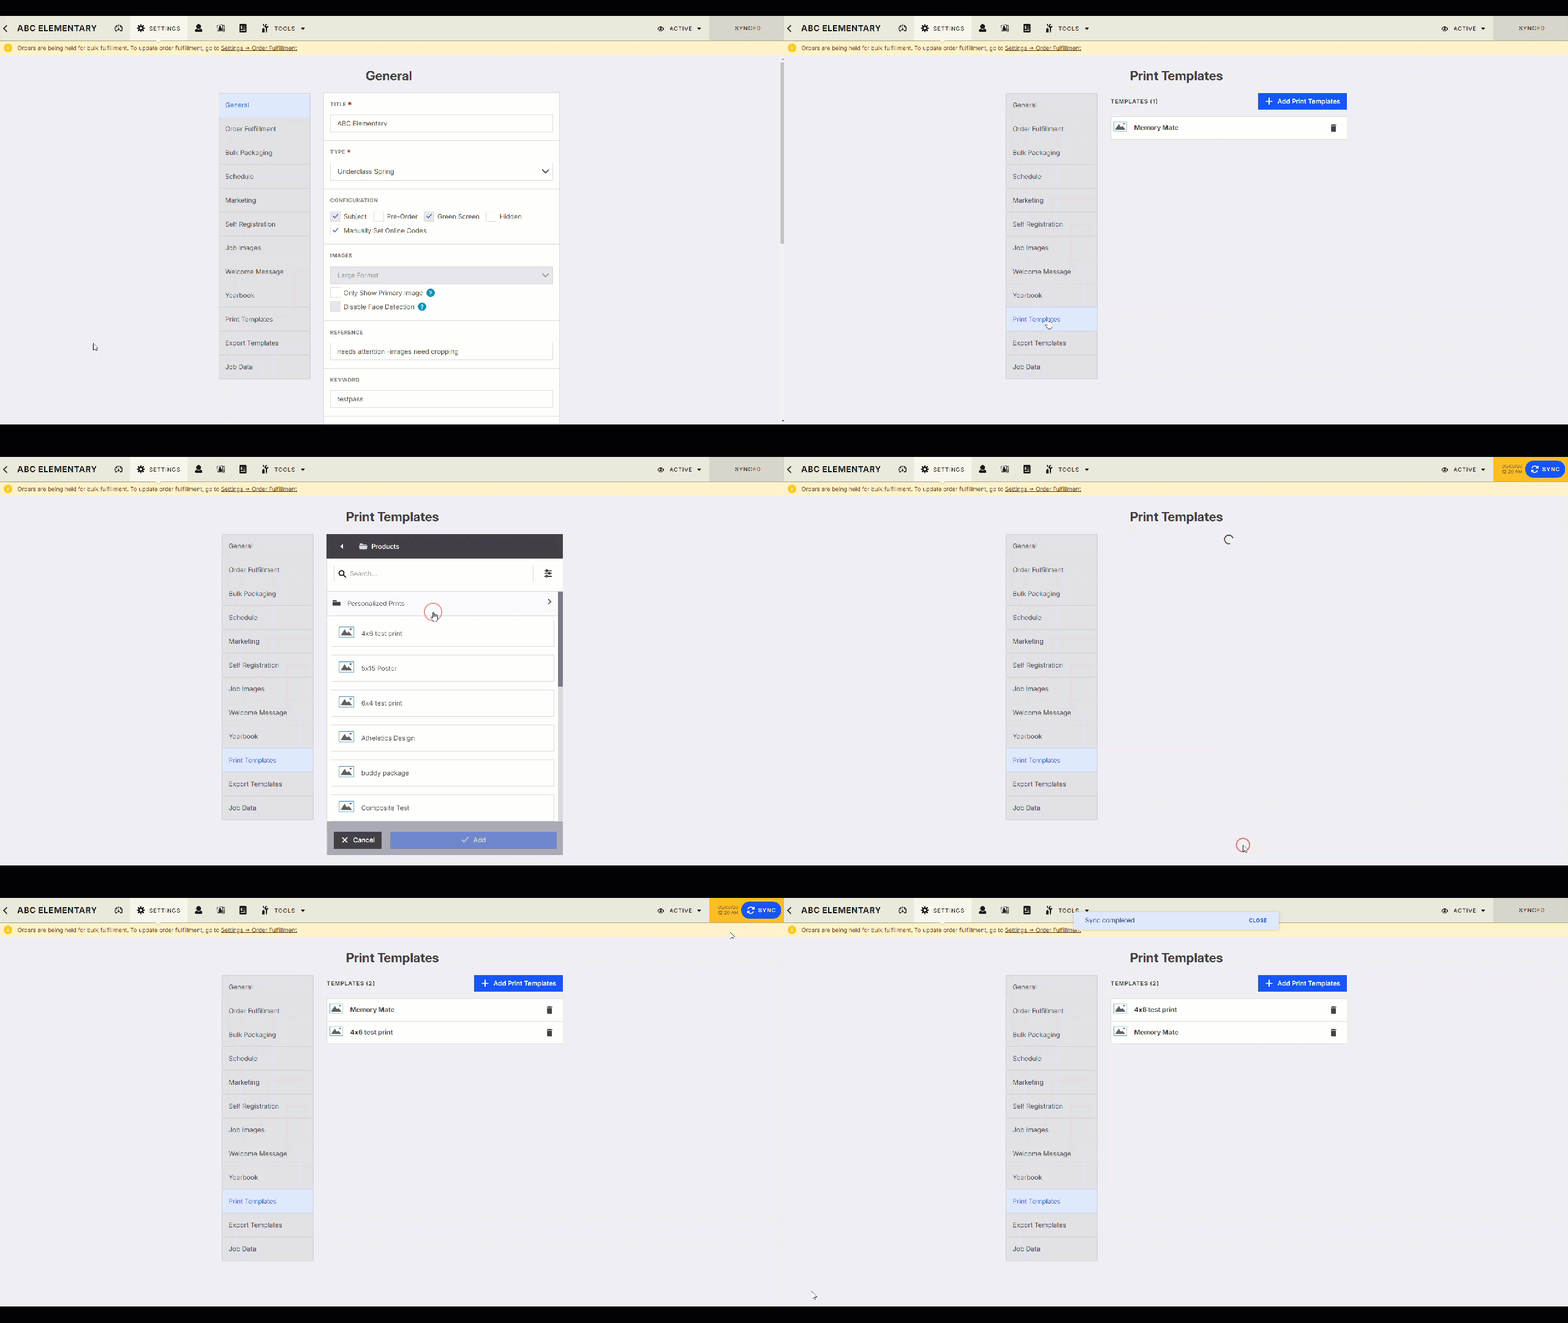
2. Add the Print Template to Your Job
Navigate to your job settings to attach the Designer product.
Job → Settings → Print Template
Then:
Click Add Print Template
Select the Designer product you created
Sync your changes
Your template is now available for printing within the job.
Ways to Print your design
There are three different ways to print your design:
Printing a Designer for single subject
Print a Designer on-site through the Capture screen during the picture day
Print a Designer product for the entire job or filtered subjects
Explore these options below
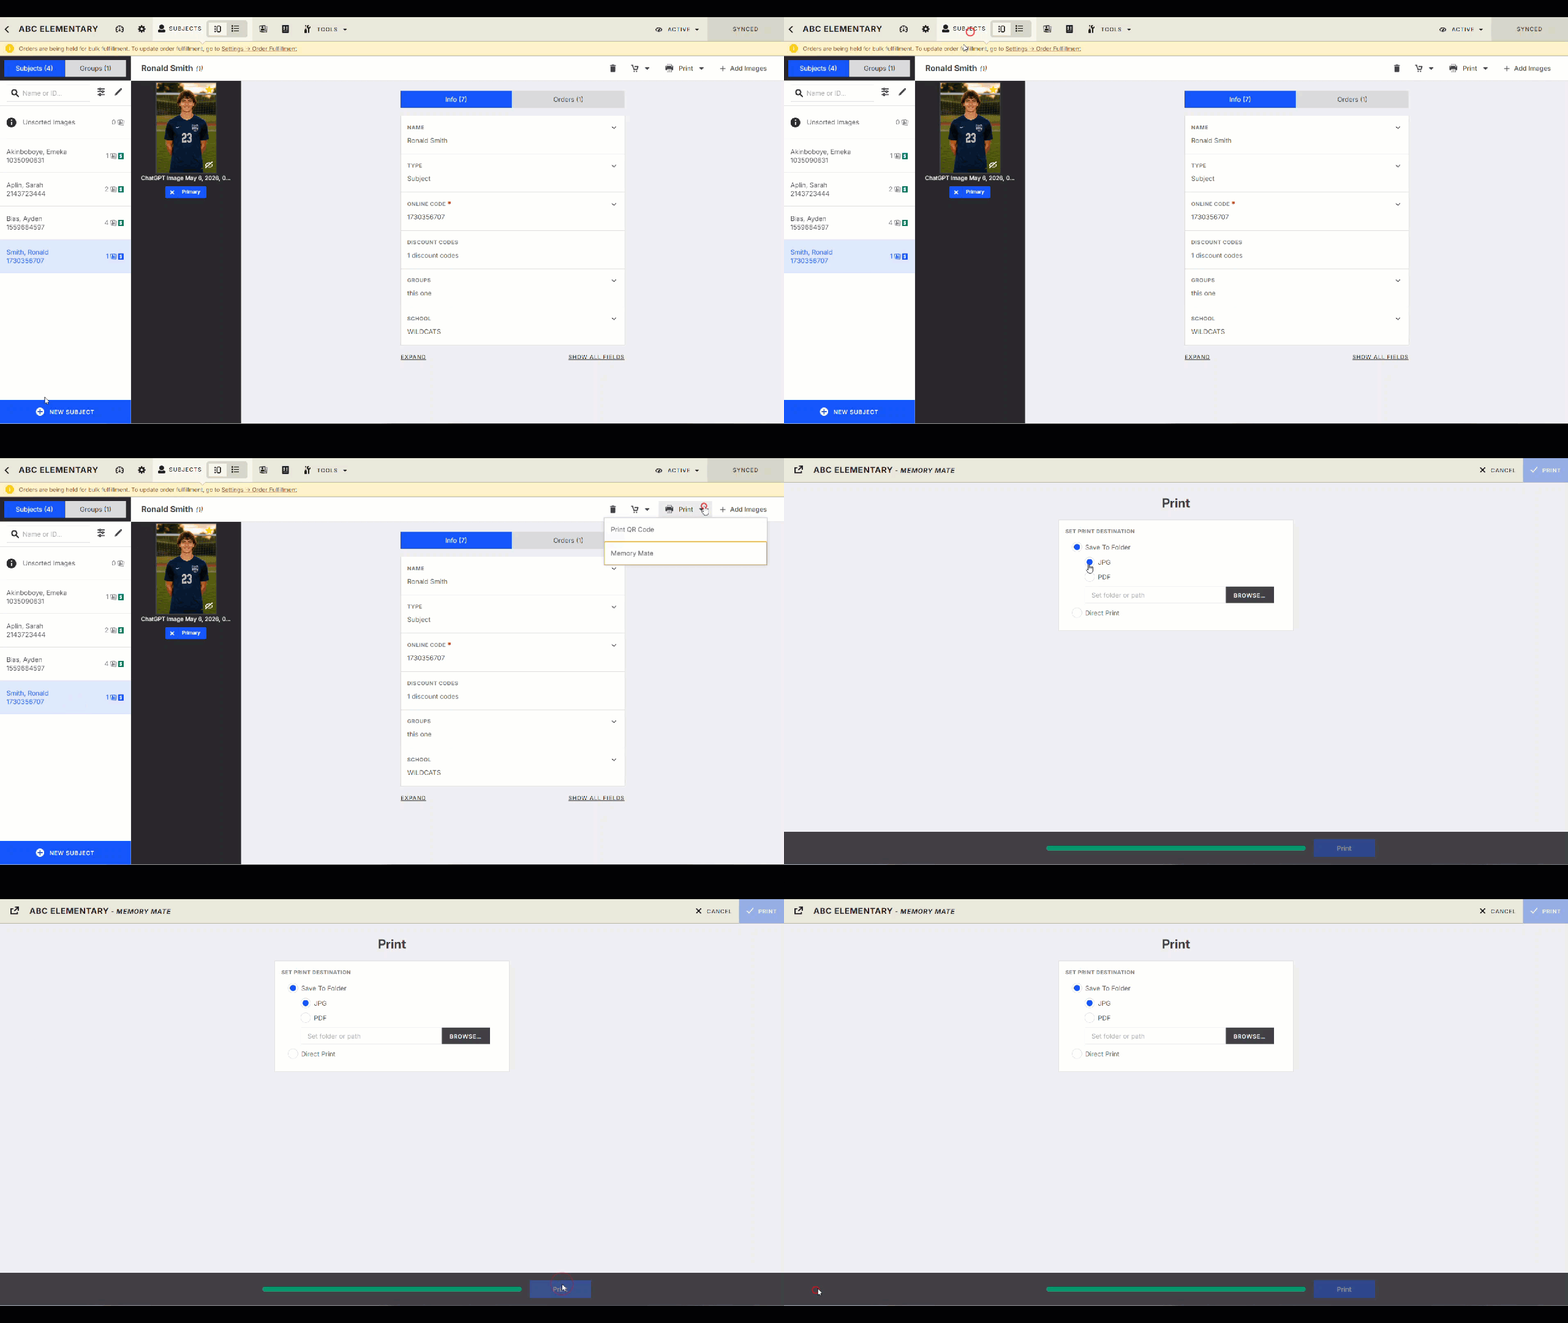
Printing a single Subject Using Your Template
Open your job
Go to the Subjects tab
Select a subject
Click Print in right hand corner
Choose your Print Template from the list
Select the folder you want to send the print to
Click Print
Your file will be generated and sent to the selected output folder.
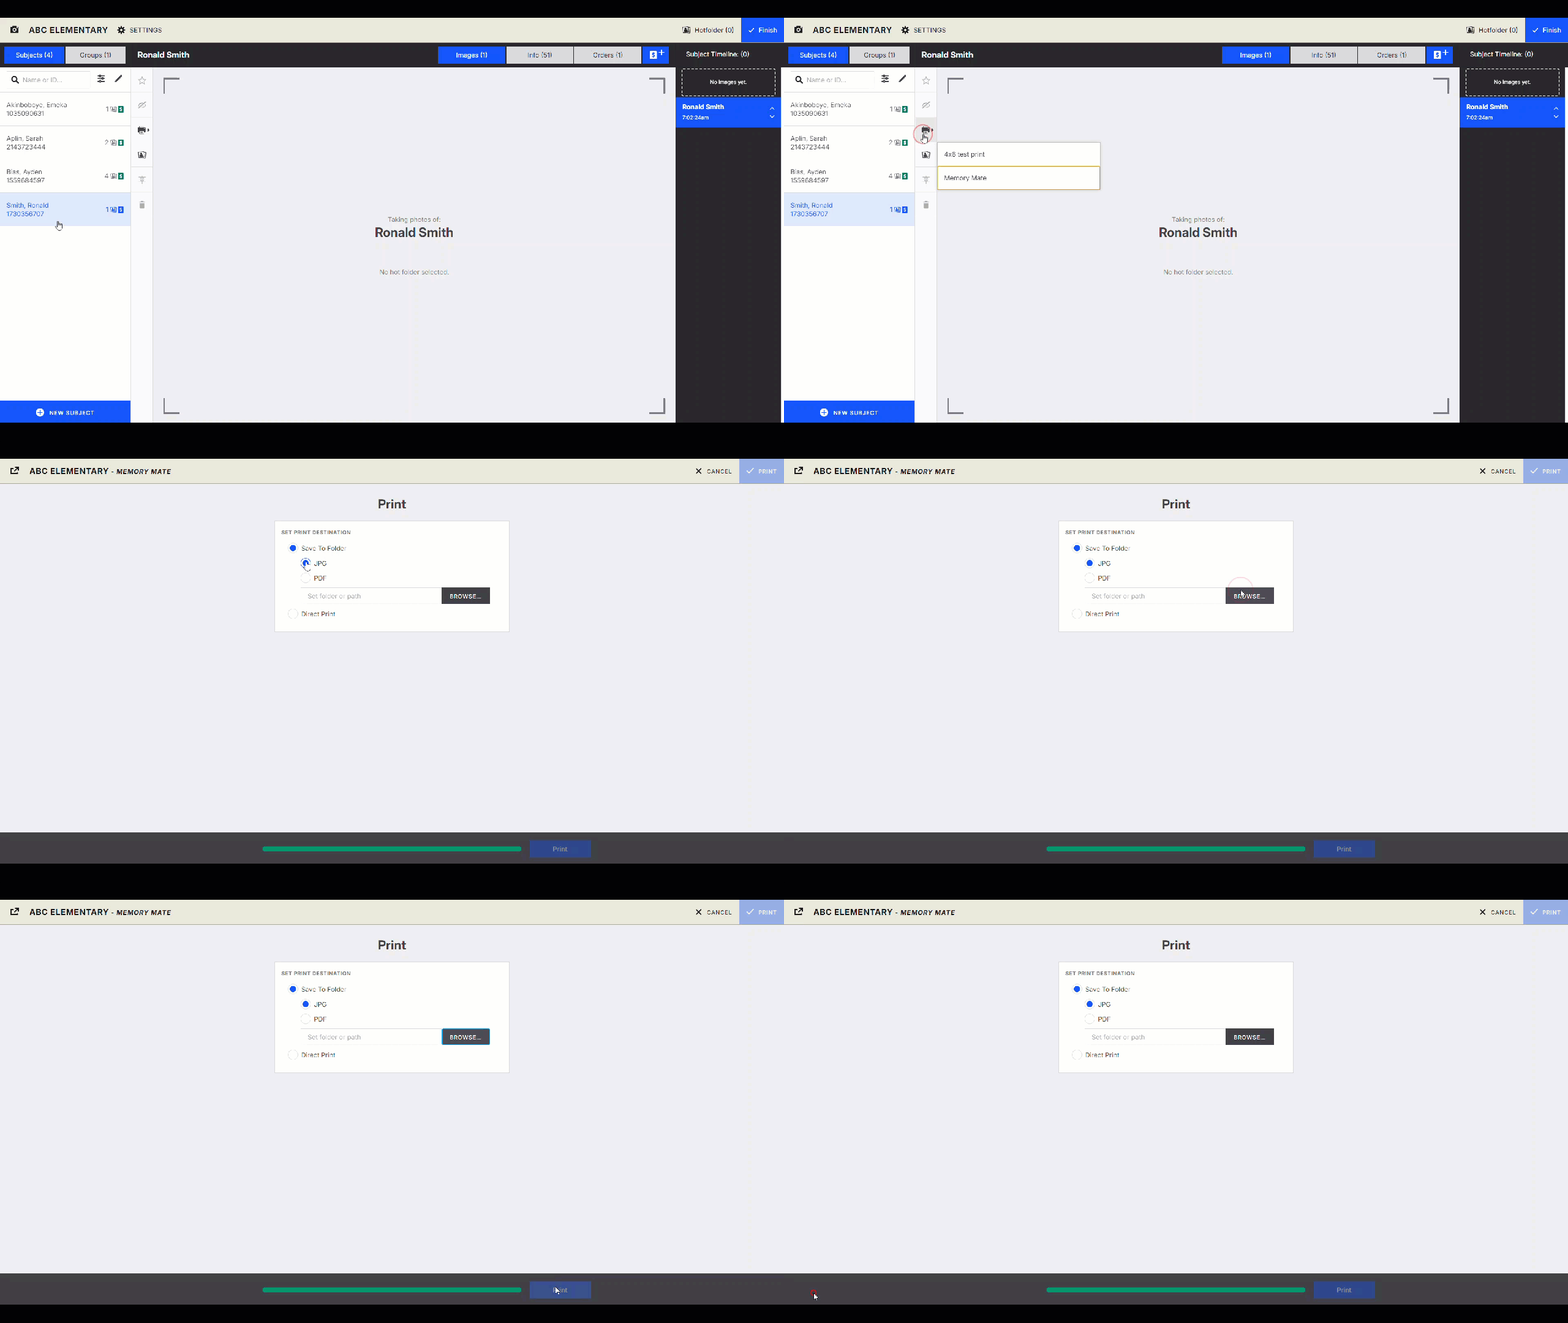
Print a Designer on-site through the Capture screen
Click tools → Capture → Subject → Print icon
Choose your out put and click Print
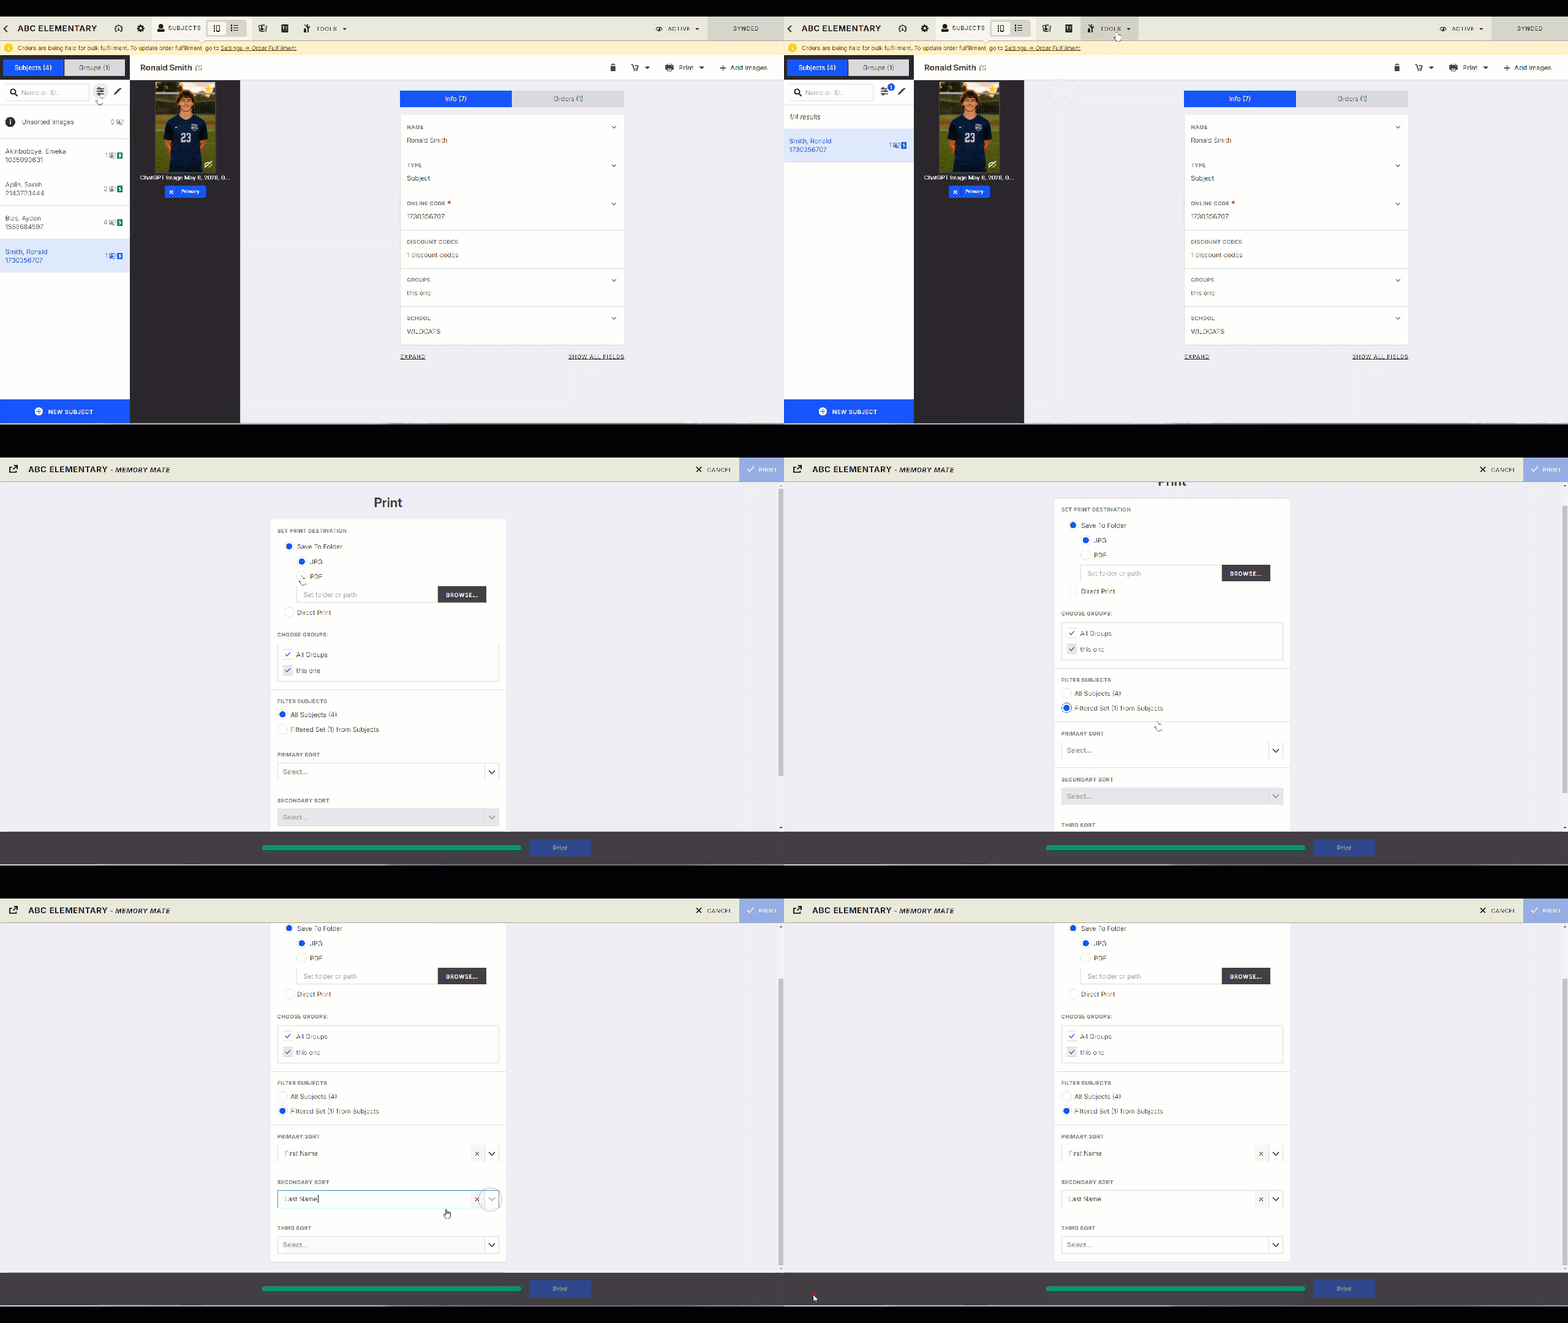
Print a Designer product for the entire job or filtered subjects
Got to Subjects tab and click filter icon → Filter for the subjects you need to print
Choose your output
Select all subjects or your filtered set of subjects
Choose the order/sort you need them to print in
Click Print
Advanced Options / Additional Rules
Print Templates must be created in Designer before they can be added to a job
You can add multiple Print Templates to a single job
Templates can be removed or replaced at any time in Job Settings
Output folders should be organized by job or product type to keep files easy to locate