Getting Started with Price Sheets
Learn how to create and manage Price Sheets (aka Order Forms, Price Lists) in Workflow
What is a Price Sheet?
A Price Sheet is for organizing prints, products, services, and backgrounds to sell. Use flexible configurations to build unique packages and offers to entice and incentivize customers.
There are four different sections inside a price sheet:
Categories: prints, products, specialty items, a la carte items, etc.
Image Options: retouching, glass glare removal, braces removal, etc.
Order Options: special packaging, personalization, etc.
Backgrounds: background image sets for green screen poses.
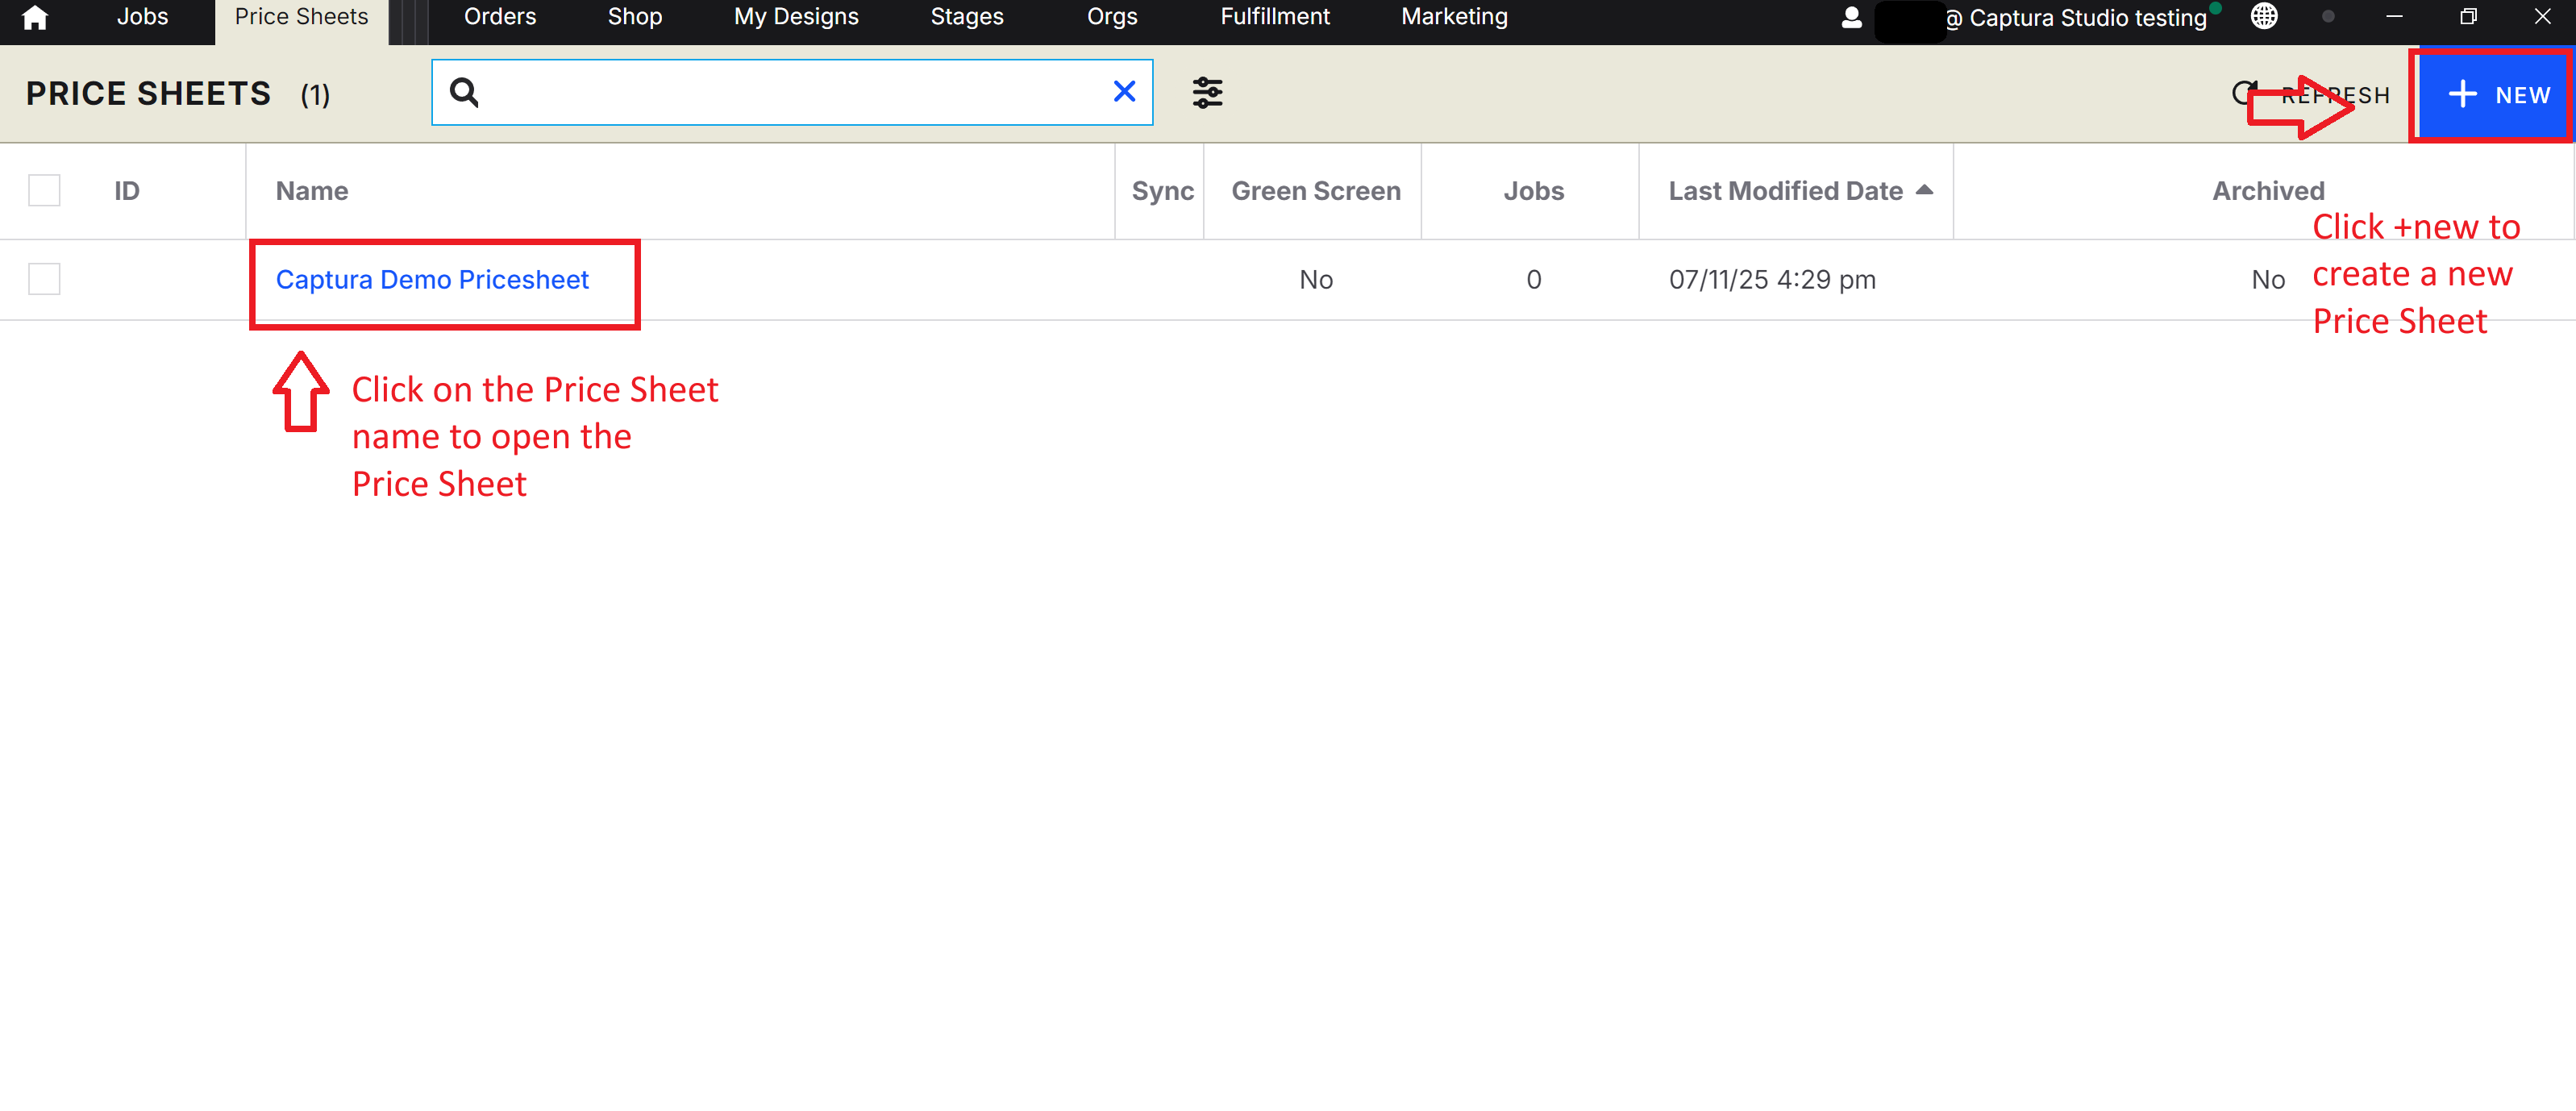
Creating a new Price Sheet
Click on the blue + NEW button in the top-right corner to create a new price sheet:
Product Categories
A product category is the core of the shop. It's where you'll add packages, prints, products a la carte items, and more to your price sheet. Create and name as many product categories as needed to keep merchandise organized. Customers can select them online to quickly navigate the price sheet.
Click Remove to delete the selected category.
Adding Packages
Inside a Product Category, click on + Add a package. Package contents will automatically be listed in the online gallery. Select the newly created package to edit the following attributes:
Package Attribute | Detailed Info | |
Display Image | Upload a custom display image (1200x1200 PIX JPG, JPEG) or PNG | If Default is selected, a preview of the Subjects photo will be generated for Packages |
Name | Add a custom name to your package. | |
Price | Set a price for your package. | |
Promotional Price | Cross-Out Pricing and Product Badges — you can strategically highlight discounts and guide customers toward your best offers. | |
| Add a custom description to your package. Package contents are automatically listed in the online gallery. | |
| Add the Map Key from the corresponding package in your Flow Catalog if you're importing your orders back into PhotoLynx Flow for fulfillment. | |
| Choose between a Standard or Build-Your-Own Standard: Everything in the package is included. Build-Your-Own: Customers can choose their desired contents from the items added in the package. | |
Image Configuration | Set the number of images that can be used for the package. | |
| Set if the package is hidden or visible to customers in the online gallery.* *Smart Workflow members can still order hidden items using the Point-of-Sale system in Workflow. | |
| Add a Based on Order discount code to automatically give a discount code to subjects who order the package. The Based on Order discount code will be available to use on the next order placed on the subject. |
💡 In the Price Sheet, package information takes precedence over product information. Clients will only view the package attributes if both a package and a product within the package have undergone customization. This exception does not apply to the Display Image and Name attributes.
Adding Offers
Offers allow you to create dynamic rules and purchasing criteria to entice and incentivize your customers. Inside a product category, click on Add Offer.
Offer Setting | Detailed Info |
| Specify what the purchasing restrictions are for all items in the product category. You can choose between:
|
| Add dynamic rules to unlock the product category for customers. Rules can be set to unlock the product category once:
Rules can be configured to be and/or statements. The category will unlock once all the conditions of one rule are met. |
Image Options
The image option section is where you can add image services, optional Add-Ons, to your price sheet. These options will be presented for each image the customer adds to their cart.
We offer a range of AI Image Options, such as retouching and braces removal. Learn more here.
Order Options
The order option section is where you can add options that should apply to the entire order (such as boutique packaging, gift wrapping, etc.), These options will be presented right before checkout.
Backgrounds
Add your Background Set(s) created in Designer to your Price Sheet. Customers can switch between different sets to view the backgrounds applied to their PNG images while browsing the gallery.
💡 Want to make a few tweaks to a price sheet without having to rebuild an entirely new one? You can duplicate the price sheet of your choice by selecting the check box next to the desired price sheet you want to copy and selecting Duplicate from the blue taskbar that will appear.
Creating a "Build-Your-Own-Package"
BYO packages are a great way to for customers to tailor products to their unique needs and preferences. Rather than choosing from a fixed set of options, customers can mix and match components to build a package that feels personal and relevant.
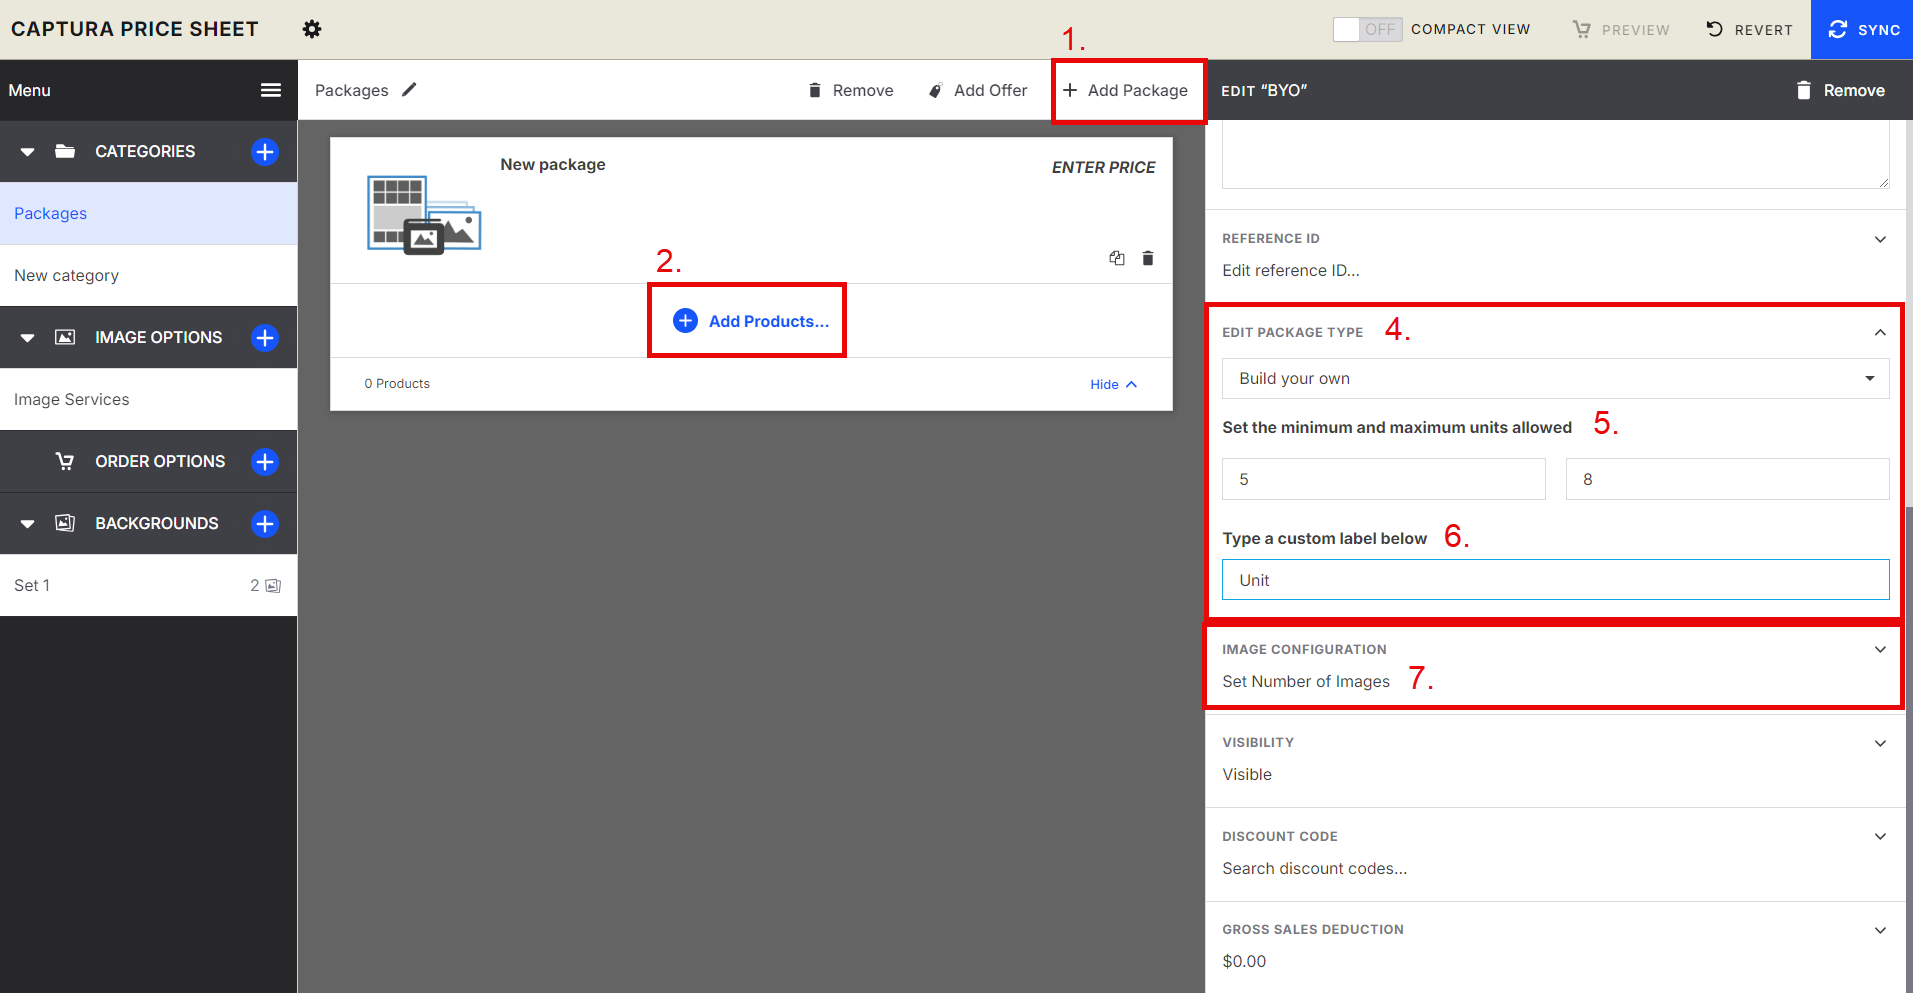
Click Add package
Add your products
Fill in Name, Price, Description and Promotion details
Click Package Type and select Build your own
Select the minimum and maximum items that can be purchased. This is known as Units. You will set the unit value in step 8 below for each product. You can set items at different values.
You can change the language to something your customer will understand. Example: Products or items
Select Image configuration and set how many images they can choose from and any surcharges
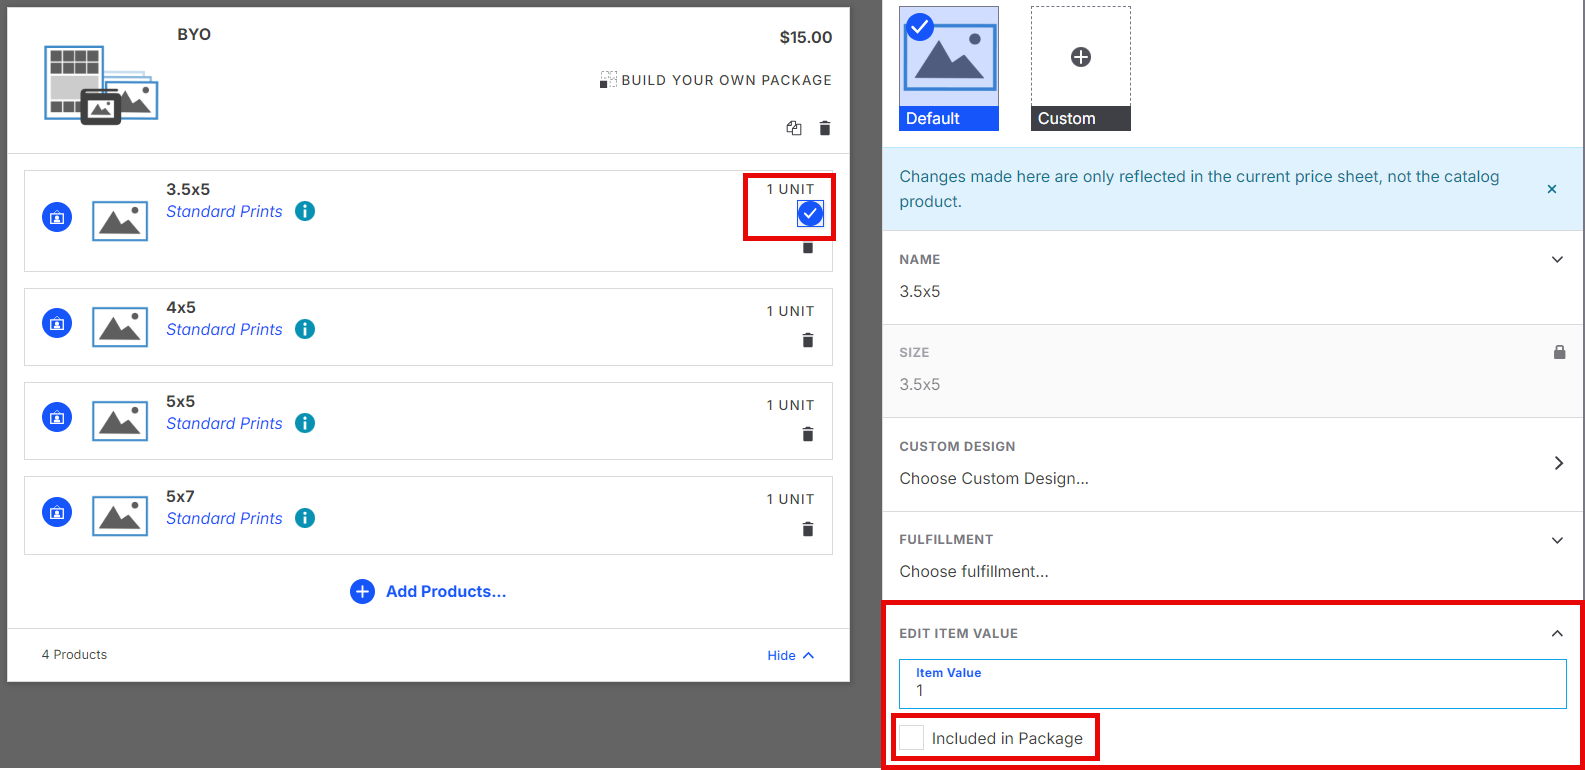
8. Click on each item in the package and add how many units each package is worth. You can also have products that are included in the package, the value of these items will not be included in the total units used.
Offering multiple images in Packages.
Set a default number of included images, and give customers the flexibility to add more by applying a per-image surcharge beyond the base limit.
Click Add package
Add your products
Fill in Name, Price, Description and Promotion details
Set how many images are included in the package
You can then set a per image surcharge or a one time surcharge to add more images for an added price to the included images

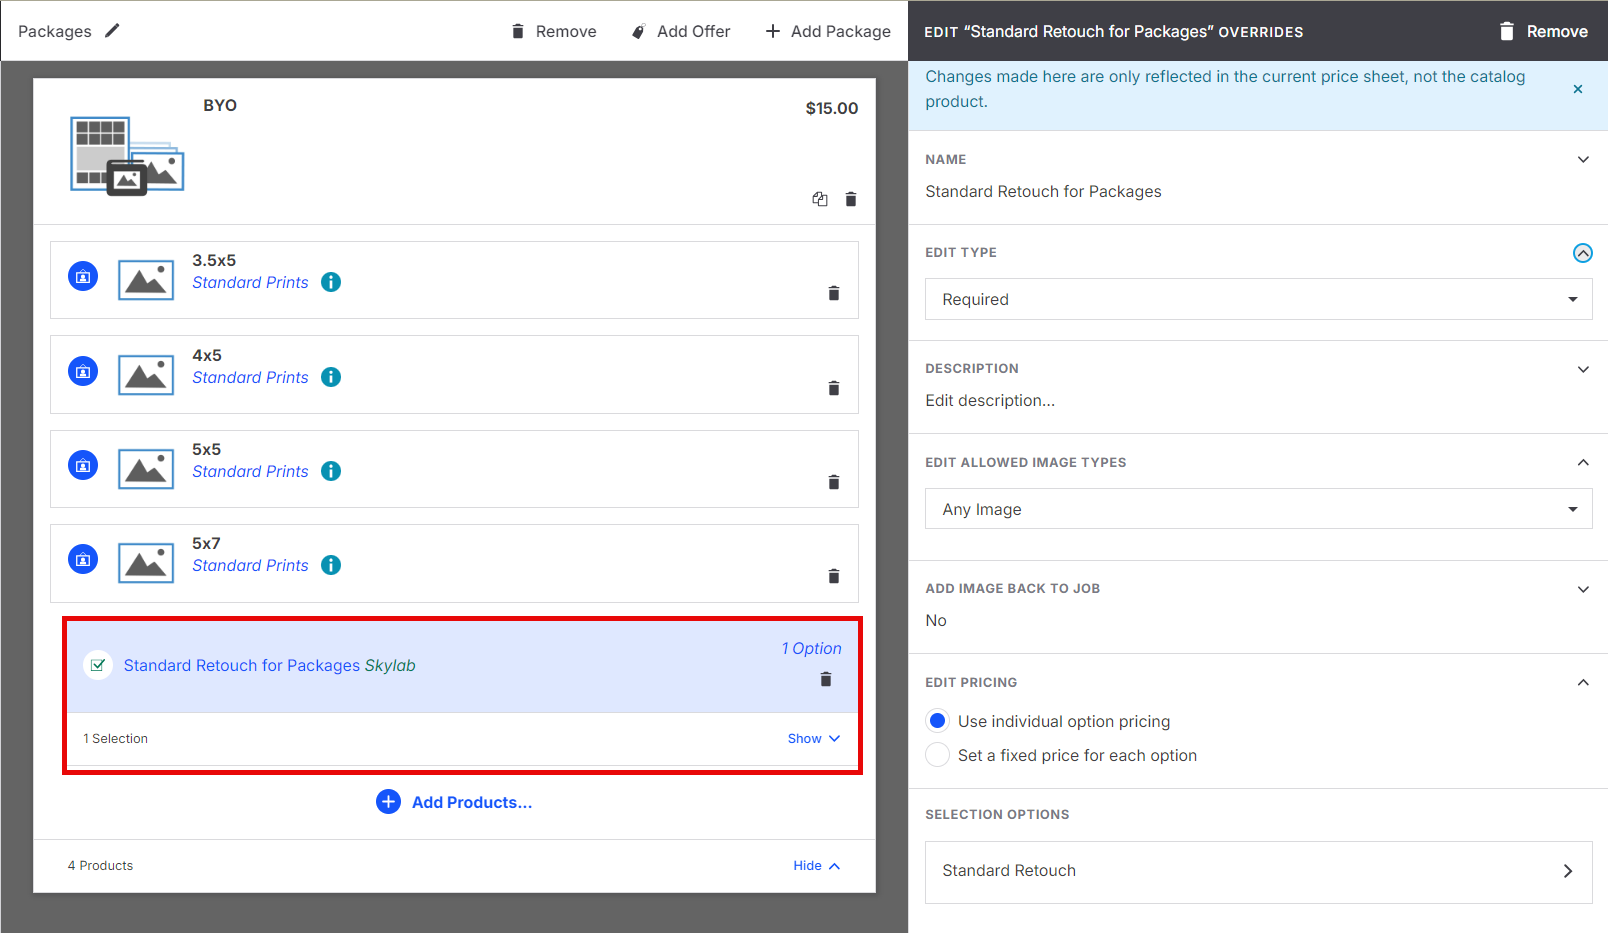
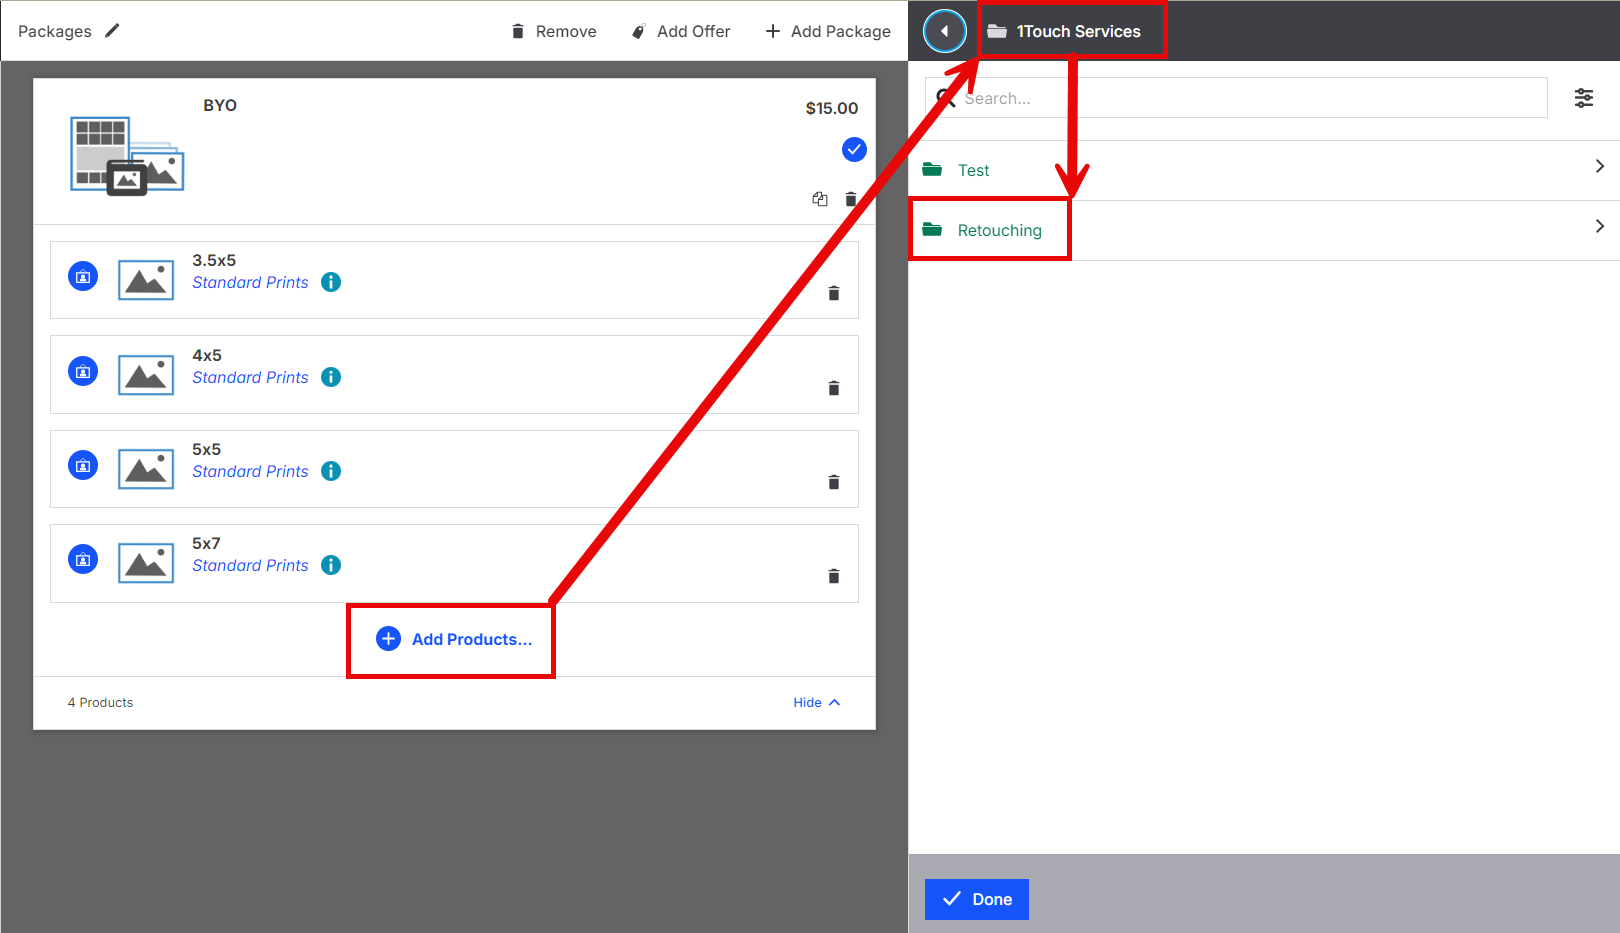
Add retouching to a packages
Set up your package
Click add products
Got to 1 Touch Services in right hand menu
Click Retouching
Select Standard retouching for packages
Click on the newly added retouching option
Select if this is required to be added or optional
Click edit allowed image types: Select individual image type only. Group images can not have retouching applied
Click Add image back to job.
Clicking "Yes" here will add the retouched images back to the job as a version of the original image for the customer to purchase the retouched version in future orders with out having to pay again.Select Pricing and add an over all price for each option or a set price.
Selection options allows you to change the name of the option.