
Getting Started with Custom Forms
Brief Overview
Custom Forms let you collect additional information from customers during online checkout. They're especially useful for Pre-Order workflows, where the information customers provide can be used to match orders to the correct subject after picture day.
You can also use Custom Forms to collect extra details, such as contact information or other data that isn't already included in your subject records.
Overview & Objective
Custom Forms allow you to:
Collect information from customers during online checkout.
Capture the details needed to match Pre-Orders to subjects.
Automatically populate subject data from customer responses.
Gather additional information, such as email addresses and phone numbers.
Custom Forms are required when using a Pre-Order workflow.
Setup / Configuration
To manage Custom Forms:
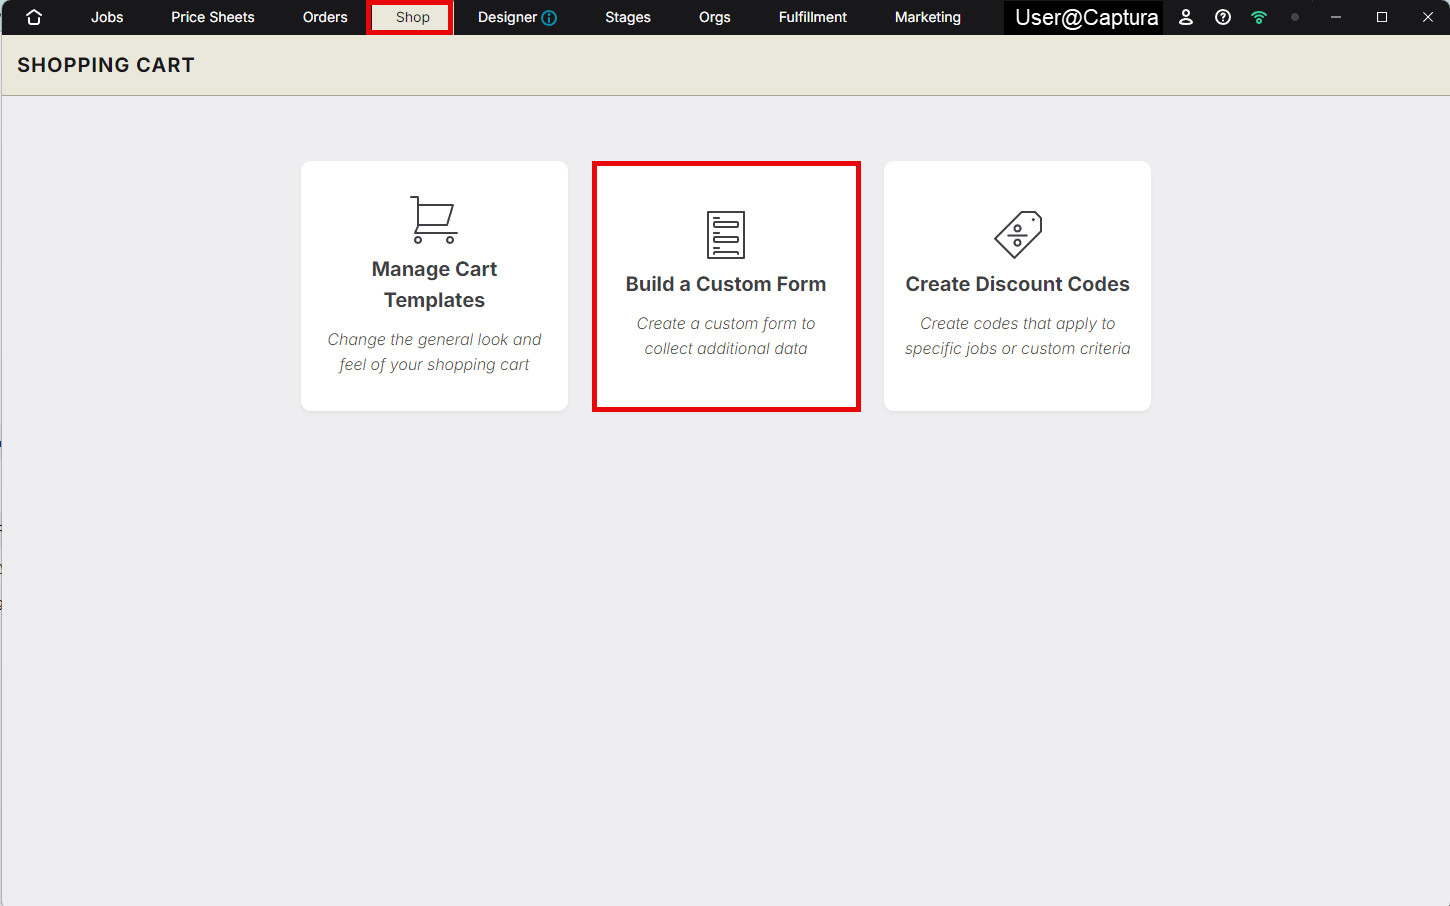
From the Workflow homepage, select Shop.
Select Build a Custom Form.
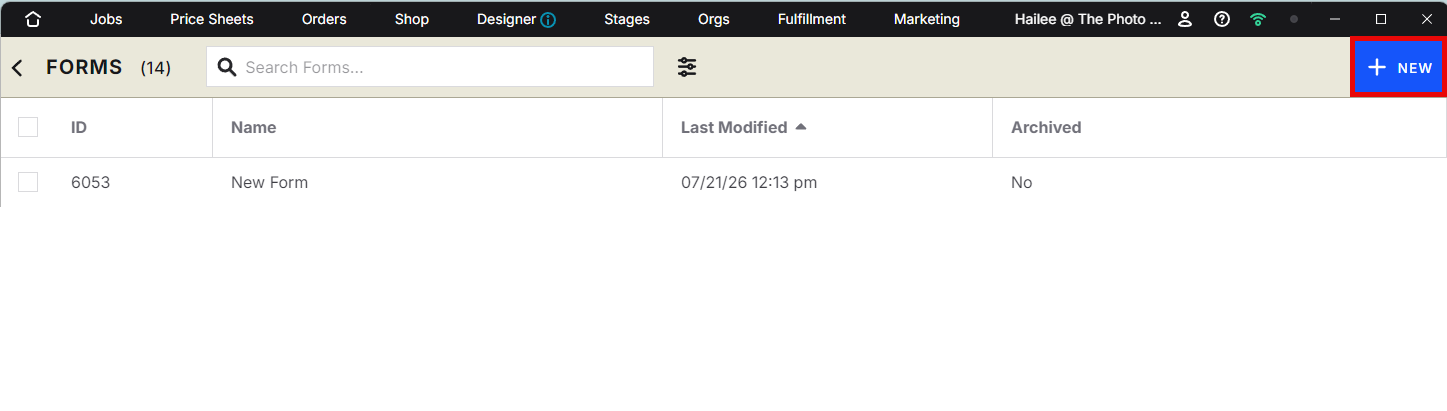
Select an existing form to edit it, or click the green + New button to create a new Custom Form.
💡 PRO TIP: You can add up to 8 questions to each Custom Form, and each job can have one Custom Form assigned.
Create a Custom Form
Open Shopping > Build a Custom Form.
Select + New.
Drag the desired data fields from the available field list into your form.
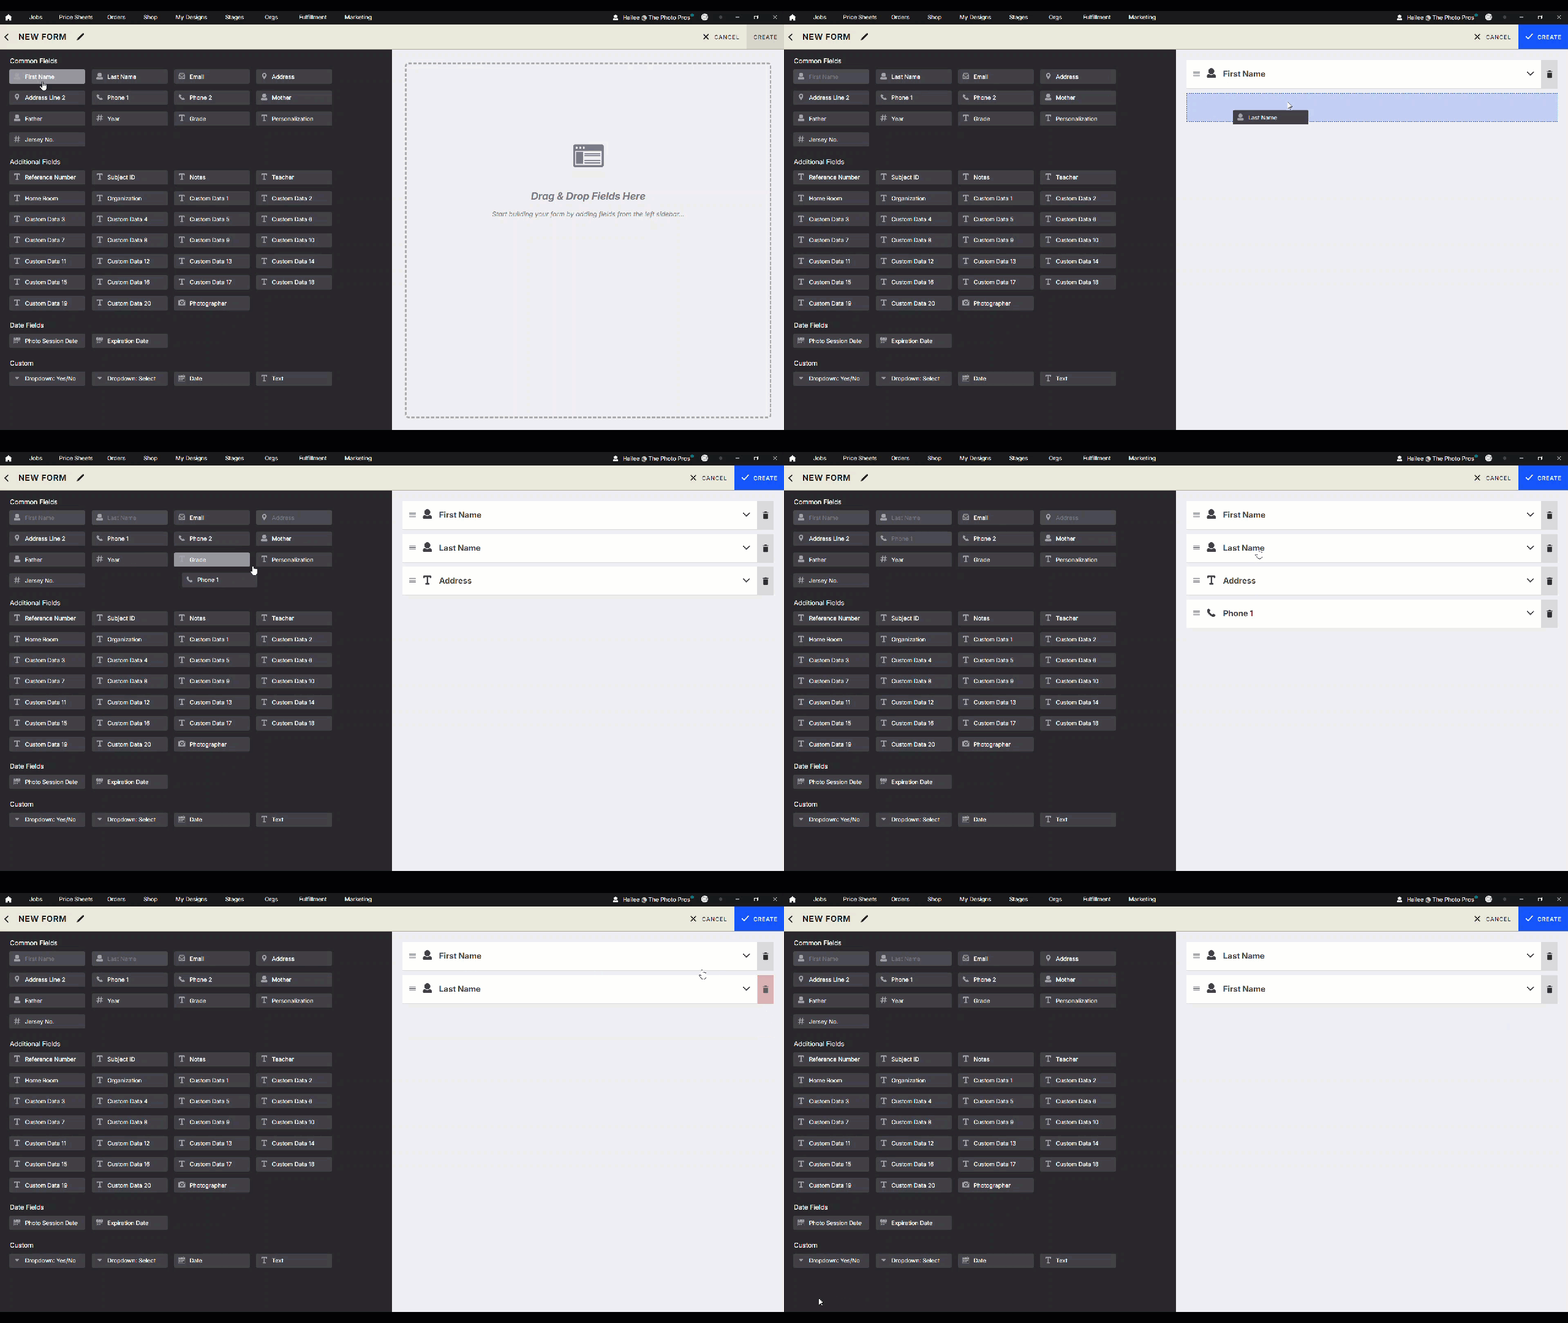
Once a field has been added to your form, you can:
Drag it to reorder the question.
Select the field to edit the question.
Select the trash icon to remove it from the form.
Configure Form Questions
Select any question in the form to expand its settings and make changes.
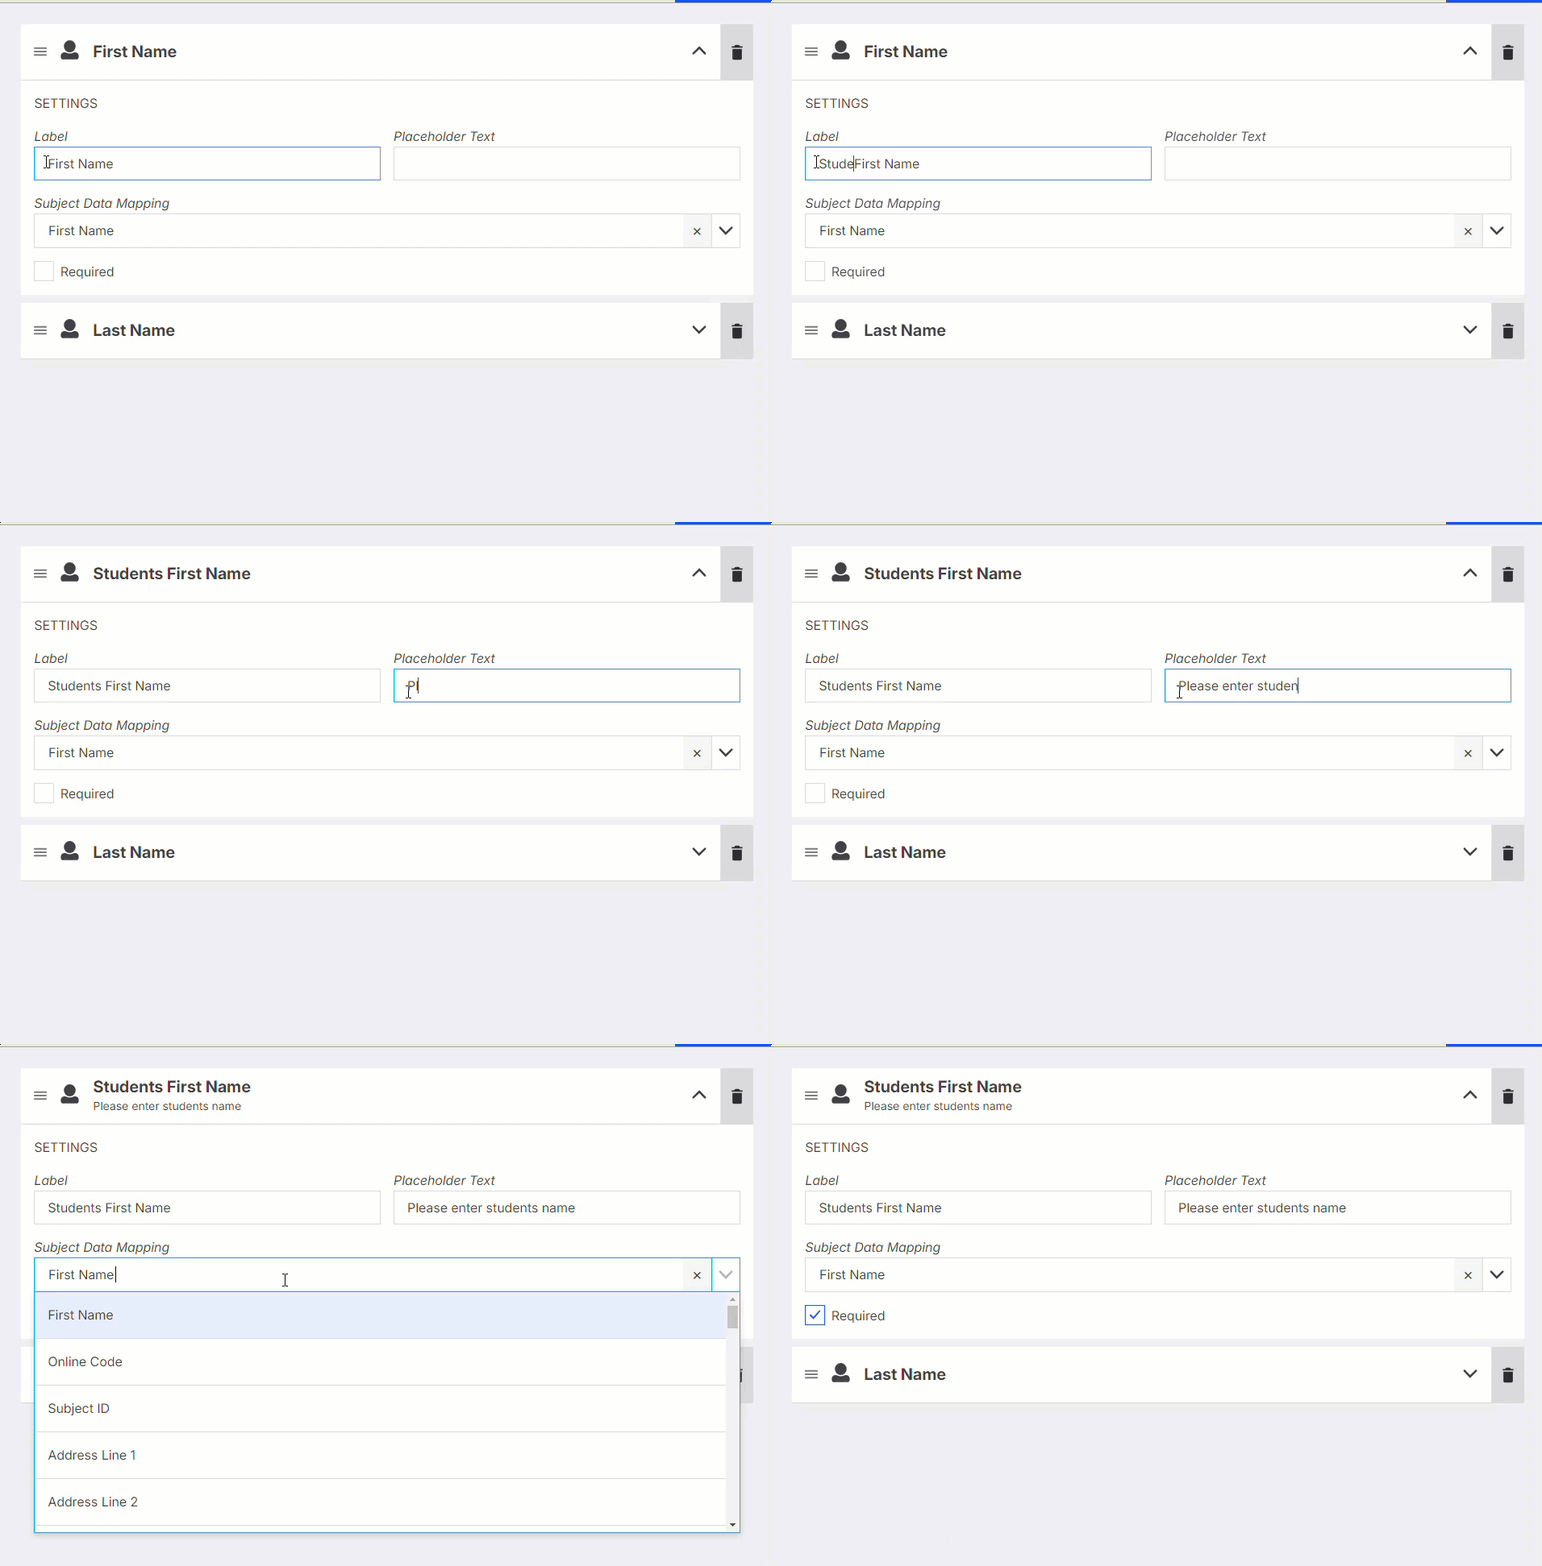
Most standard fields, such as First Name, are automatically mapped to their corresponding Subject Data field.
Use Custom Questions when you need to collect information that isn't already available as a standard Subject Data field.
Save Your Form
When you've finished building your form:
Select the Pencil icon in the upper-left corner to rename the form.
Select the Blue Create button to save it.

Attach a Custom Form to a Job
After creating your Custom Form, you'll need to assign it to the job where it will be used.
Open the desired job.
Select the Settings tab.
Under the General section, locate the Custom Form dropdown.
Select the Custom Form you want to use.
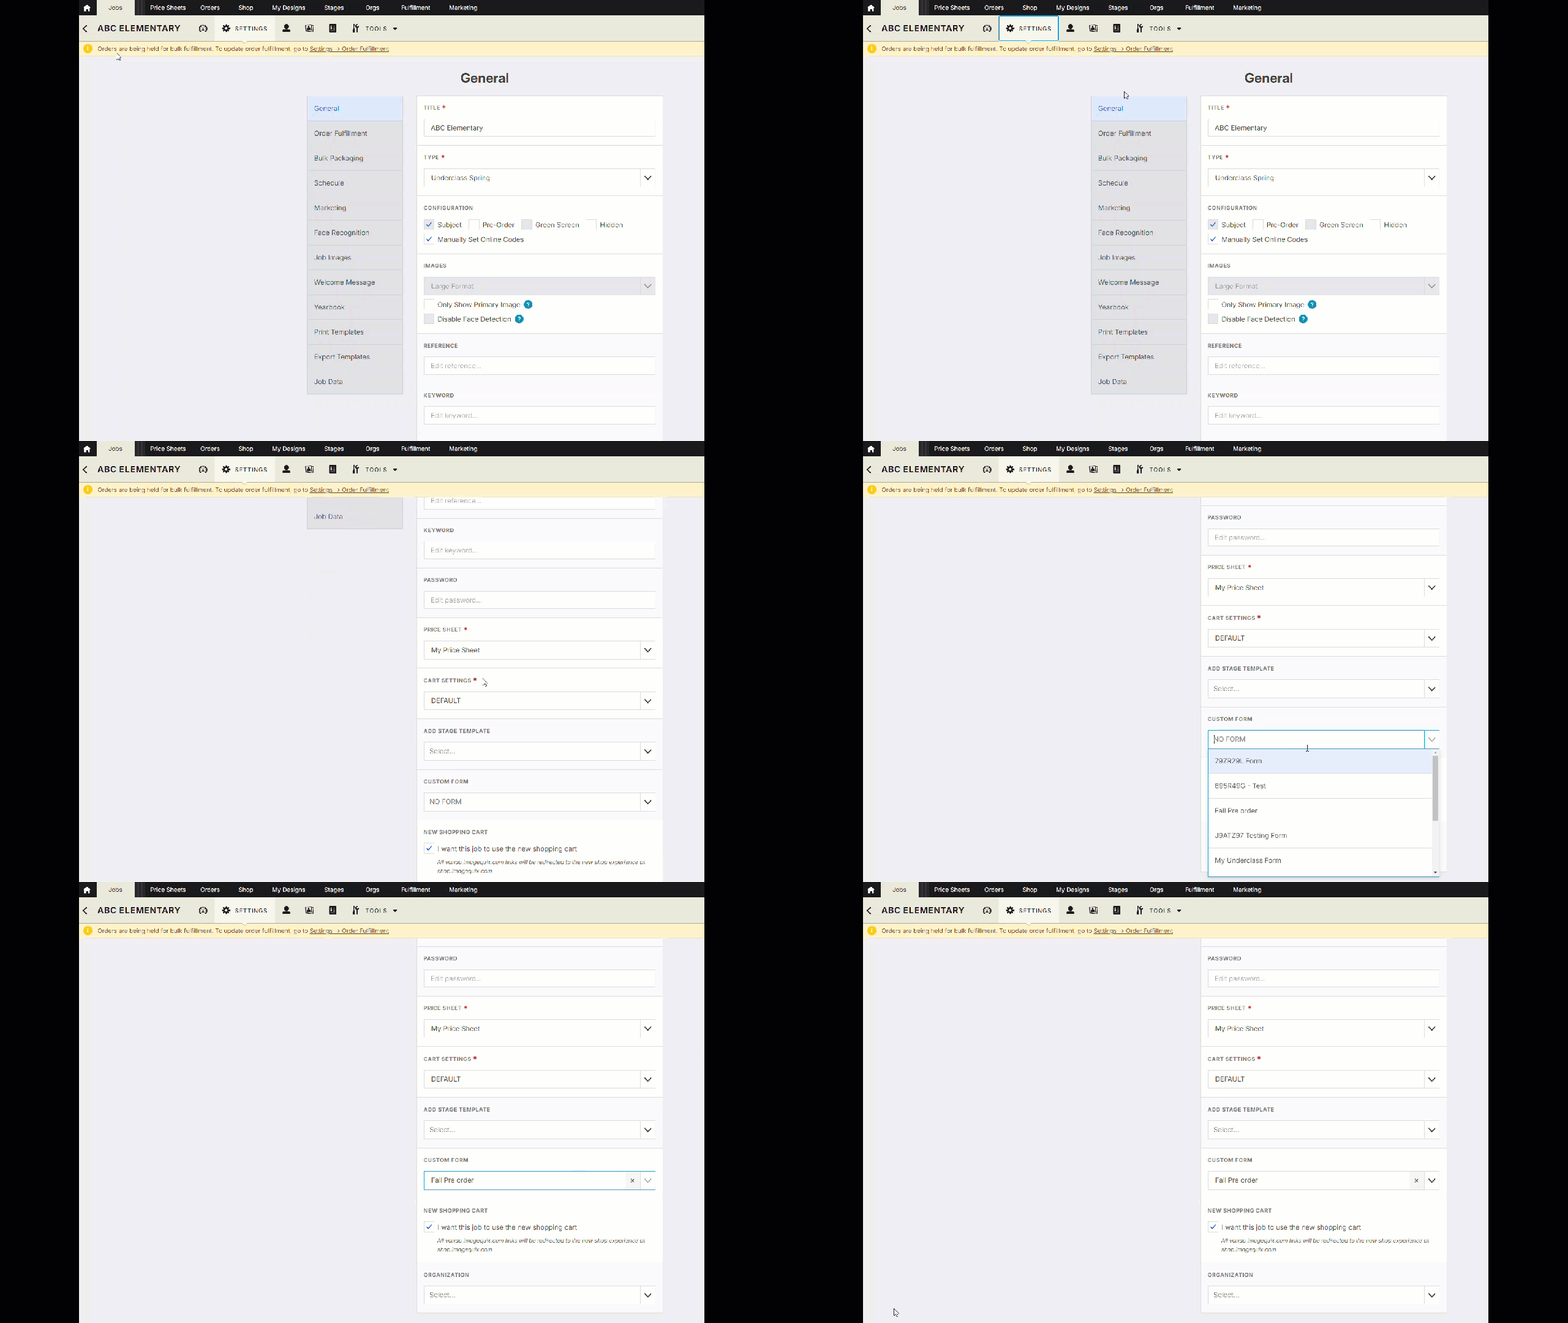
Important: Be sure to Sync and Save your changes after assigning the form.
NOTE: Be sure to Sync and save your changes.
Customer Experience
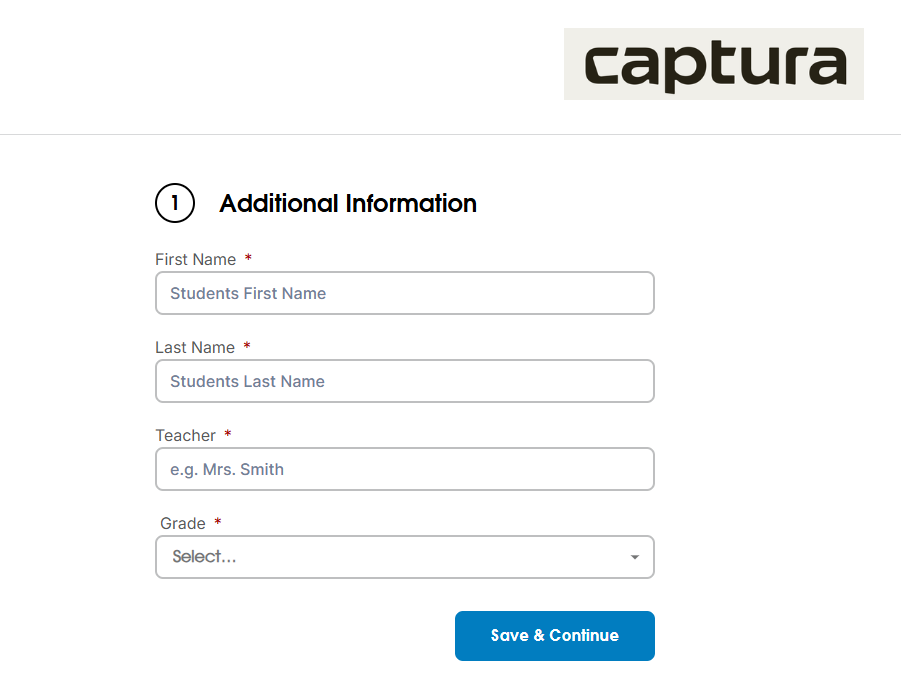
Once the Custom Form has been assigned to a job, customers will complete the form during online checkout.
Their responses are saved with the order and can be used throughout your workflow.
Advanced Options / Additional Rules
Each Custom Form can include up to 8 questions.
Each job can have one Custom Form assigned.
Standard Subject Data fields automatically map to their matching Workflow fields.
Custom Questions can be used to collect additional information that isn't included in the standard Subject Data fields.
Custom Forms are required for Pre-Order workflows because they provide the information needed to match customer orders to subjects after picture day.
Common Questions
Q: When do I need to use a Custom Form?
A: A Custom Form is required for Pre-Order workflows. It collects the information needed to match customer orders to the correct subject after picture day.
Q: How many questions can I add to a Custom Form?
A: Each Custom Form can include up to 8 questions.
Q: How many Custom Forms can I assign to a job?
A: Each job can have one Custom Form assigned at a time.
Q: Why are some fields already mapped to Subject Data?
A: Standard fields, such as First Name, automatically map to their corresponding Subject Data fields. This helps Workflow use the information collected during checkout without additional setup.
Q: Can I collect information that's not part of Subject Data?
A: Yes. Use Custom Questions to collect additional information, such as contact details or other data your studio needs.