Using DP2 to print? Make sure you setup Workflow to submit orders correctly:
Setting
Details
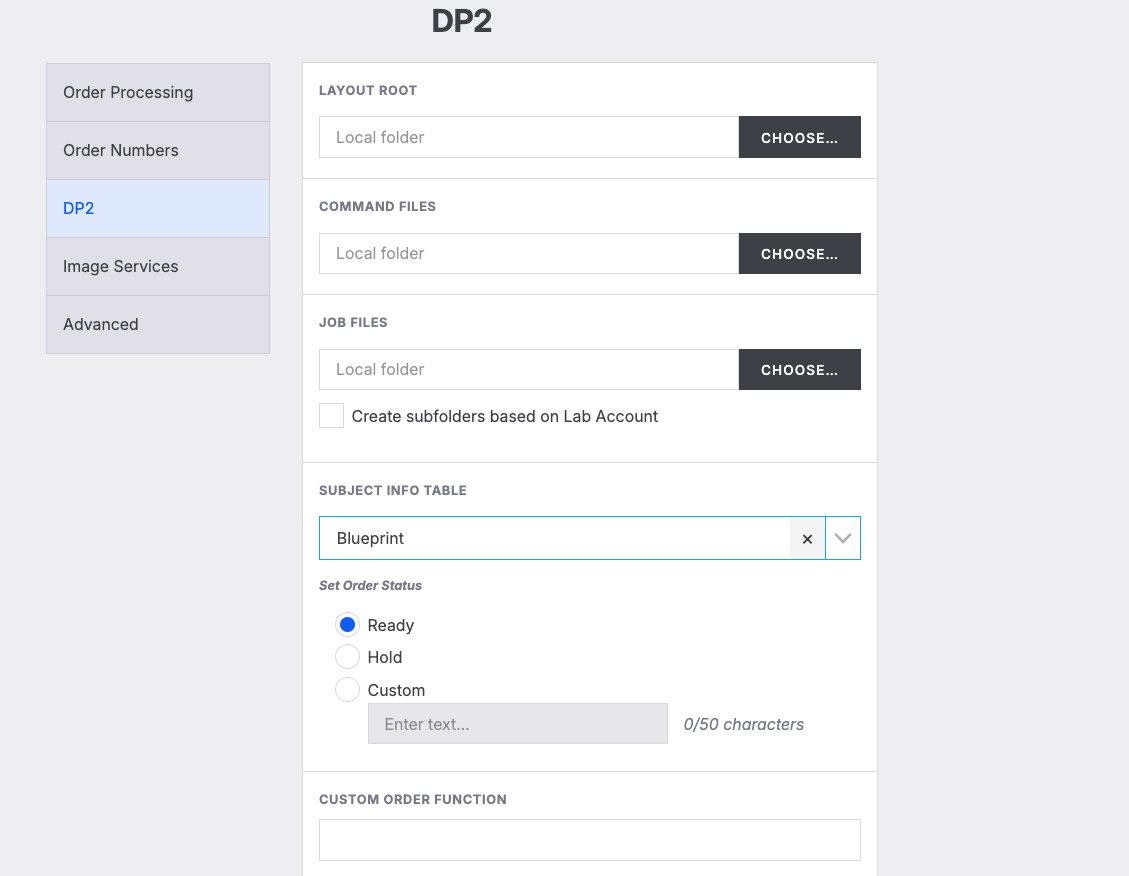
Layout Root
Where the DP2 layout files are pulled from.
This path should be the main layout folder contained within the Eastman Kodak folder.
Command File
When Workflow prints an order for DP2, a DP2 CMD file is made to import into DP2.
The folder you save the DP2 file can be any folder, but when running the import into DP2 confirm you're referencing this folder.
Job Files
Workflow creates a job file for each order pulled down into DP2. This Job file is used to populate the correct product with the image file selected
If you'd like to separate those files into folders based on different lab accounts, then select the check box to create subfolders
This should be stored within the job files folder within the Eastman Kodak folder.
Subject Info Table
The Subject Info Table tells DP2 what data to pull in and how to format it from workflow Orders.
The table is provided when you sign up with and inform ImageQuix of your intent on using DP2.
The info table will be added to the user definitions in the Eastman Kodak folder.
Set Order Status
Set the status of the orders in DP2. By default it is set to "Ready"
Custom Order Function
You can identify custom functions to run when pulling down the orders into DP2.
These functions will be added to the cmd file coming from Workflow
These are functions already created in DP2 and ready to run on orders.
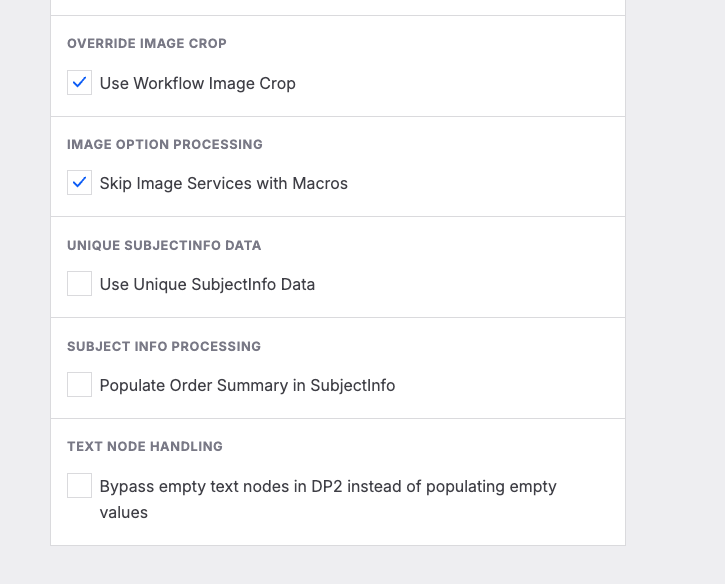
Image Option Processing
If you're skipping image services with Macros, then all image services with a macro will skip Image Services Fulfillment and go straight to fulfillment.
Use Workflow Image Crop
By default this will be checked
When this is checked this means that orders pulled into DP2
Use Unique Subject Info Data
When “Use Unique SubjectInfo Data“ is disabled, one SubjectInfo record is added for every unique subject within an order. The ‘SubjectID’ field populated in DP2 SubjectInfo is the Workflow Subject ID. This can cause issues when multiple orders exist within a bulk order for a single subject (for example when parents and grandparents place different orders for the same student). Since Workflow is adding order details (such as iqOrderID) into SubjectInfo, the order data added to SubjectInfo is only accurate for one order tied to a subject.
When “Use Unique SubjectInfo Data“ is enabled, one SubjectInfo record is added for every order within the bulk order. The ‘SubjectID’ field populated in DP2 SubjectInfo is a unique identifier for each order and each subject (since some orders contain multiple subjects). This results in duplicate data, since two SubjectInfo records will be present for one subject if two orders for that subject are included in the bulk order. While the subject name and most of the other data fields are repeated, this style of SubjectInfo population allows the order-specific fields (such as iqOrderID) to be accurate for each order in the bulk order.
Populate Order Summary in Subject Info table
By default, the “Populate Order Summary in SubjectInfo“ setting is disabled.
When the “Populate Order Summary in SubjectInfo“ setting is enabled, orders added to DP2 will populate the ‘orderSummary’ SubjectInfo field with a text summary of the DP2 products included in the order.
Please note: The DP2 SubjectInfo table named “workflow” must have a field named ‘orderSummary’ when this setting is enabled.
Bypass Empty text nodes in DP2
By default, the “Bypass empty text nodes in DP2 instead of populating empty values“ setting is disabled.
This setting controls the behavior of text node population when a text node is included in a Workflow catalog product.
When “Bypass empty text nodes in DP2 instead of populating empty values“ is disabled, empty text node values will be added to the DP2 layout. If any static text or DP2 macros are present in the DP2 layout, that text will be overwritten by the empty value injected by Workflow. Also note that in some cases, Workflow passes a variable name wrapped in double curly braces (I.E. “{{ subject.firstName }}”) when a mapped subject data field is empty, so this variable text will be inserted into the DP2 layout when the “Bypass empty text nodes in DP2 instead of populating empty values“ setting is turned off.
When “Bypass empty text nodes in DP2 instead of populating empty values“ is enabled, no text will be inserted into the DP2 layout by Workflow. This will allow any static text or DP2 macro to be used in the final rendered layout when an empty value for the text node is present in the Workflow order.