How to use Auto-Applied Image Services
Instructions for using Auto apply services to help the QA process
Auto Apply services are image services that will be applied to orders automatically before it gets sent off to the lab for Printing. This process would be perfect for any studio look to do some QA prior to releasing.
To get started you will first want to create the Image Service, we will want to make sure this image service is created on the studio side (not going to the lab)
Creating Image Services
Go to My designs
Select Options
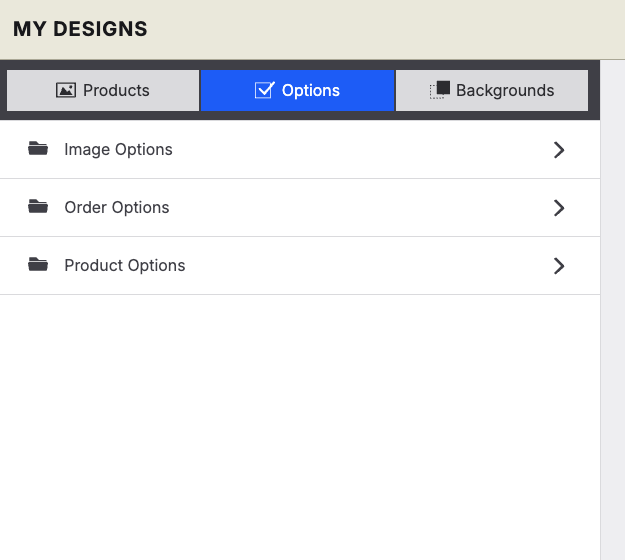
Select Image Options
Add a Category
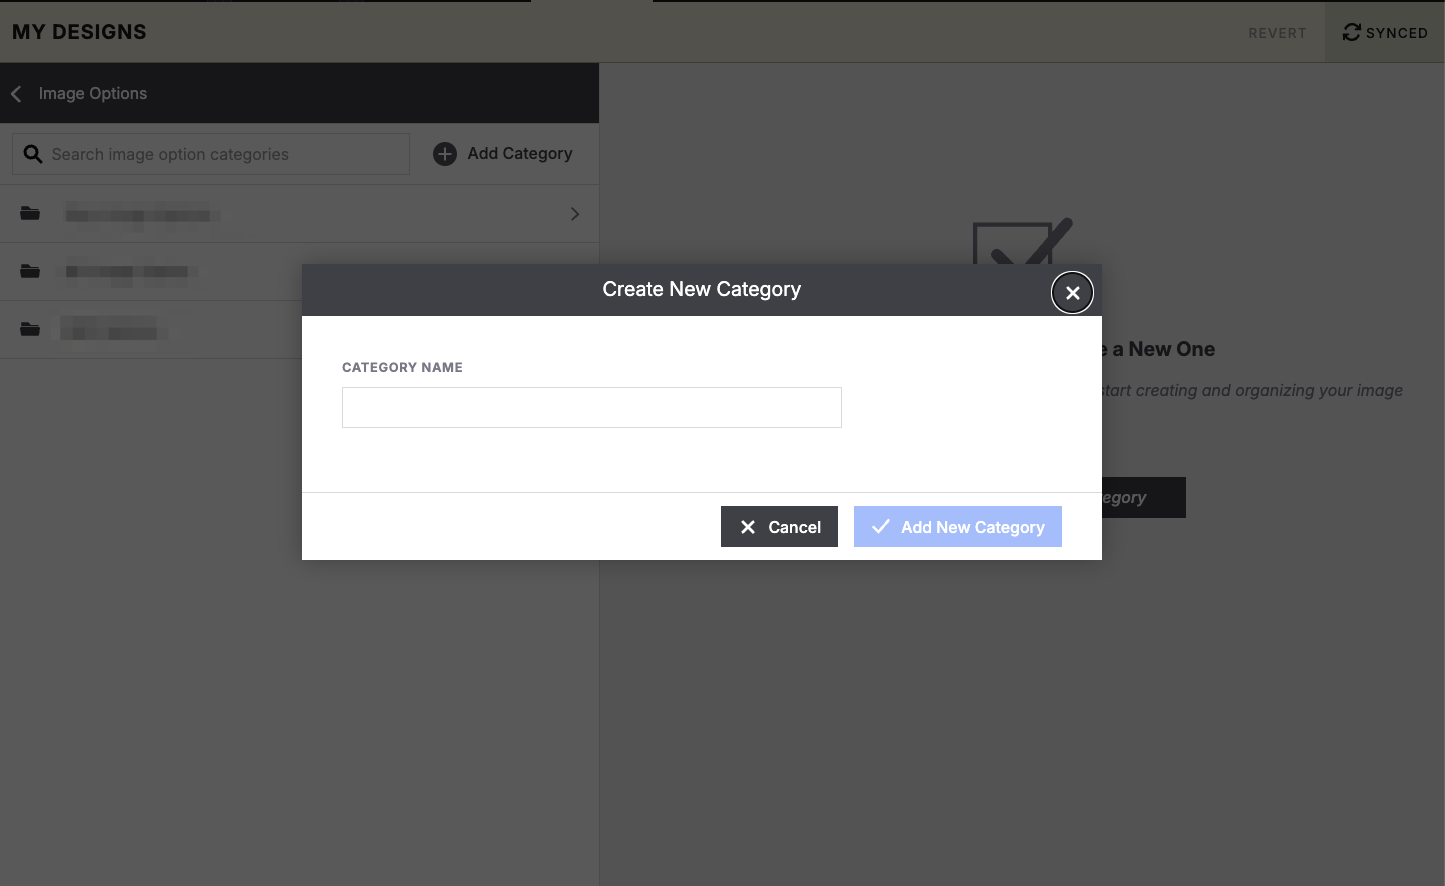
Call this something recognizable, like "Quality Assurance"
Next select Add Option and decide between a Toggle option or Selection option
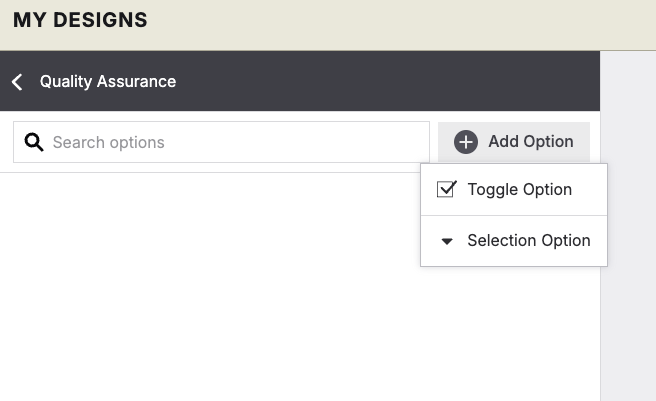
For the purpose of what we are doing here, the toggle option would be the best option. This will lock "yes" on the option so orders coming through will all be required to go through QA
Call this service "QA" or "Quality Assurance" (note that the consumer will not see this anywhere)
Once this has been created it is ready to add to the job
Adding the service
Create a new Job (or open up an older job)
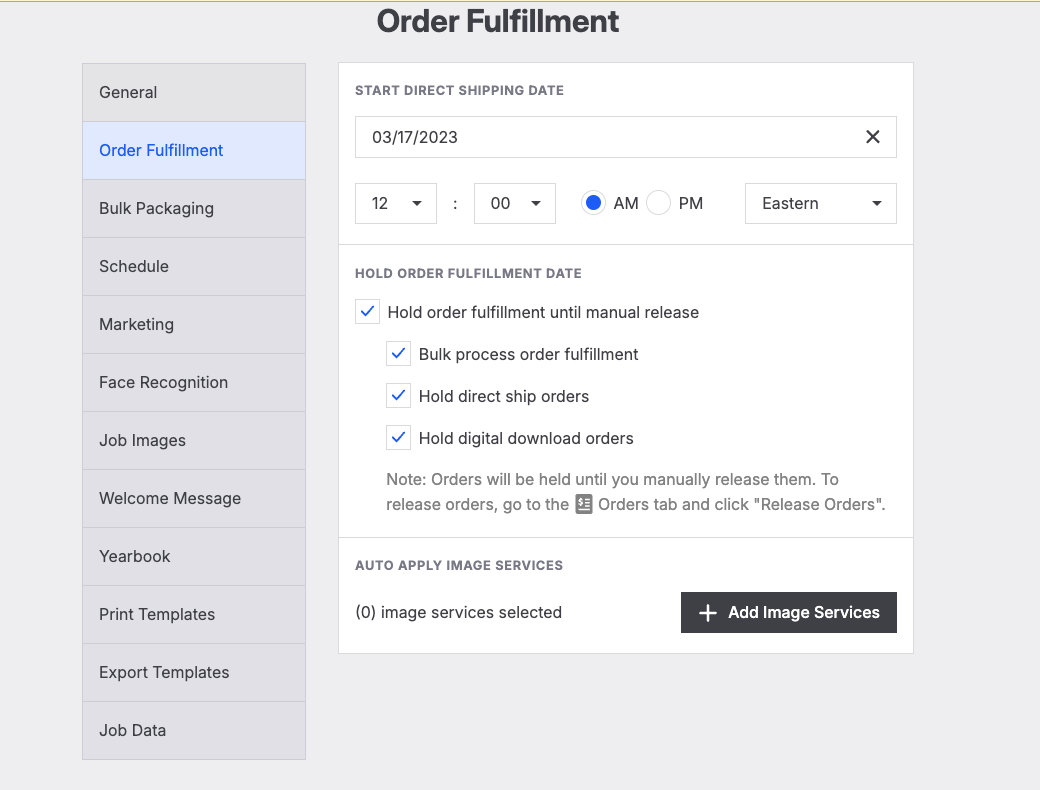
Go to Order Fulfillment in the settings
Go down to the auto applied service and select to add service
After adding it you will see an option to select, as a toggle option there will only be one option to select
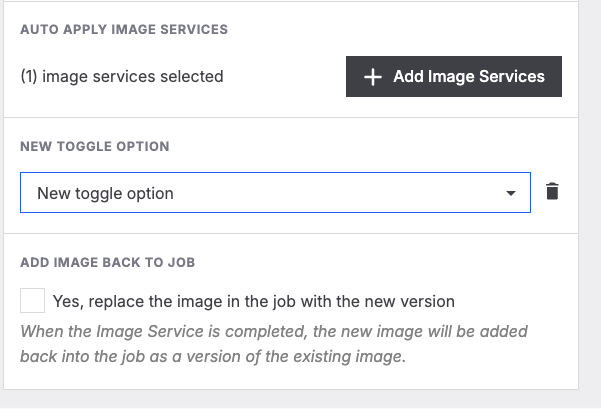
Next choose if you want those Images going back into the gallery, if you were using this for retouching, then the image going back would be fully retouched.
Sync your changes