Getting started with Standard Jobs

Edited

Brief Overview

Standard Jobs are ideal for events where you want to share a gallery of images without assigning them to individual subjects. Instead of using Online Codes, customers access the gallery using a single password.

This workflow is commonly used for candid events, sports tournaments, weddings, performances, and other public galleries where subject matching isn't required.


Overview & Objective

In this article, you'll learn how to:

  • Create a Standard Job.

  • Configure a gallery password.

  • Upload and organize images.

  • Publish your gallery.

  • Share your gallery with customers.

Standard Jobs provide a simple way to showcase event images and begin accepting customer orders without the need for subject data.


Setup / Configuration

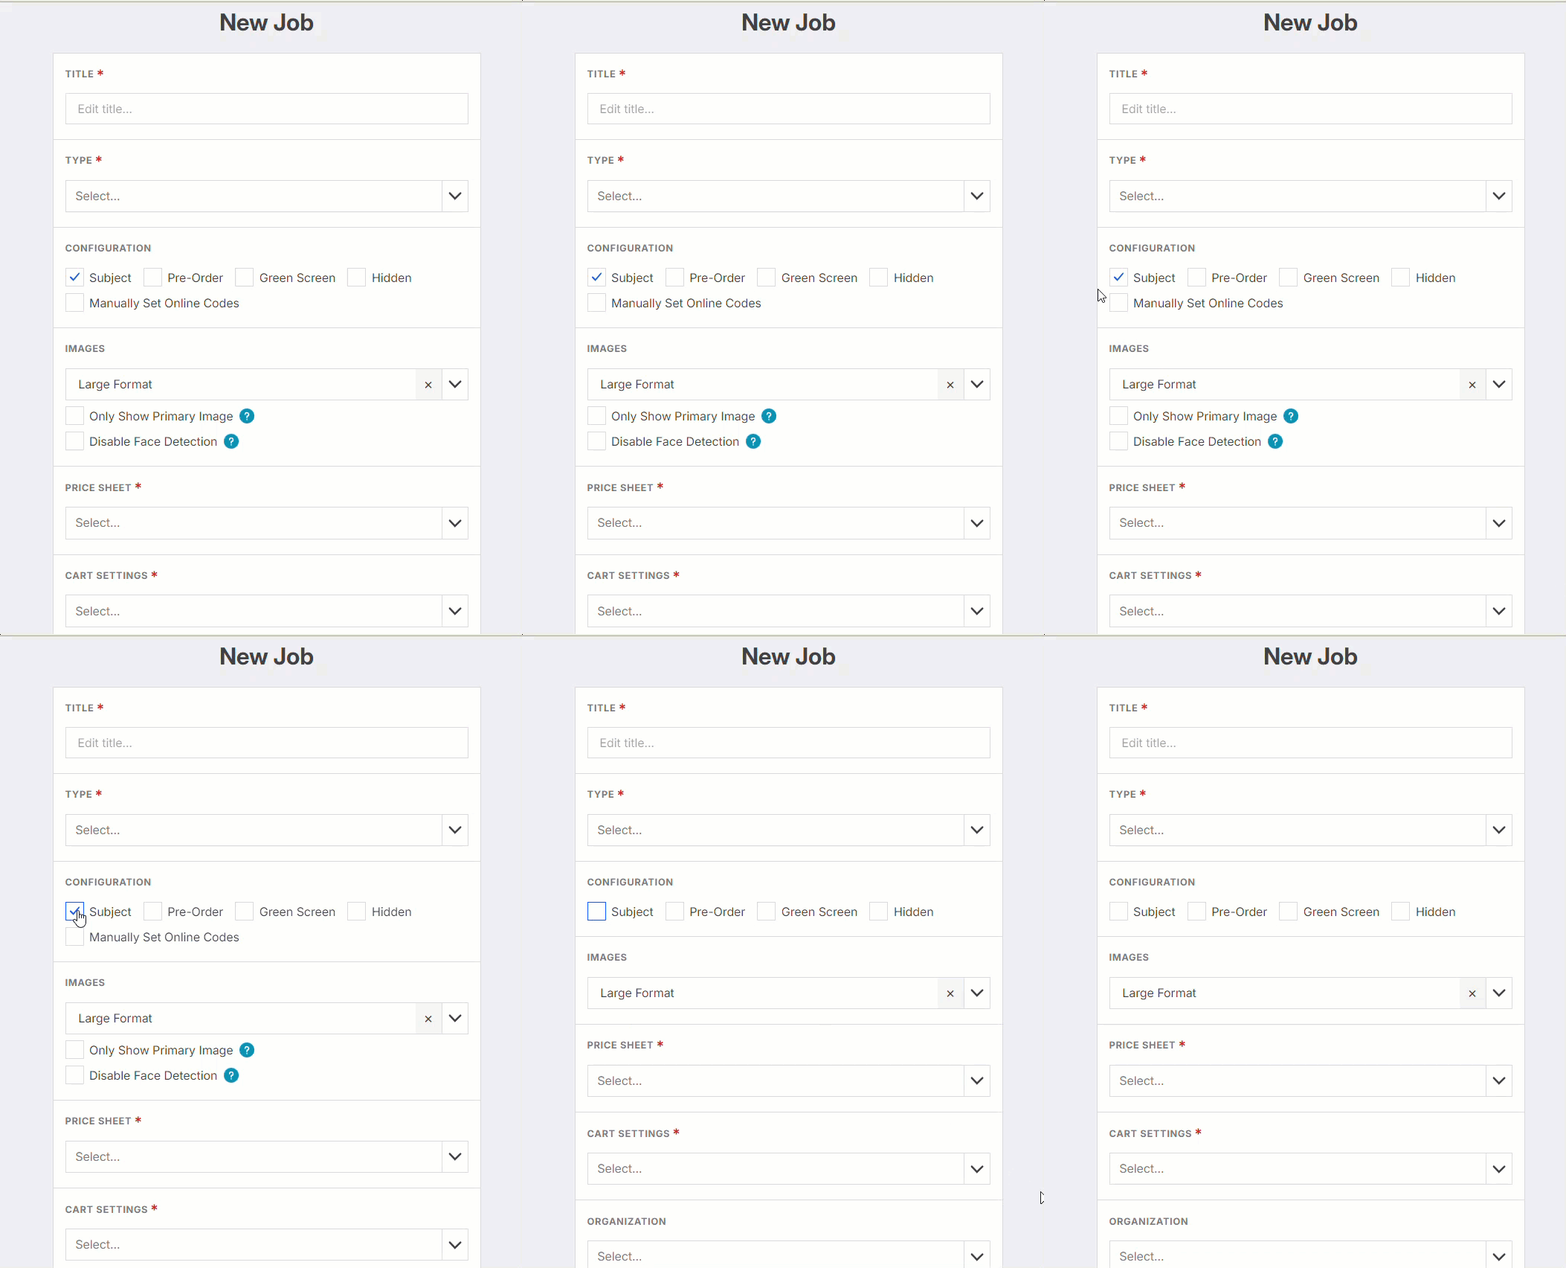
To create a Standard Job:

  1. Open Jobs.

  2. Select New Job.

  3. Complete the required job details.

  4. Clear the Subject checkbox.

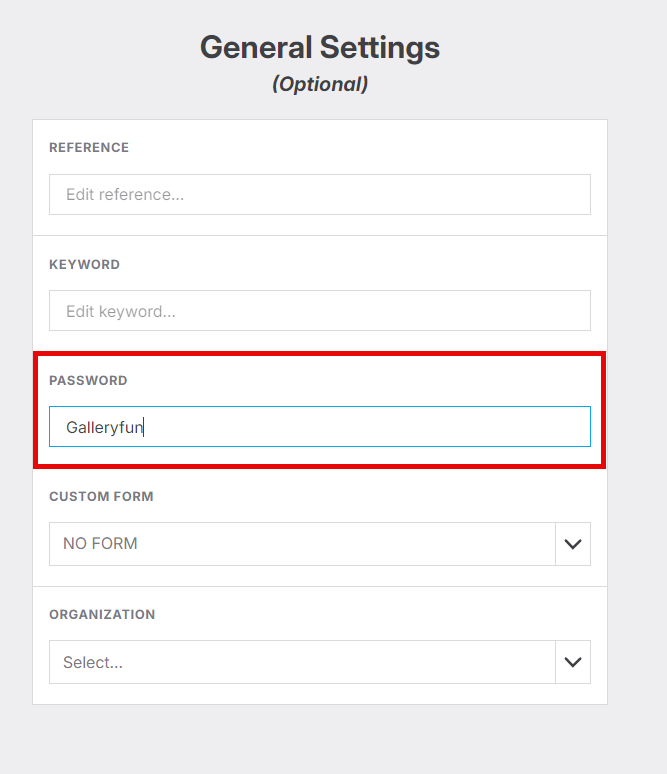
Next, configure a gallery password.

  1. Open Job Settings.

  2. Enter a Gallery Password.

Customers will use this password to access the gallery.

💡 PRO TIP: Choose a password that's easy for customers to remember but not easy to guess. Include it in your customer communications when sharing the gallery.


Step-by-Step Instructions

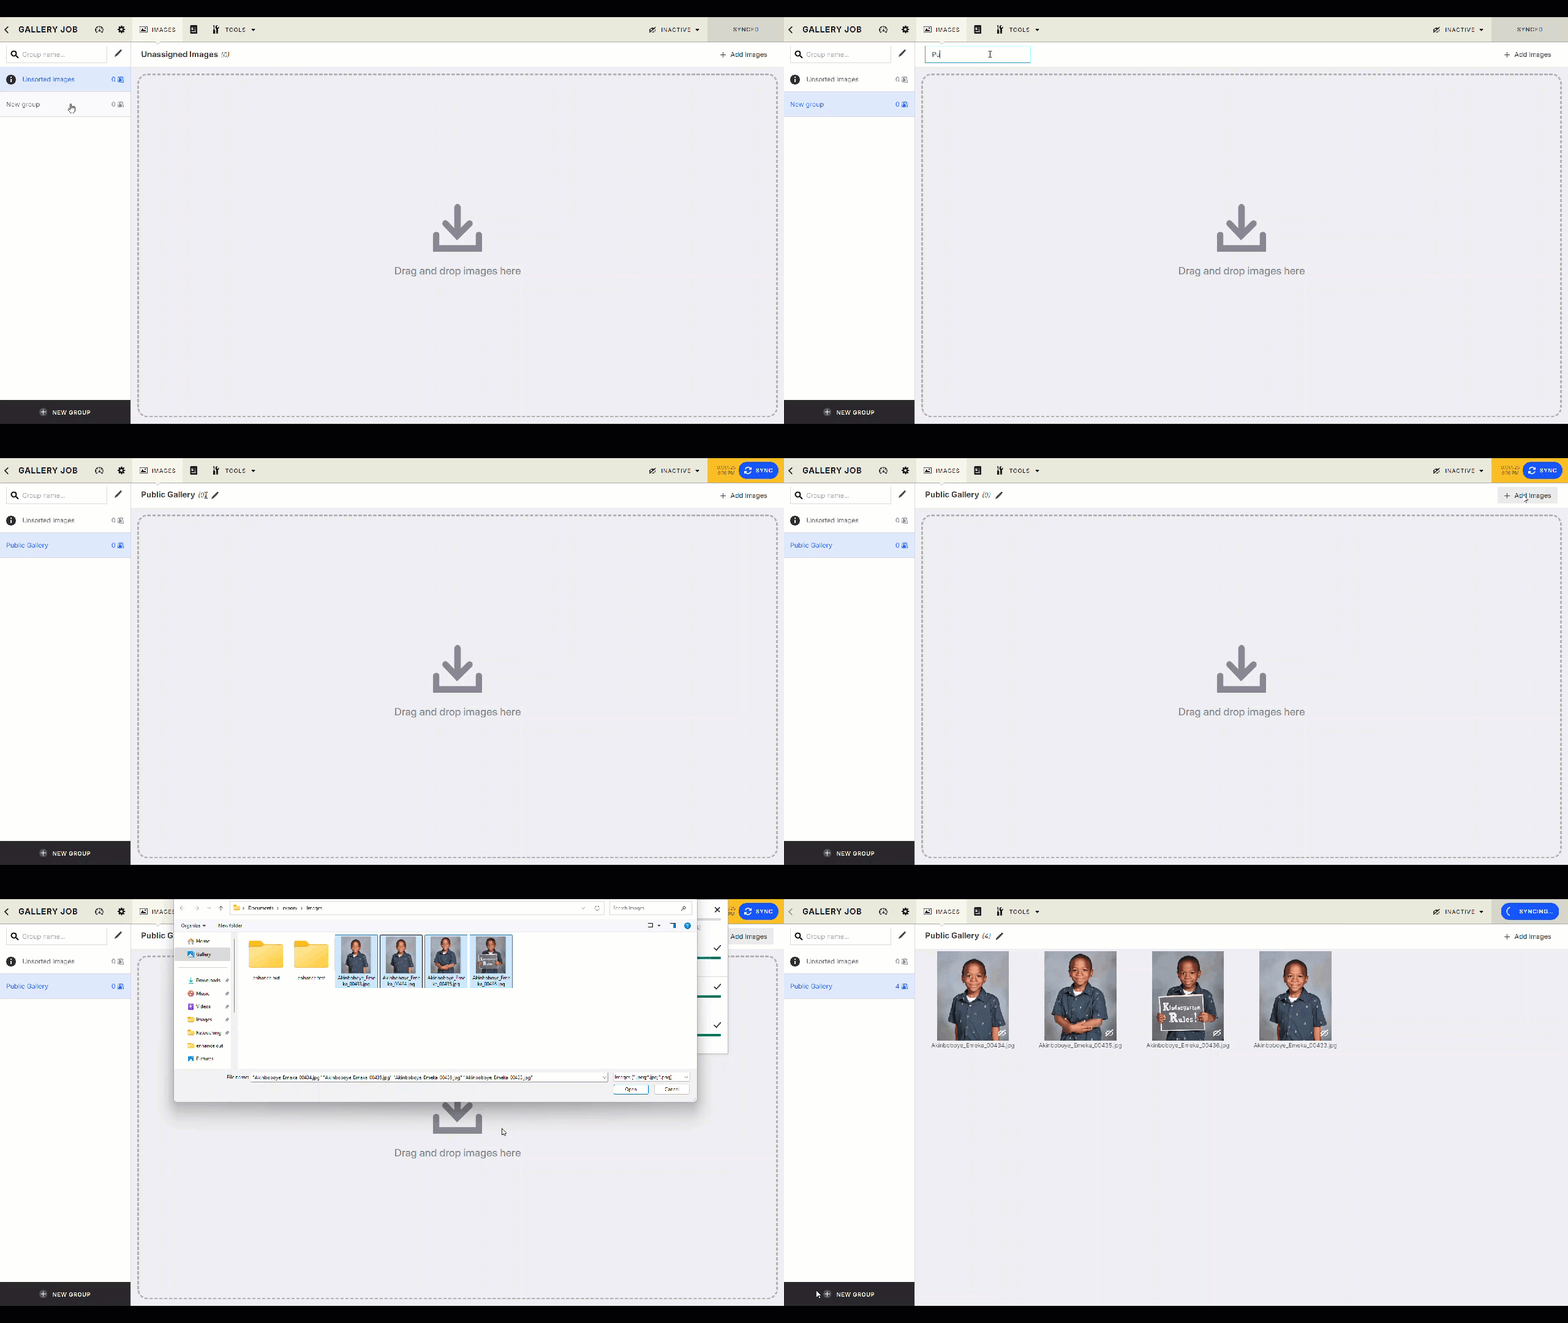
Upload Images Using Drag and Drop

You can manually organize images into groups as you upload them.

  1. Open the Images tab.

  2. Select New Group.

  3. Rename the group using the Pencil icon.

  4. Select Add Images.

  5. Drag and drop images into the group or browse to upload them.

  6. Sync your changes.


Upload Images Using Subfolders

If your images are already organized into folders, Workflow can automatically create image groups during import.

Prepare Your Folders

Create a folder structure similar to the following:

  • Main Folder

    • Ceremony

    • Reception

    • First Dance

    • Family Photos

Place the appropriate images into each subfolder before importing.

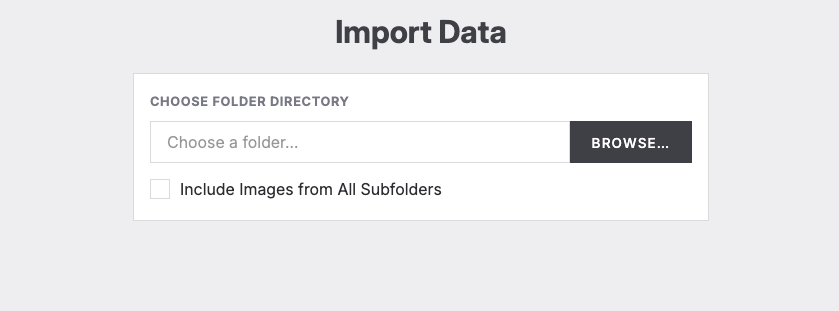
Import Your Images

  1. Open Tools.

  2. Select Import.

  3. Choose the Main Folder.

  4. Enable Include Images from Subfolders.

  5. Review the groups that will be created.

  6. Select Import.

    Workflow automatically creates image groups based on your folder structure, helping you organize large galleries more efficiently.


Publish Your Gallery

When you're ready to make the gallery available to customers:

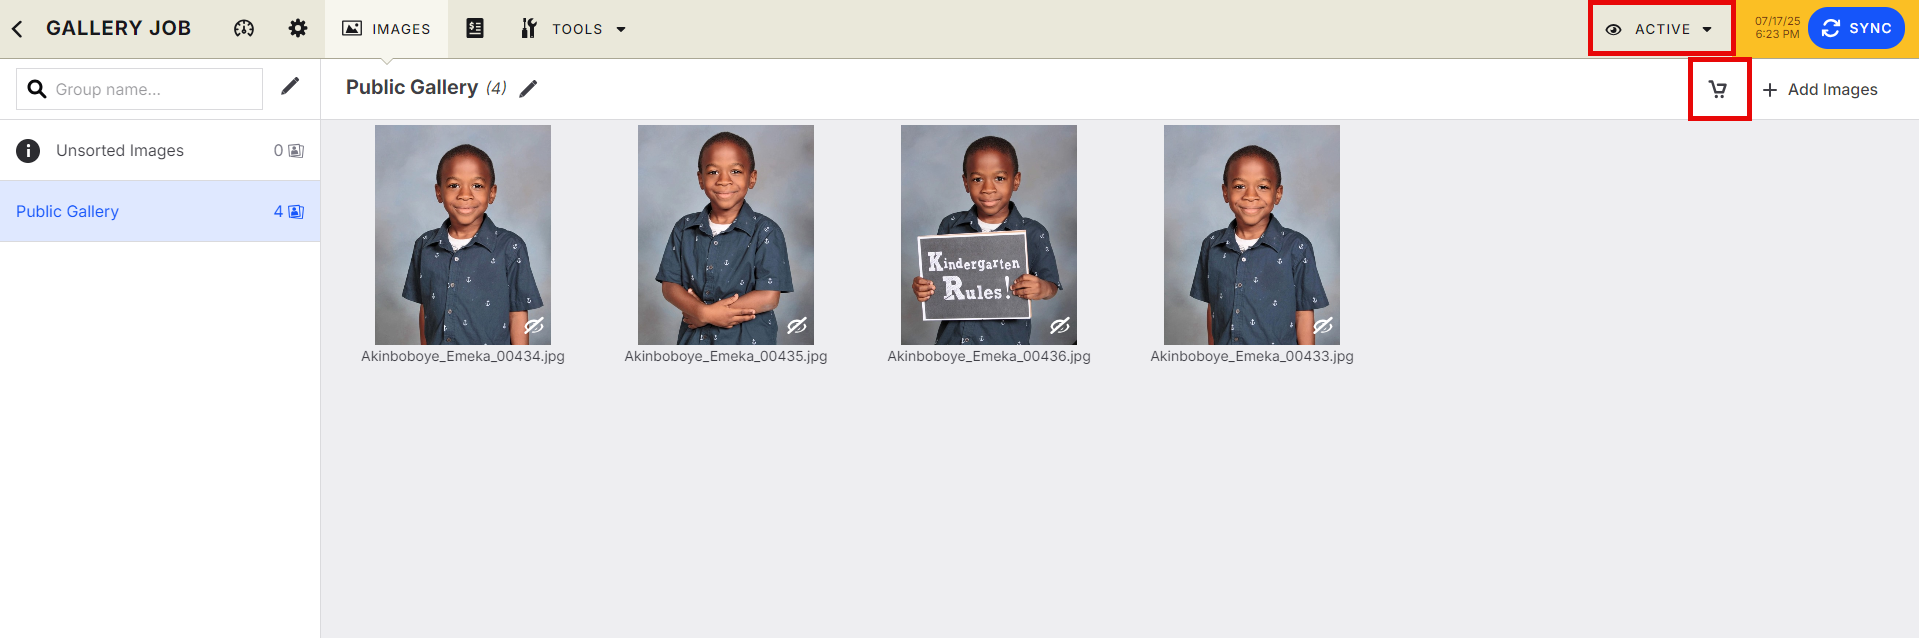
  1. Change the job status to Active.

  2. Sync your changes.

  3. Select the Shopping Cart icon to open the online gallery.

  4. Enter the gallery password to verify customers can access the gallery.


Share Your Gallery

Once you've confirmed everything looks correct, you're ready to share your gallery with customers.

Send them:

  • The gallery link

  • The gallery password

Customers can browse the gallery and place orders as soon as the job is active.


Advanced Options / Additional Rules

  • Standard Jobs do not use Subject Data.

  • Customers access the gallery using a single gallery password.

  • Images can be organized into multiple groups to improve navigation.

  • Importing from subfolders automatically creates matching image groups during import.

  • Remember to Sync after making changes so updates are reflected online.


Common Questions

Q: When should I use a Standard Job?

A: Standard Jobs are ideal for events where images aren't assigned to individual subjects, such as weddings, performances, sports tournaments, or candid event photography.


Q: Do customers need an Online Code?

A: No. Customers access a Standard Job using the gallery password you configure in the Job Settings.


Q: Can I organize images into groups?

A: Yes. You can create image groups manually or have Workflow automatically create them when importing images from organized subfolders.


Q: Why can't customers see my gallery?

A: Make sure the job is set to Active, you've synced your changes, and you're sharing the correct gallery password.


Q: What's the fastest way to upload large galleries?

A: If your images are already organized into folders, importing from subfolders is the quickest option because Workflow automatically creates image groups based on your folder structure.

Was this article helpful?

Sorry about that! Care to tell us more?

Thanks for the feedback!

There was an issue submitting your feedback
Please check your connection and try again.