
Moving Pre-Orders Across Jobs
Mistakes happen and sometimes parents place pre-orders on the wrong job — especially if they have multiple children or schools. The good news? You can now move pre-orders quickly and easily to the right job.
Why It Matters
When a pre-order ends up in the wrong job:
It’s matched to the wrong subject or school
Products may use incorrect data or images
Financials get assigned to the wrong place
The order might ship to the wrong school
This feature gives you a fast way to correct these mistakes, no reordering or duplicating required.
How It Works
✅ Orders that can be moved
You can move an order if all of these are true:
It’s a pre-order (not a full order)
The order has no images assigned
It is not archived
The job is a subject job (not standard)
The job is active or inactive (not expired or archived)
📌 Good to know: If the order has a subject assigned, it will be unassigned during the move — that’s normal!
🚫 Orders that can’t be moved
You’ll be blocked from moving any order if:
The job is a standard, archived, or expired job
The order has images assigned
The order is archived
It’s a full order, (not a pre-order)
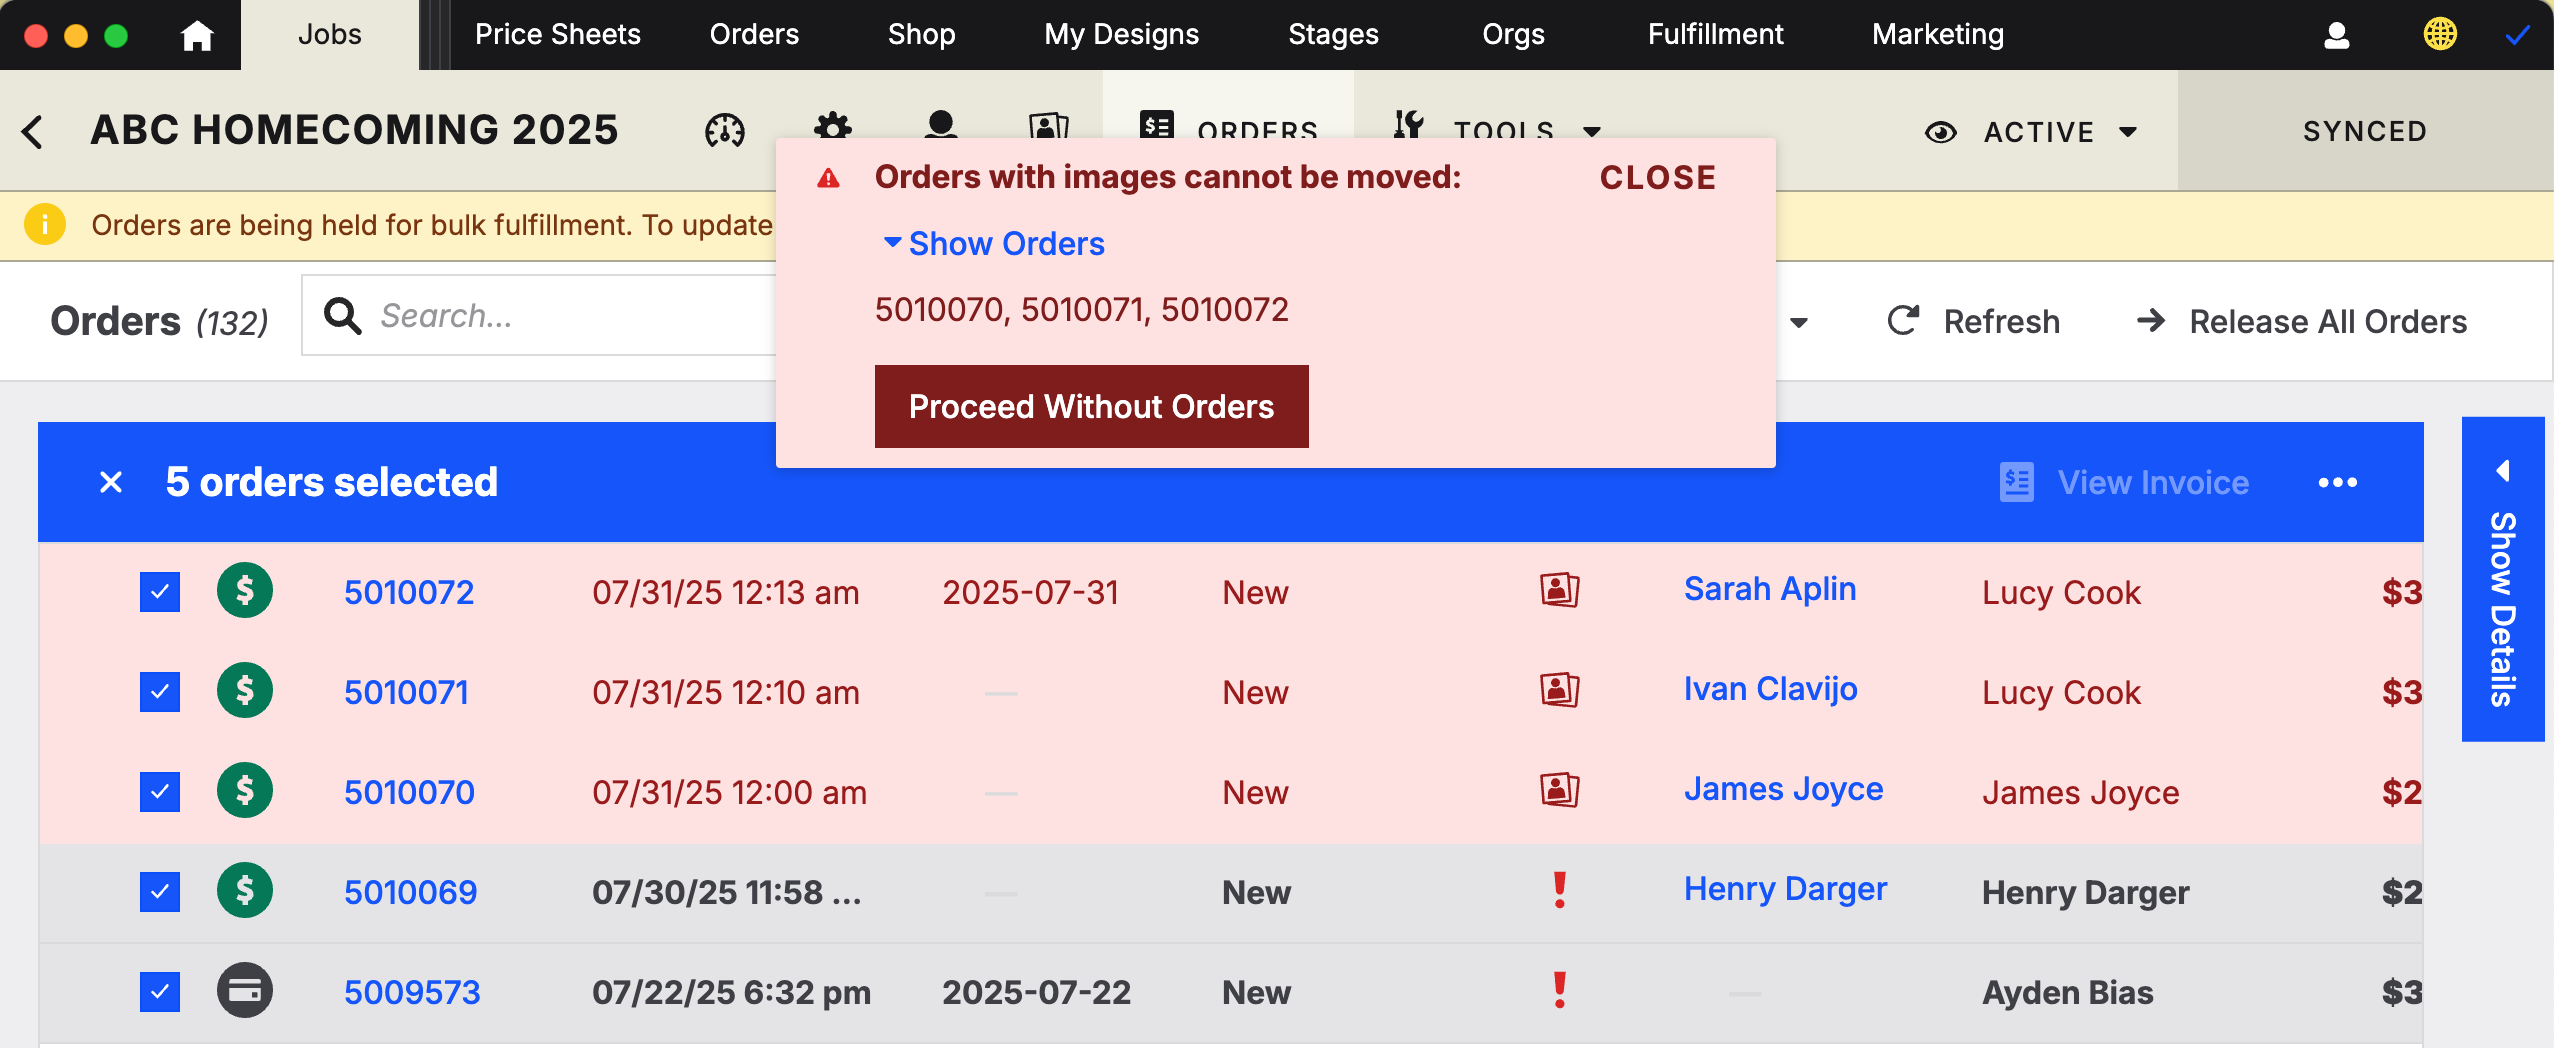
If you select a mix of valid and invalid orders, we’ll show you a warning. You can either:
Remove the invalid ones yourself
Click “Proceed Without Orders” to automatically remove invalid ones and continue
🔐 Permissions
Only users with the Job Orders: Add/Edit/Delete permission can move orders. If you don’t see the option, check with your admin
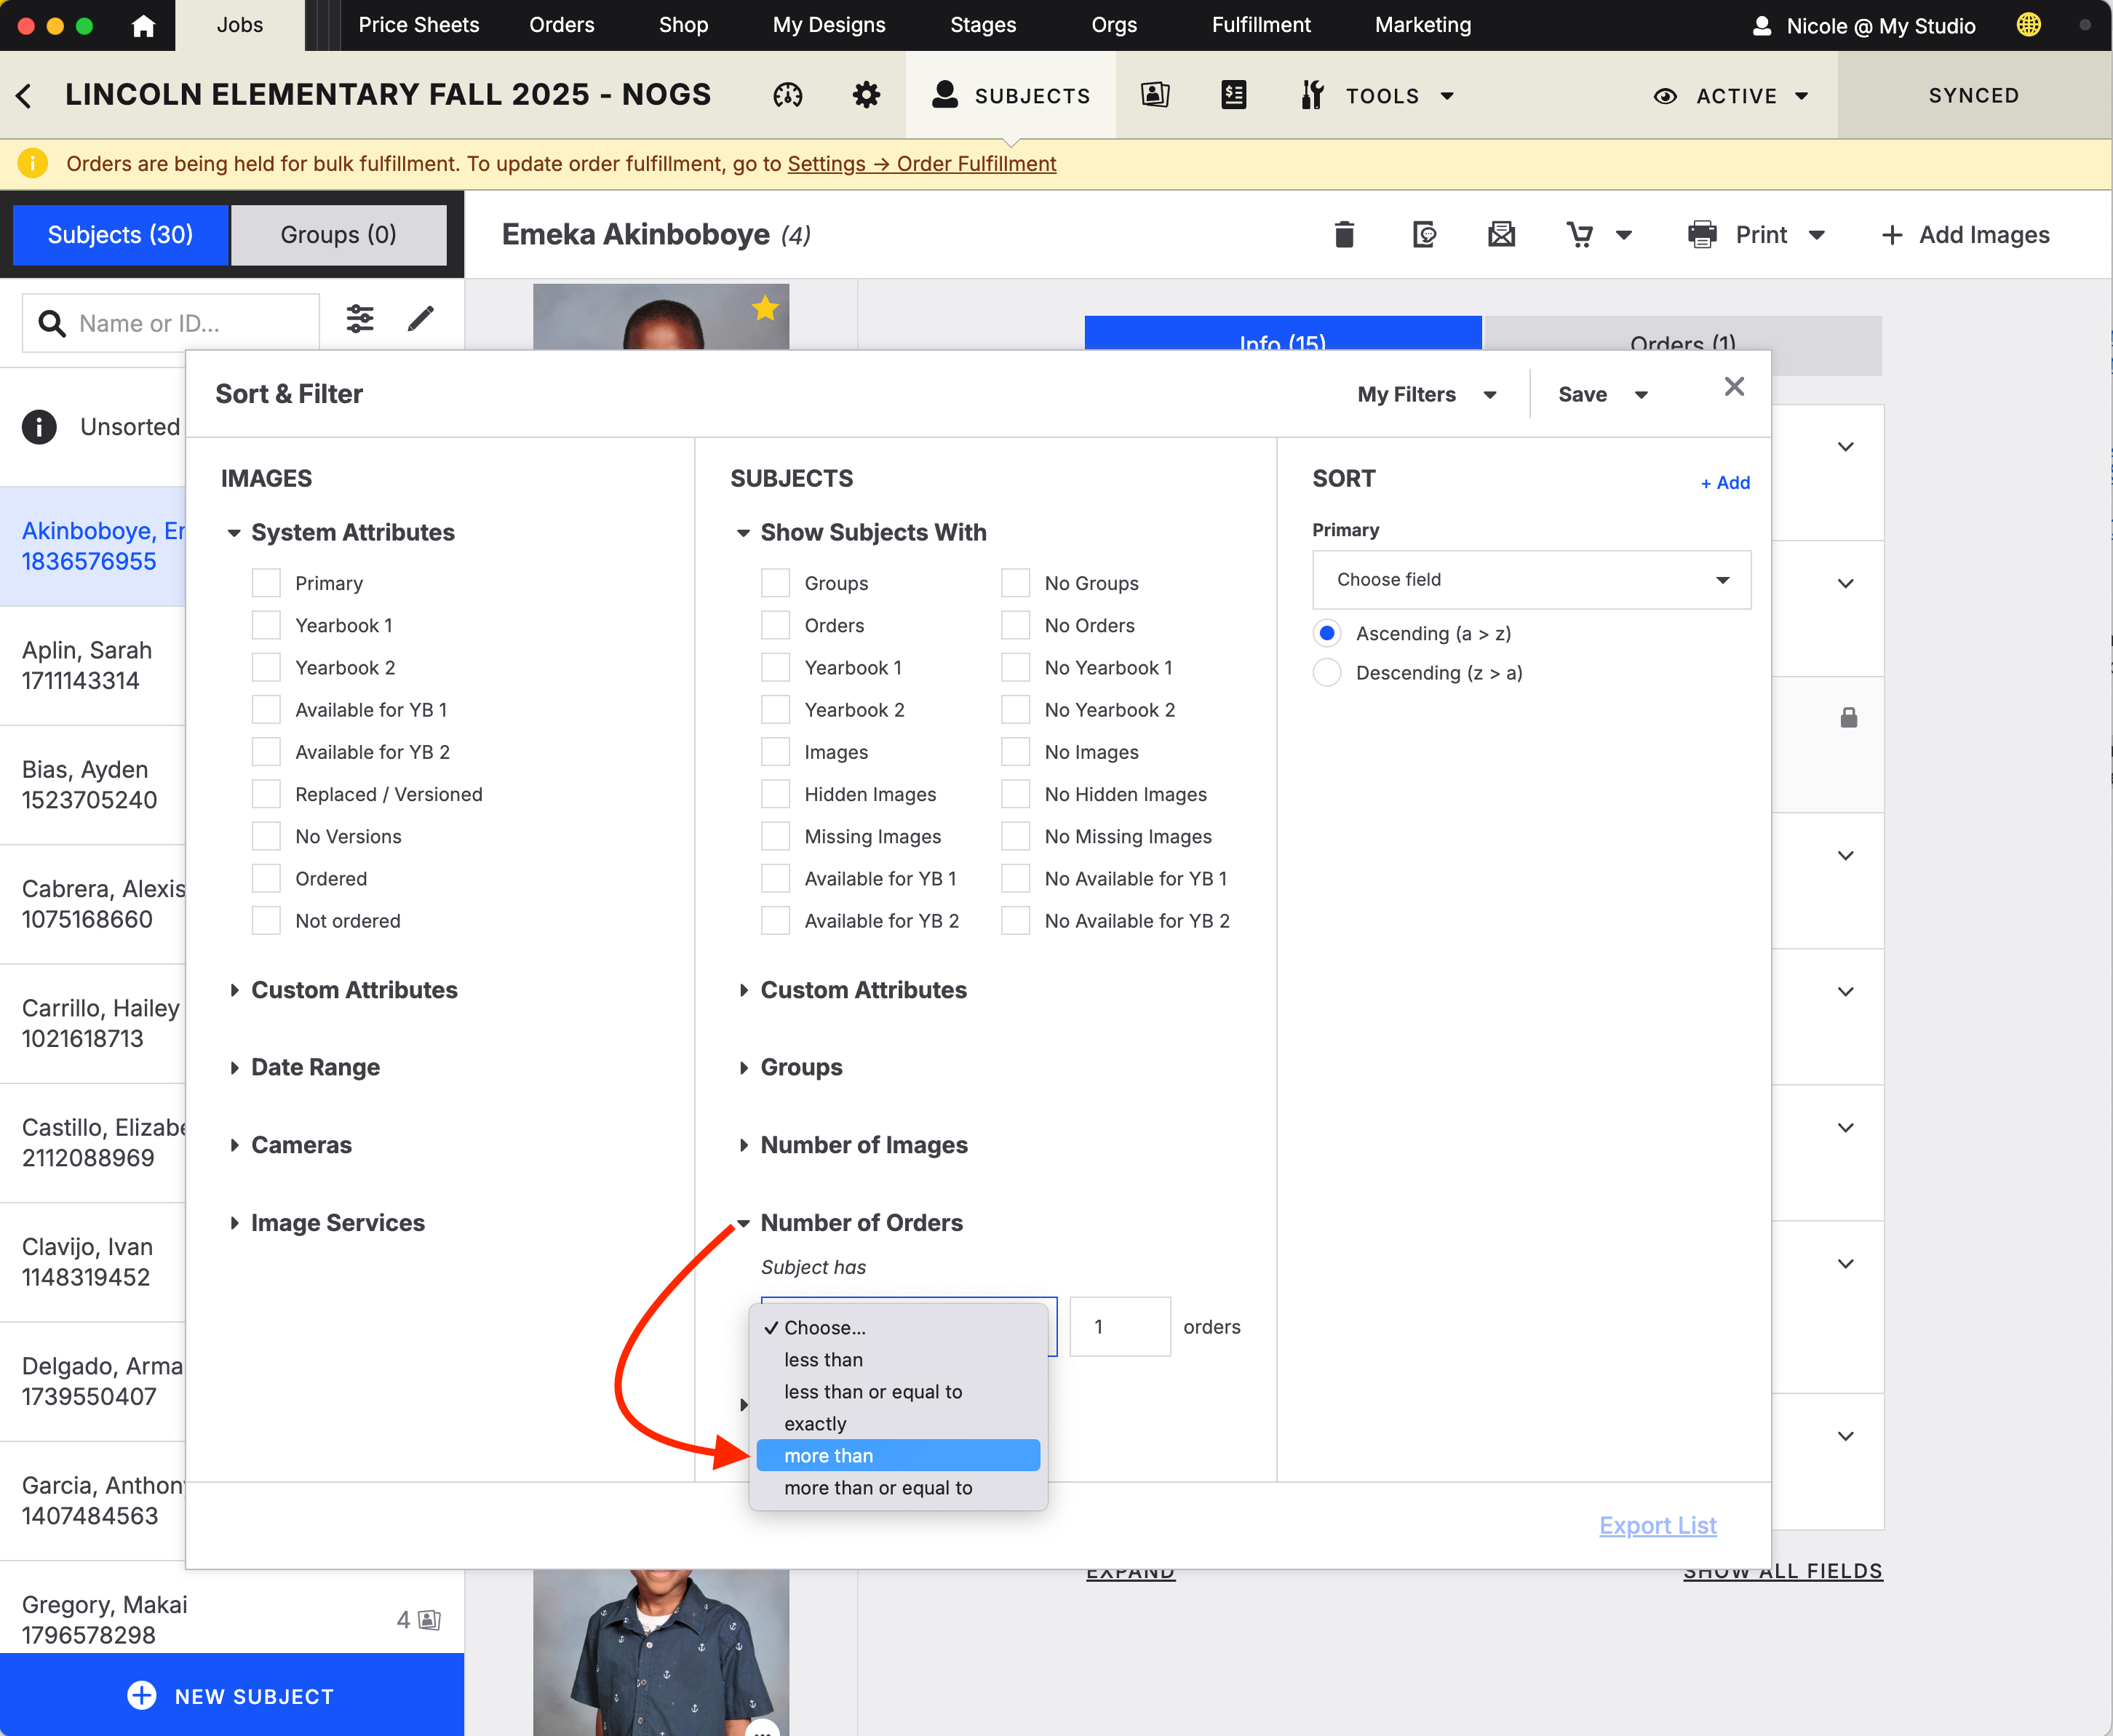
🔍 Tip: Finding orders that might need to be moved
To help you spot issues faster, try using filters in the Subjects tab to filter for subjects with more than one order.
Step-by-Step: Moving Orders
Here’s how to move one or more pre-orders to the correct job:
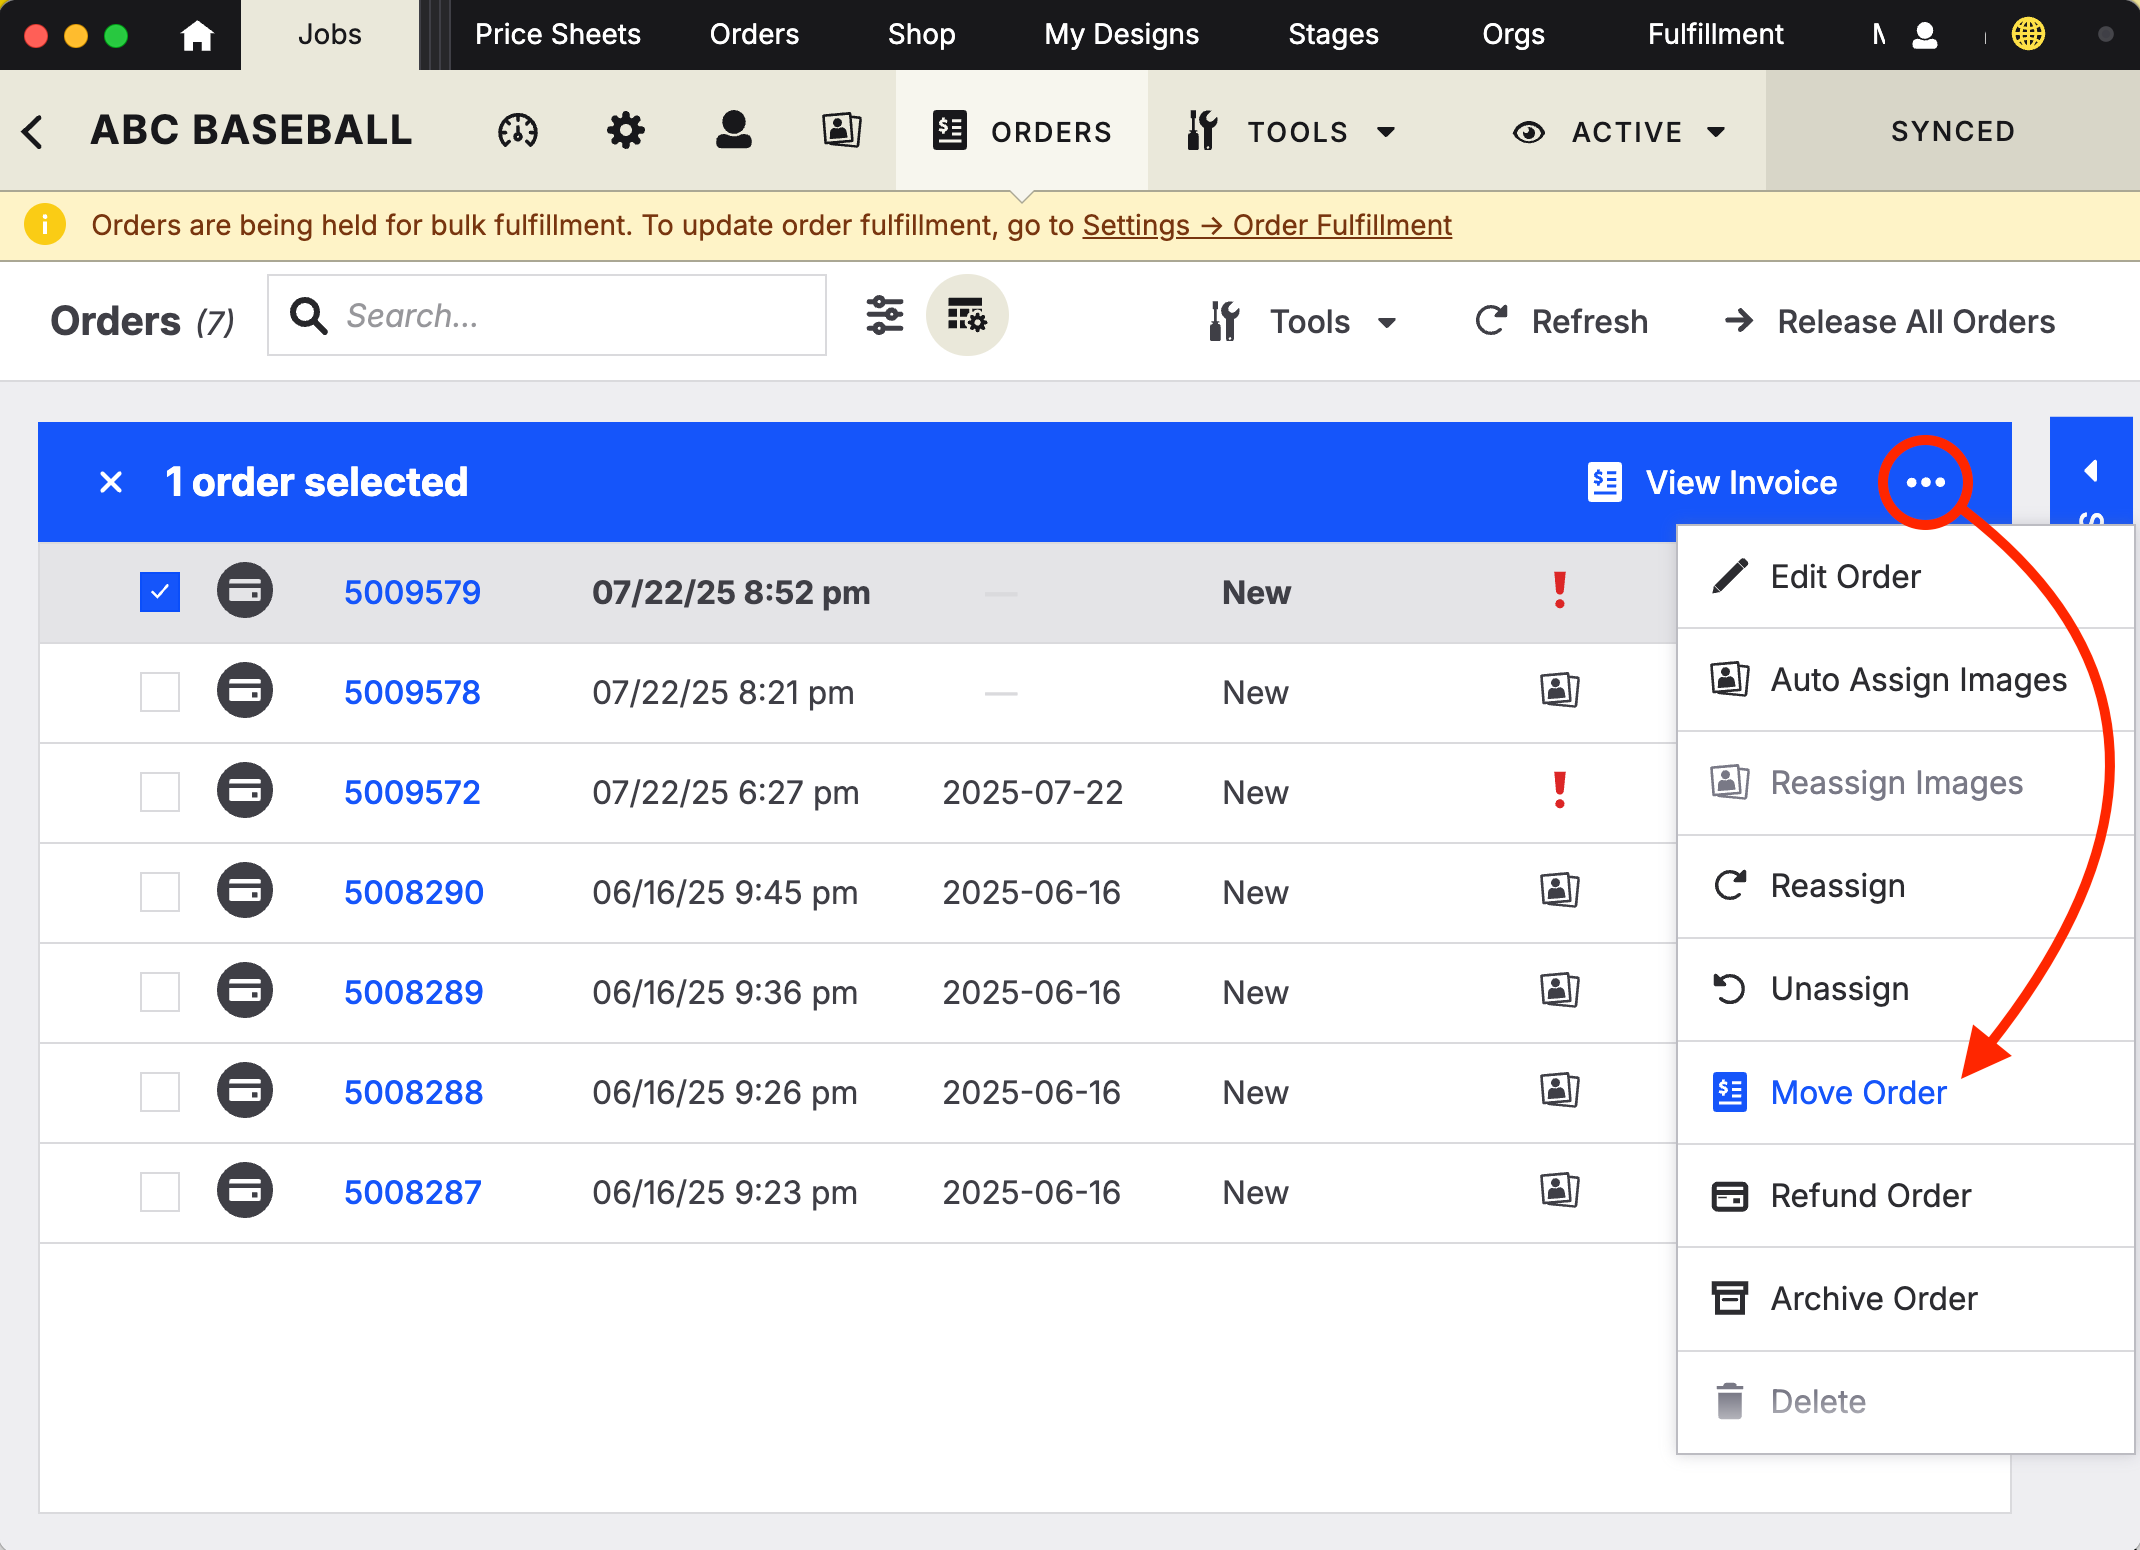
Go to the incorrect job and open the Job Orders or Subject Orders tab.
Select one or more qualifying pre-orders.
Click the context menu (...) and choose “Move Order.”
If any selected orders are invalid, you’ll see a toast warning and the invalid orders will be highlighted. Either fix the selection manually or click “Proceed Without Orders.”
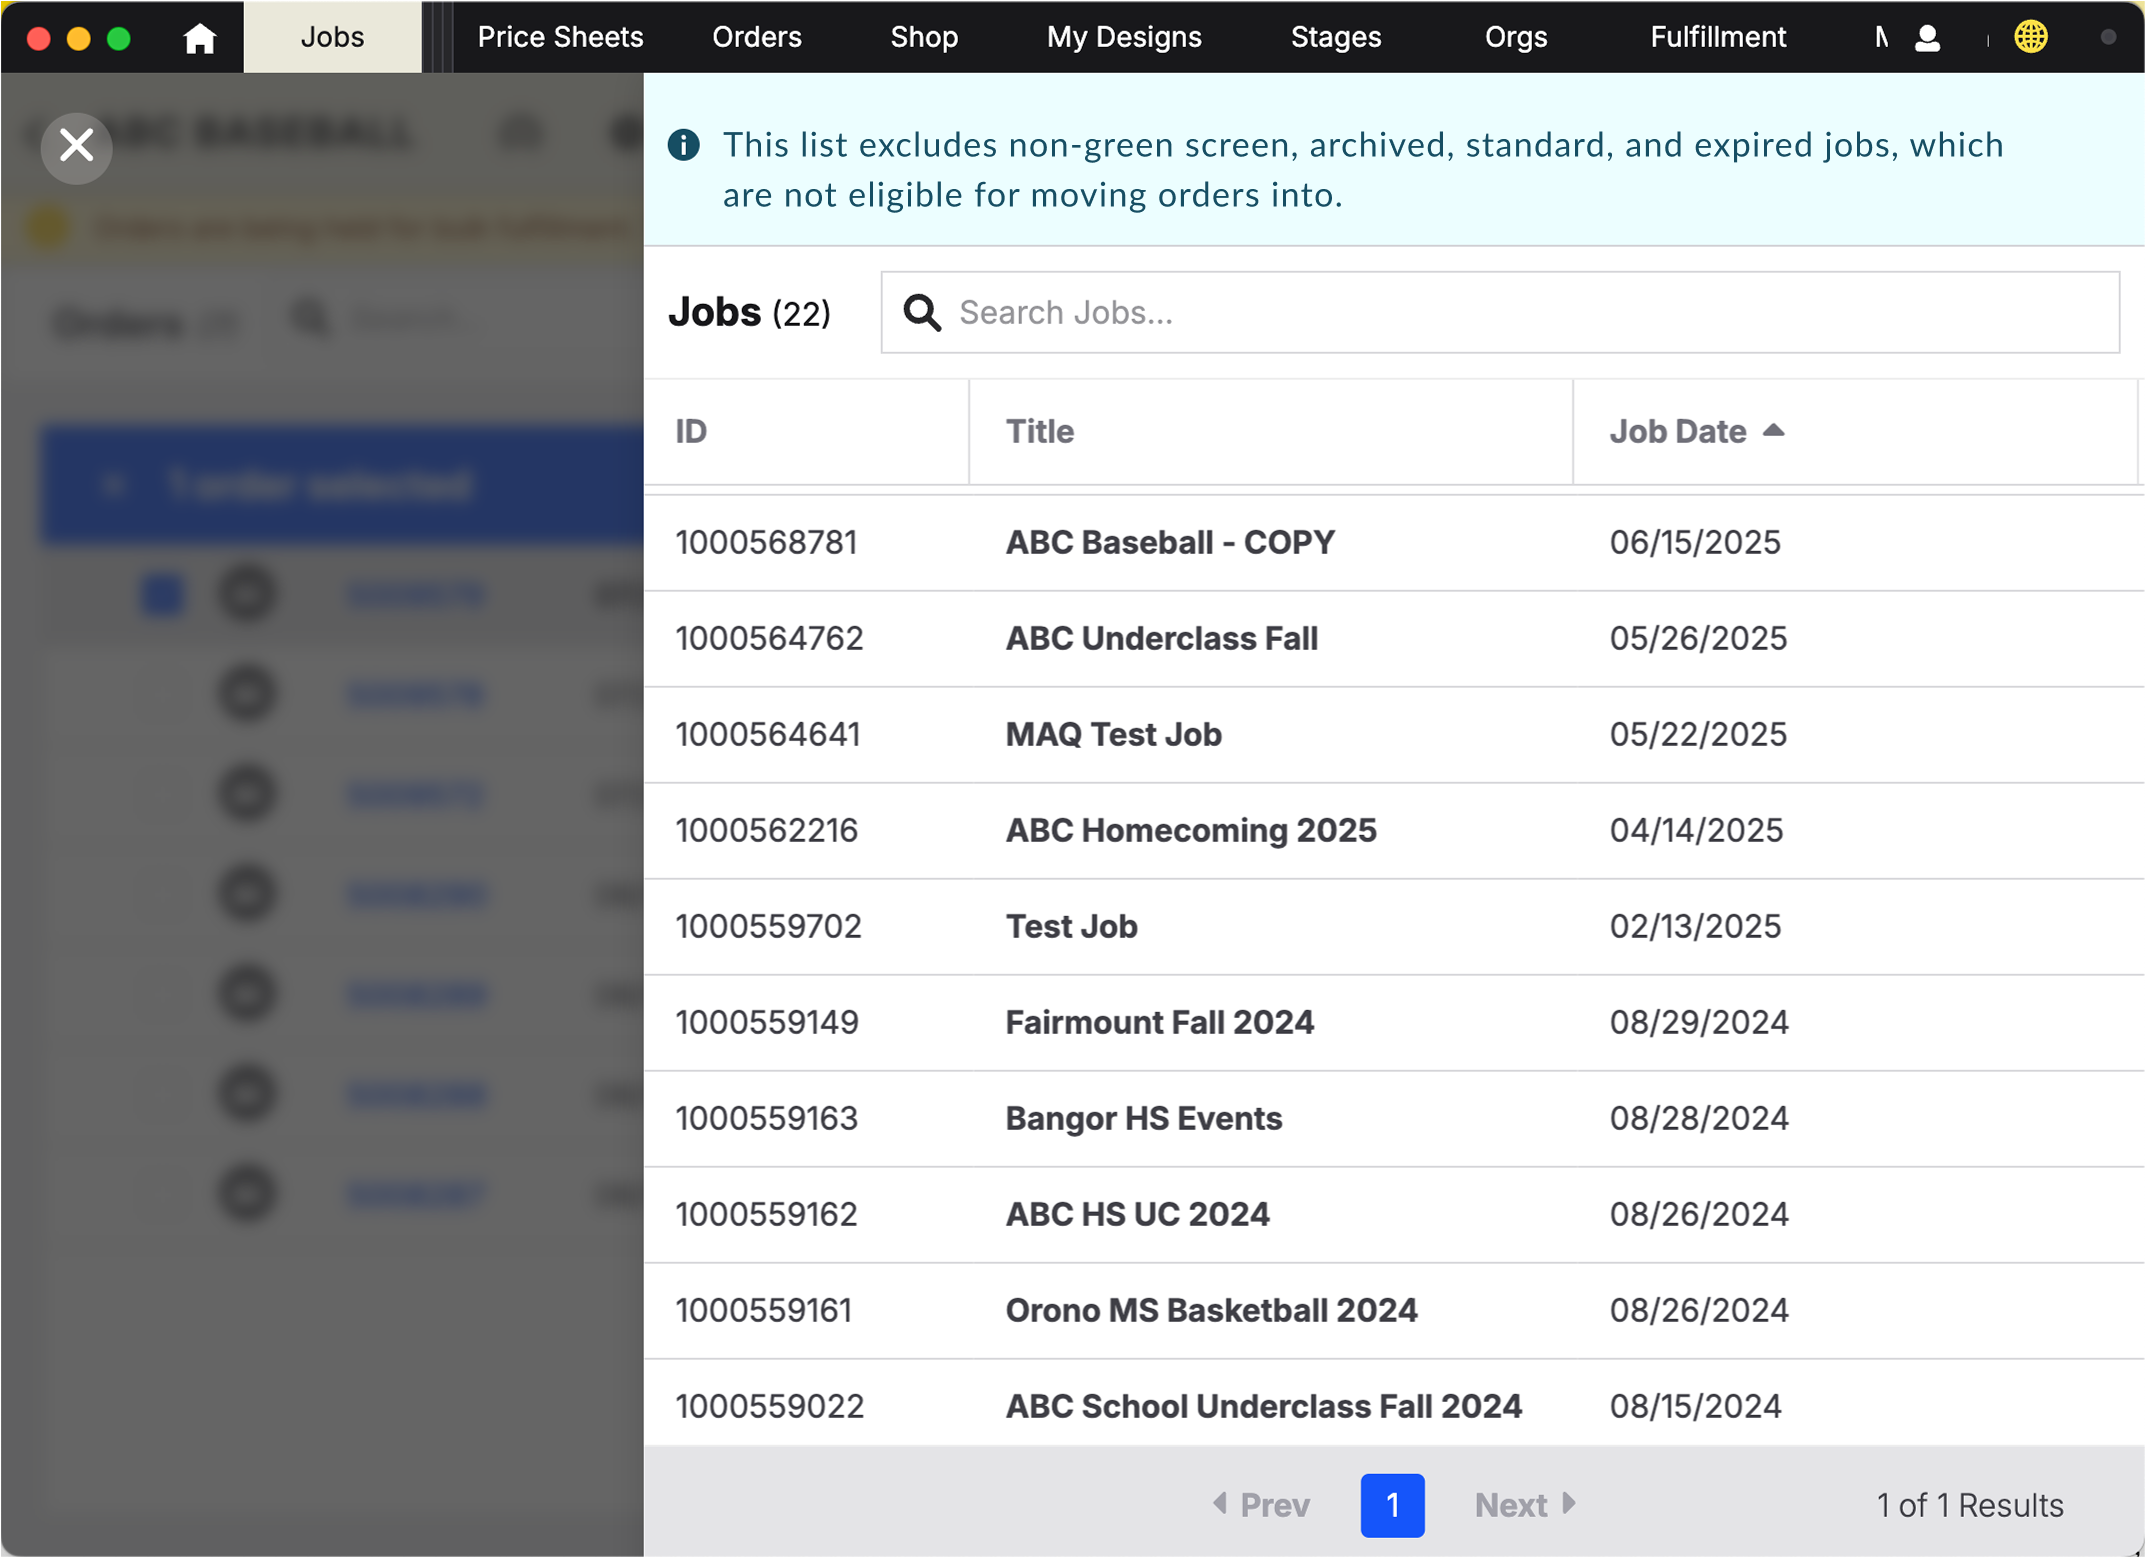
The Job Selector slide-out will appear. You can sort, scroll, or search to find the correct job.
Jobs are pre-filtered to exclude archived, expired, and standard jobs.
Green Screen jobs can only move to other Green Screen jobs.
Select the destination job. If it isn’t valid, you’ll get a new warning message.
Review the confirmation modal, including:
Number of orders
Order IDs
“From” and “To” job names and IDs
Important information
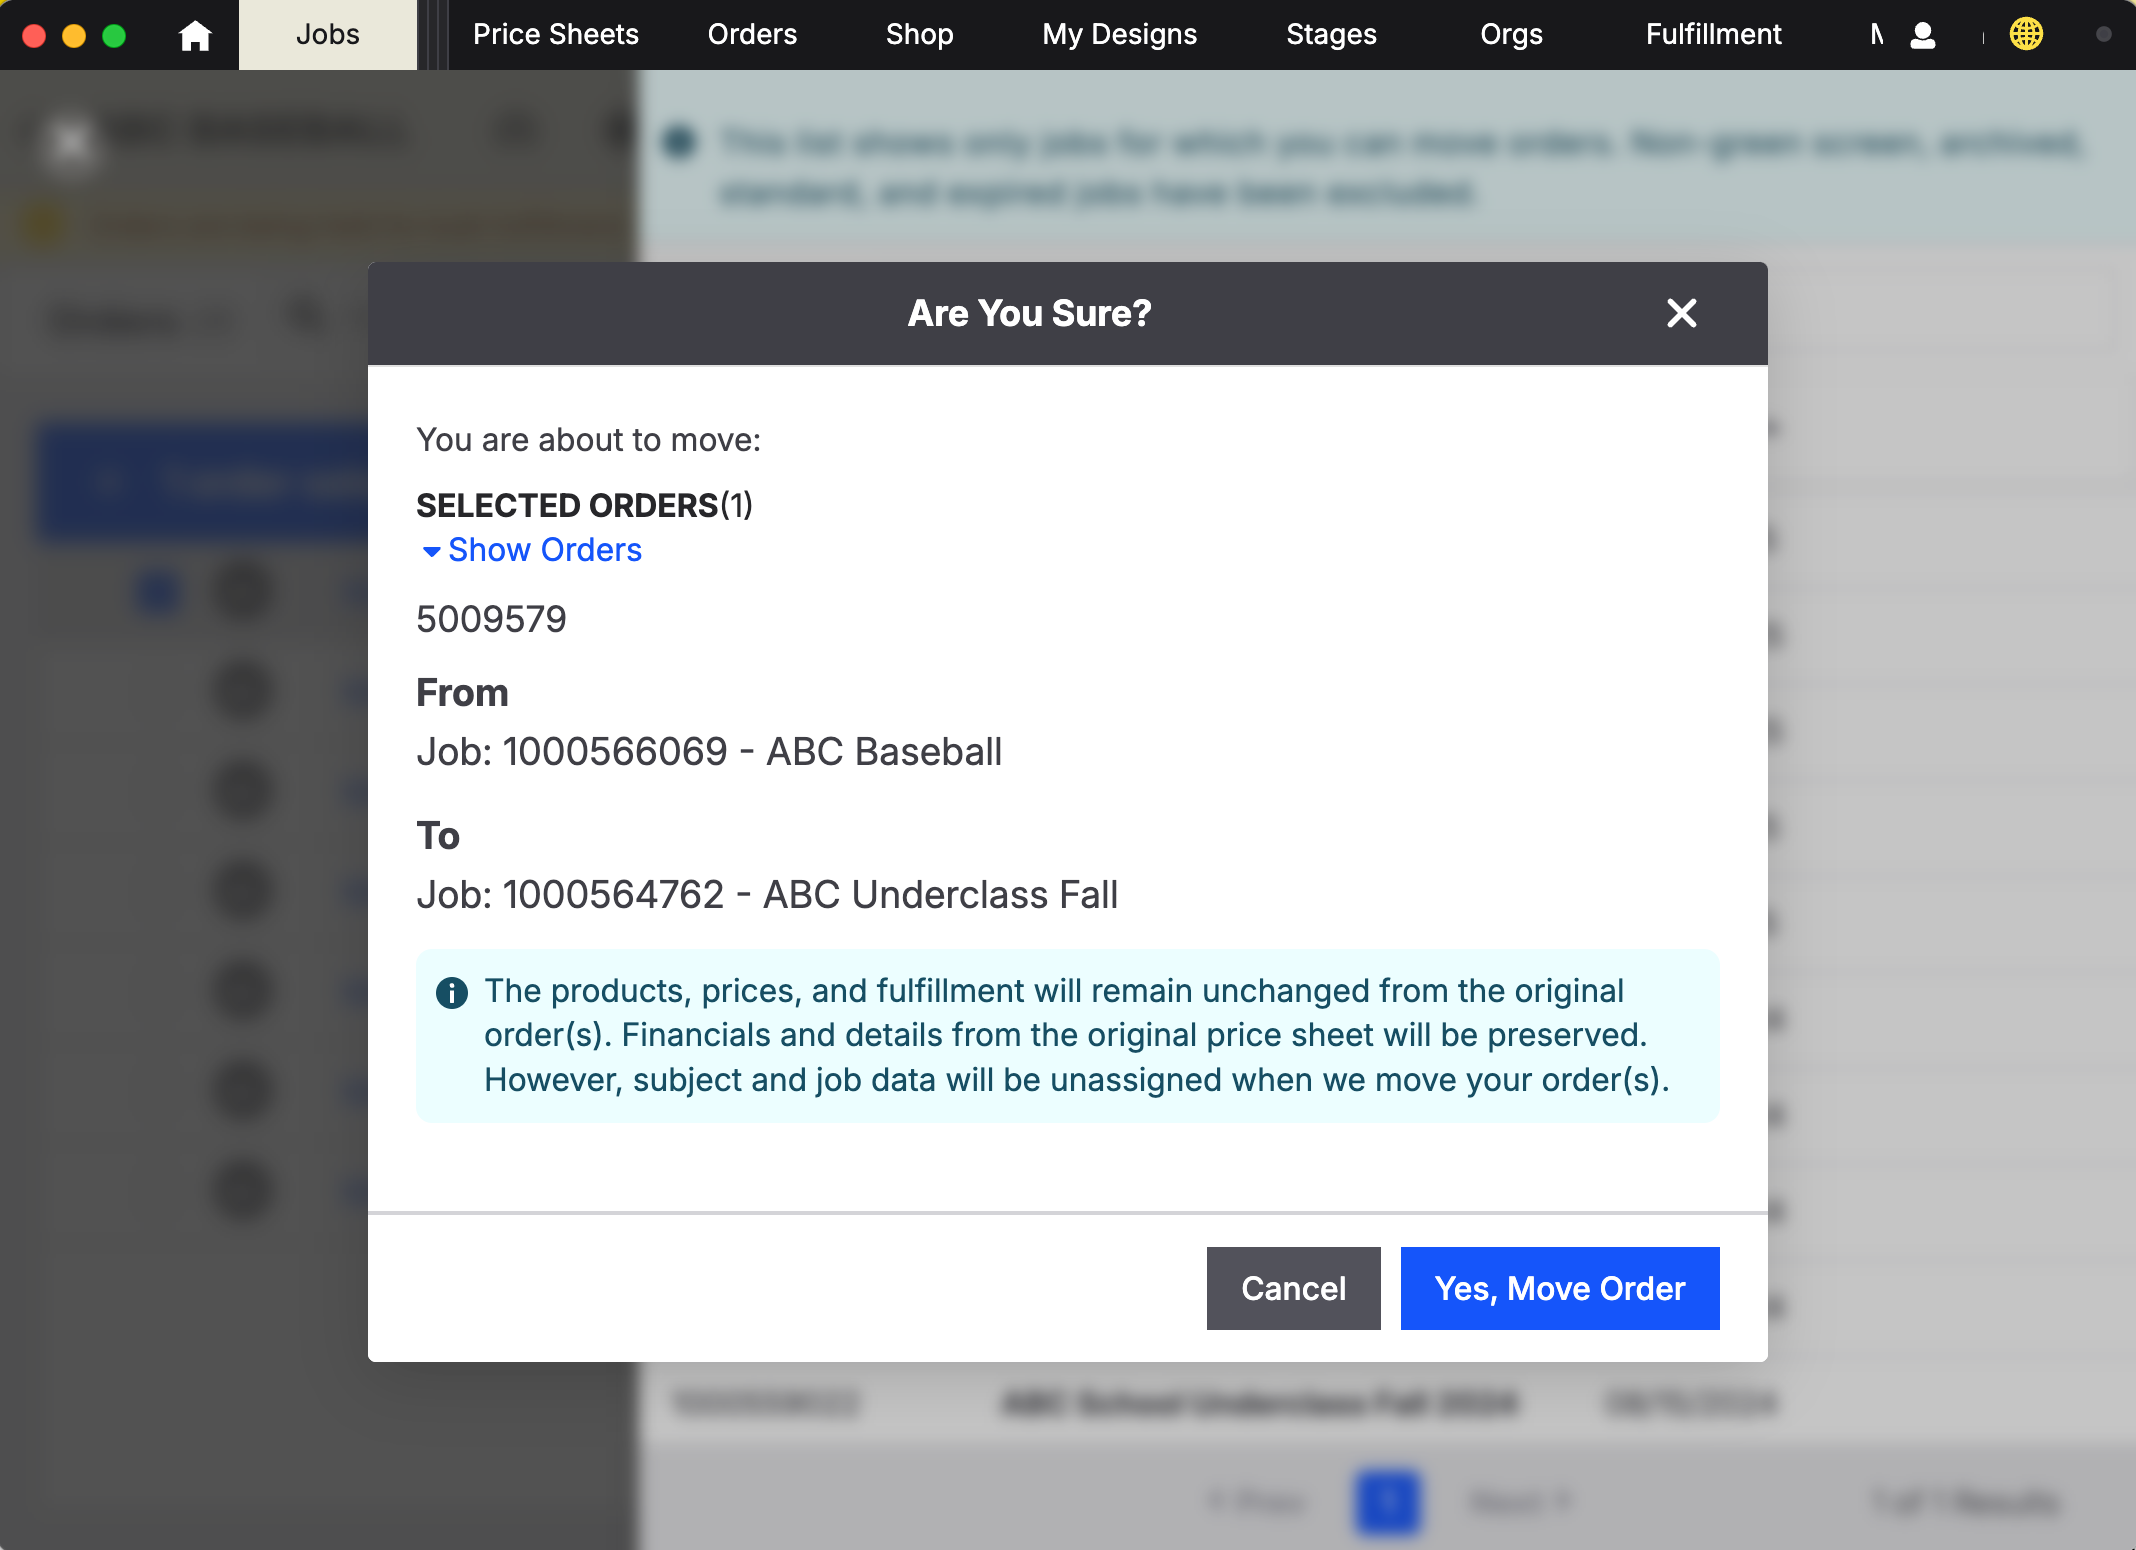
Click “Yes, Move Order” to confirm.
You’ll see a loading indicator while we process the move.
Success! You’ll see a green success message when complete.
What Happens to the Order After It’s Moved?
Moving an order updates everything it needs to work properly in its new job.
What changes | What happens |
|---|---|
🖼 Products mapped to job images | Updated to match job images in new job |
📄 Text & data fields | Cleared and repopulated from new job/subject |
🧠 Auto-applied job image services | Adopted from new job |
📦 Fulfillment settings | Adopted from new job |
🏫 Pickup shipping address | Updated to new job’s pickup location |
💸 Products & pricing | Products and financials stay intact |
⚠️ Warning about Job Images
If the new job doesn’t have a job image, you’ll still be able to move orders with products mapped to job image nodes — but the nodes will not render correctly until a job image is added to the new job.