Creating Catalogs in Riplynx
How to add products to your PUD
Configuring Units
You can add or edit your units inside of RipLynx!©. To do this:
1. Go to File>Preferences
Your units will be listed towards the bottom of the screen under Package Units Definition, also referred to as PUD
If this is not the correct PUD file, click the button with the three dots […] and browse for the correct PUD
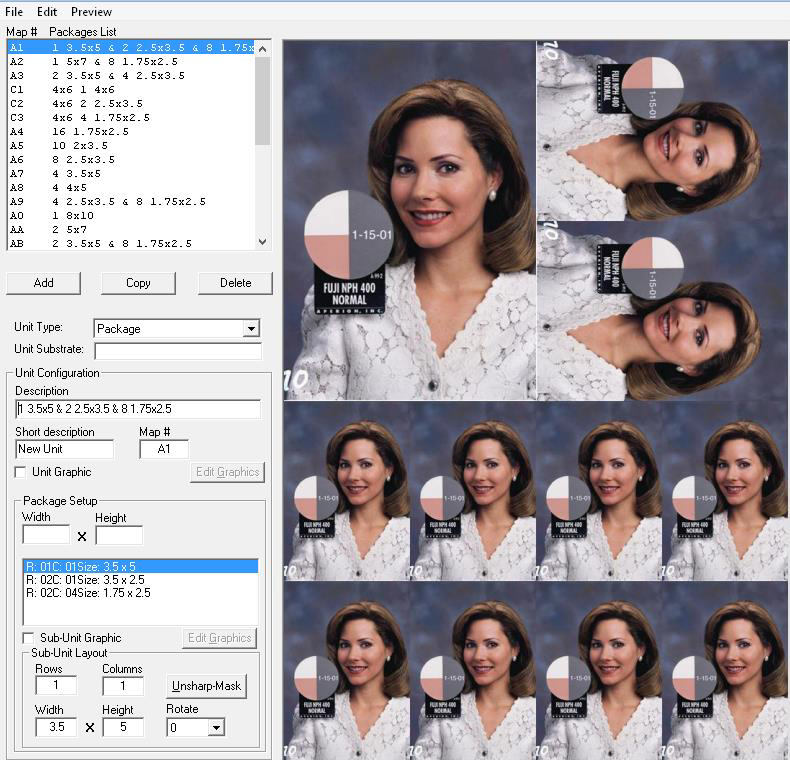
2. Click the Config button. This will bring up the Units Configurations screen

Adding a Unit
1. Click Add
2. Under the Unit Type dropdown, select whether this is a Package or service
Package - This is what will be selected if you are creating a product for printing
Service - This can be used if you want to send something over to Riplynx but not print it
3. Enter in a Description (For Example: 2 5x7)
4. Enter in a Short Description(optional)
5. Enter a Map# for the unit (There must be no duplicate map numbers)
6. Enter in the Width and Height of the paper your unit will print (For Example: 8x10)
Note: Products can be no larger than 36 inches on the long edge
7. You should see a default small unit already listed, titled R:01 C:01 Size 1x1. To edit this unit, you will need to change the Rows, Columns, Width, Height and Rotation in the Sub-Unit Layout Section
8. To Move your sub unit on your page, right-click on the unit and then right-click the location of the page you wish to place it in
Note: Full Preview must be turned off
9. Go to File>Save Unit Definitions