Guide to Printing IDs Onsite
This guide explains how to set up and print ID cards directly from your studio software, covering two methods: setting up a Hot Folder for automated printing or selecting the printer each time.
Part 1: Initial Setup
Access Preferences: Click on your Name (or profile icon) in the studio and select Preferences.
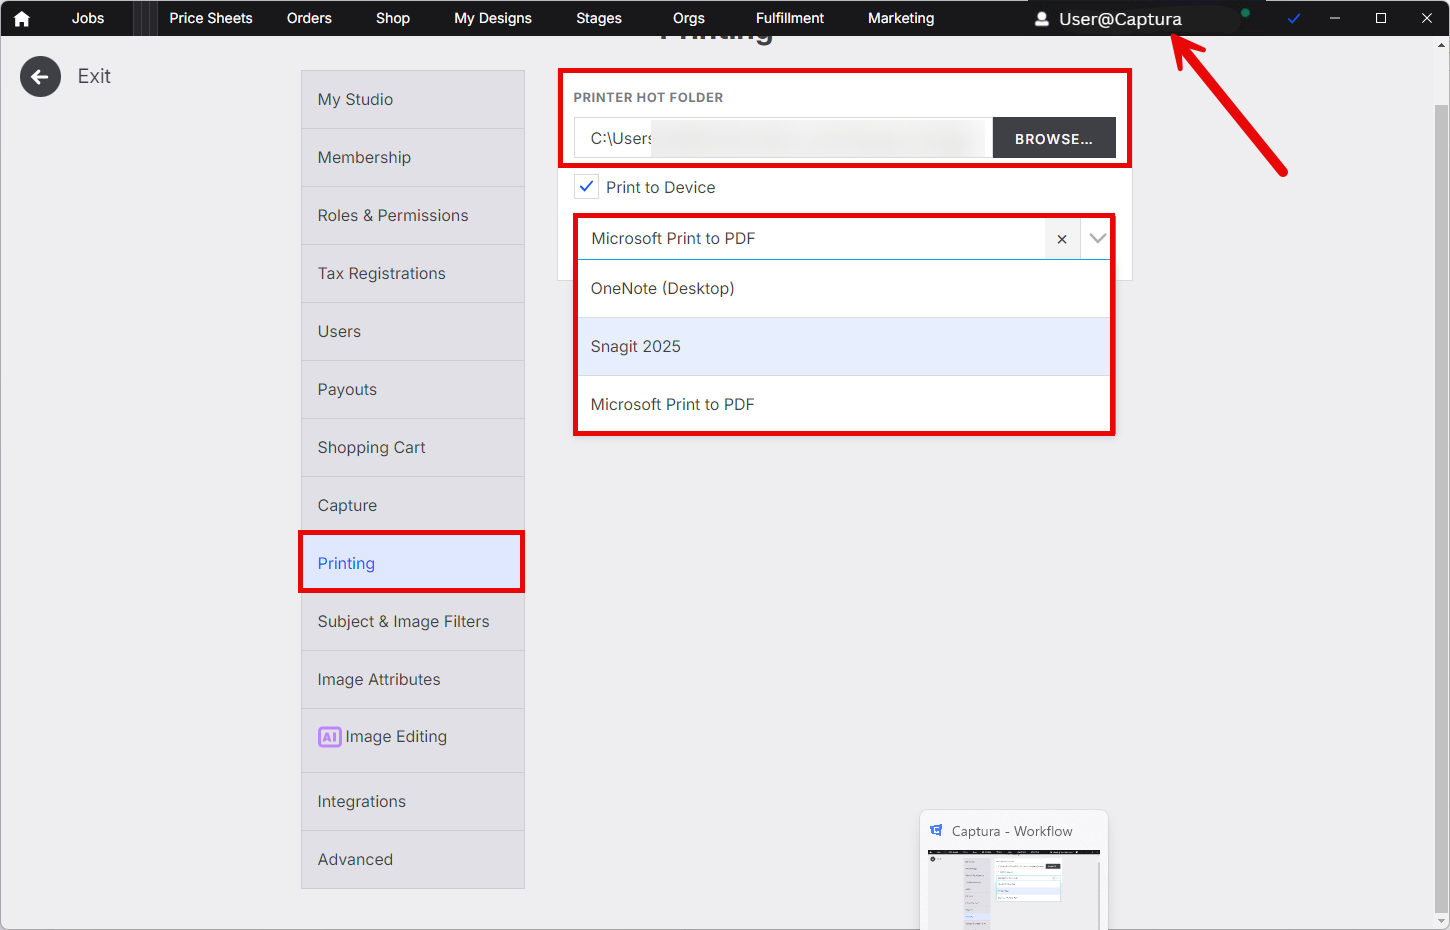
Configure Printing:
Click the Printing tab.
Set up your Hot Folder (a specific folder your software monitors for new print files).
Under "Printer Selection," choose Print to Device and select your desired printer from the dropdown list.
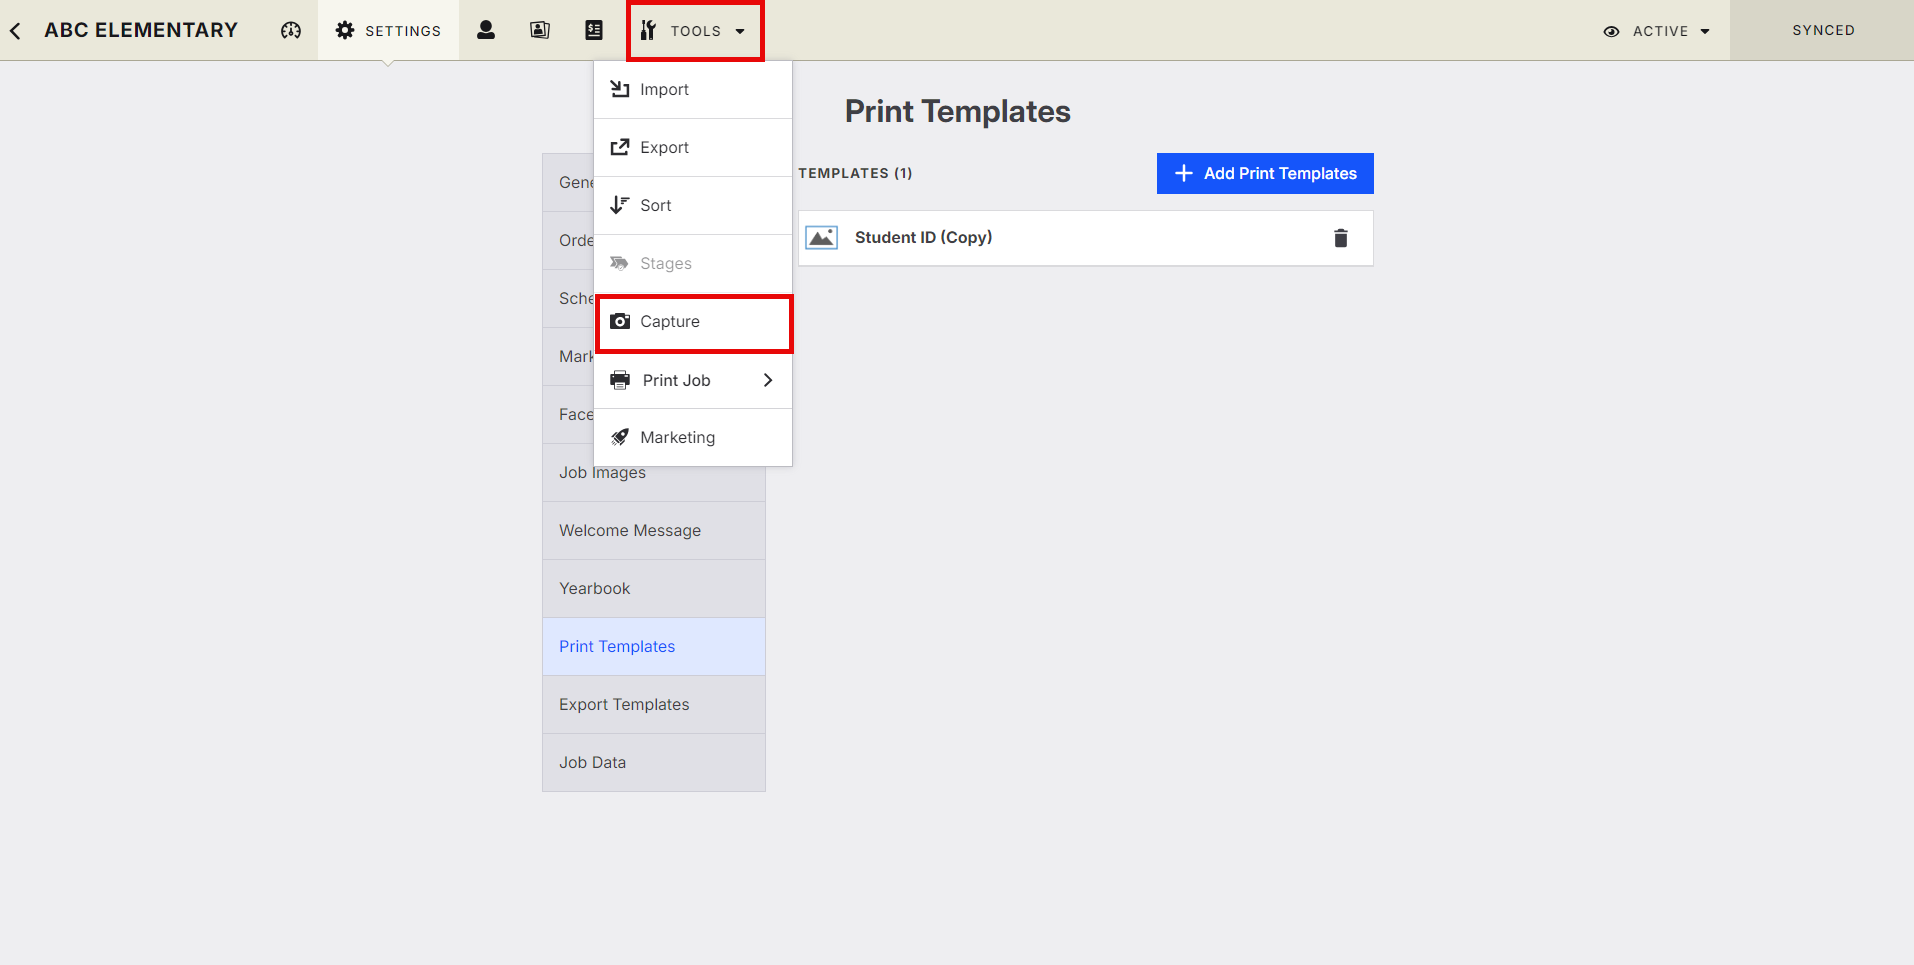
Add Print Template:
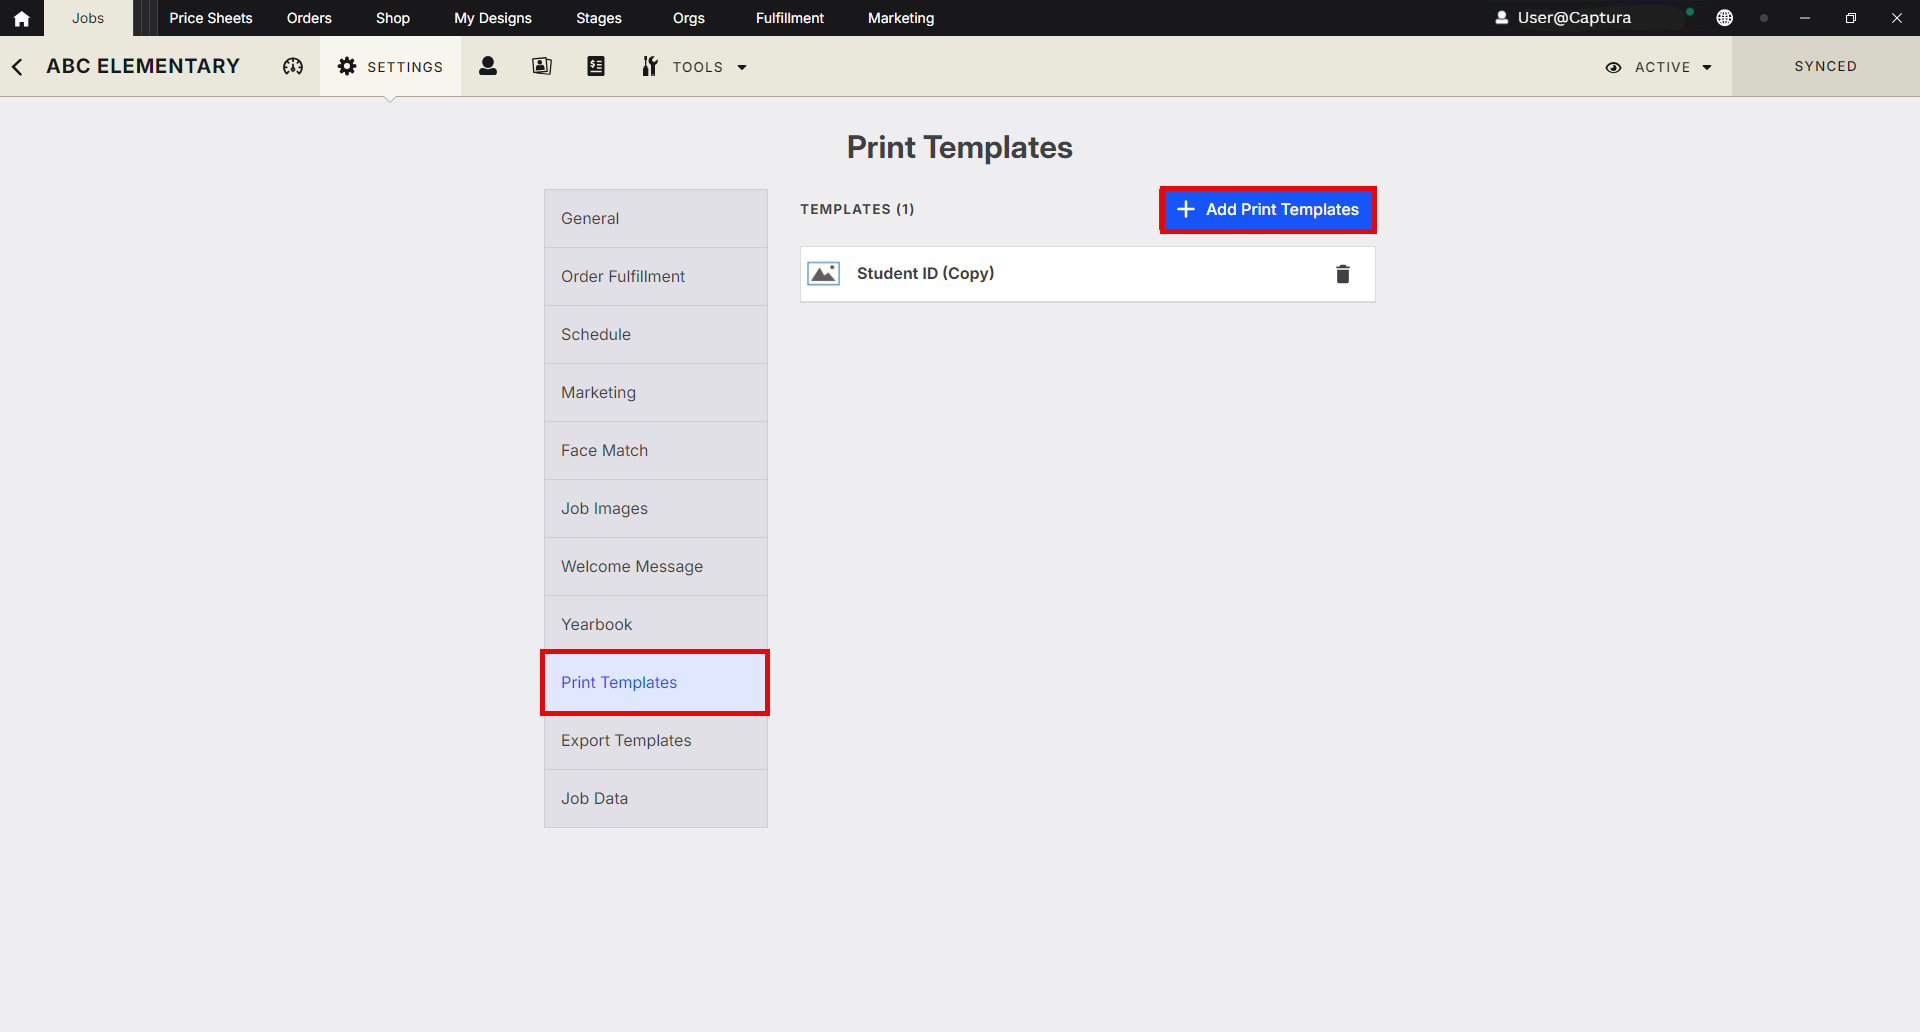
Go to your active Job.
Click Print Templates.
Add the specific ID card print template you previously created in My Designs. (Need help? Learn more here).
Part 2: Print Using Capture Tool
This is the standard workflow after initial setup.
Go to your active Job.
Click Tools > Capture.
Select the subject (image) you want to print.
Click the Print Icon (≈ icon of a printer).
Select the ID Card template to send the print job to your configured Hot Folder and printer.