Create and use an AI Crop
Our cropping tool uses perceptual head sizing to ensure a consistent crop across subjects in a job. This eliminates the need for tedious adjustments to poor crops.
Creating the profile
You can create a new crop profile in two places inside Workflow.
Option 1: Studio Preferences
Click Your Name in the top right corner
Select Studio Preferences
Open AI Image Editing
Click Add AI Crop Profile

Option 2: From a Job
Open Jobs
Select a Job
Go to the Images tab
Click Edit
Under AI Editing, check the AI crop selection
Click into the Search profiles menu
Scroll to the bottom and select Manage profiles
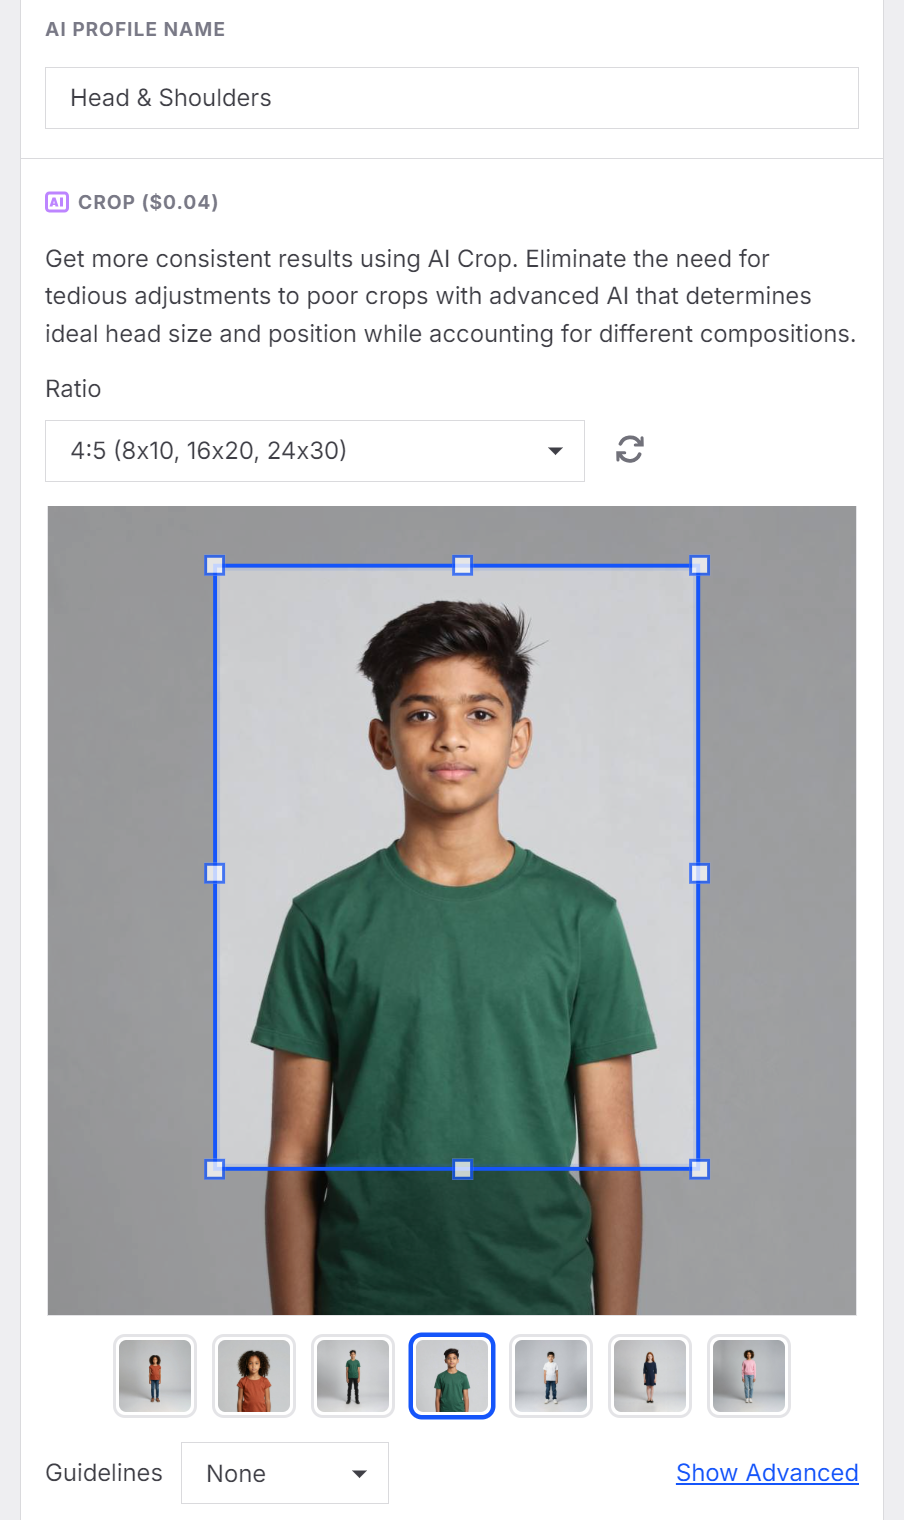
Profile Settings
We heard your feedback, so we streamlined the profile set up!
Add a profile name
Select a pre-defined ratio or create a custom one
Adjust the crop handles
Toggle on the center guideline if needed
Click Create to save the profile
Advanced Settings
These include two advanced options that are not reflected in the profile preview due to the complexity of the calculations.
Include full-body advanced centering Maintain full visibility of hands and elbows in unique full-body pose variations, without compromising subject centering.
Include additional top margin Add additional top margin to ensure the entire face and head of subjects with voluminous hairstyles or large hats/headpieces is included. Value is representative of a margin % (i.e. 0.02 is 2%).
Manual Adjustments The following are useful for tweaking and adjusting when trying to duplicate a previous model's values, or tweak results in an incremental way. These settings are not necessary for creating new AI Profiles. This is where you can easily recreate a profile from Enhance.
Tips for Testing New Crop Profiles
To get the most consistent results, create separate crop profiles for each subject and pose type. When configuring the crop, choose the preview image that most closely matches the pose you’re working with.
For example, if you’re setting up a head-and-shoulders crop for senior portraits, select the preview image that shows a similar half-body pose.
After creating your profile, apply it to a few test jobs first. This gives you a chance to confirm the framing looks right before rolling it out across larger jobs. Testing upfront helps ensure your crops stay consistent—and saves time later in the workflow.
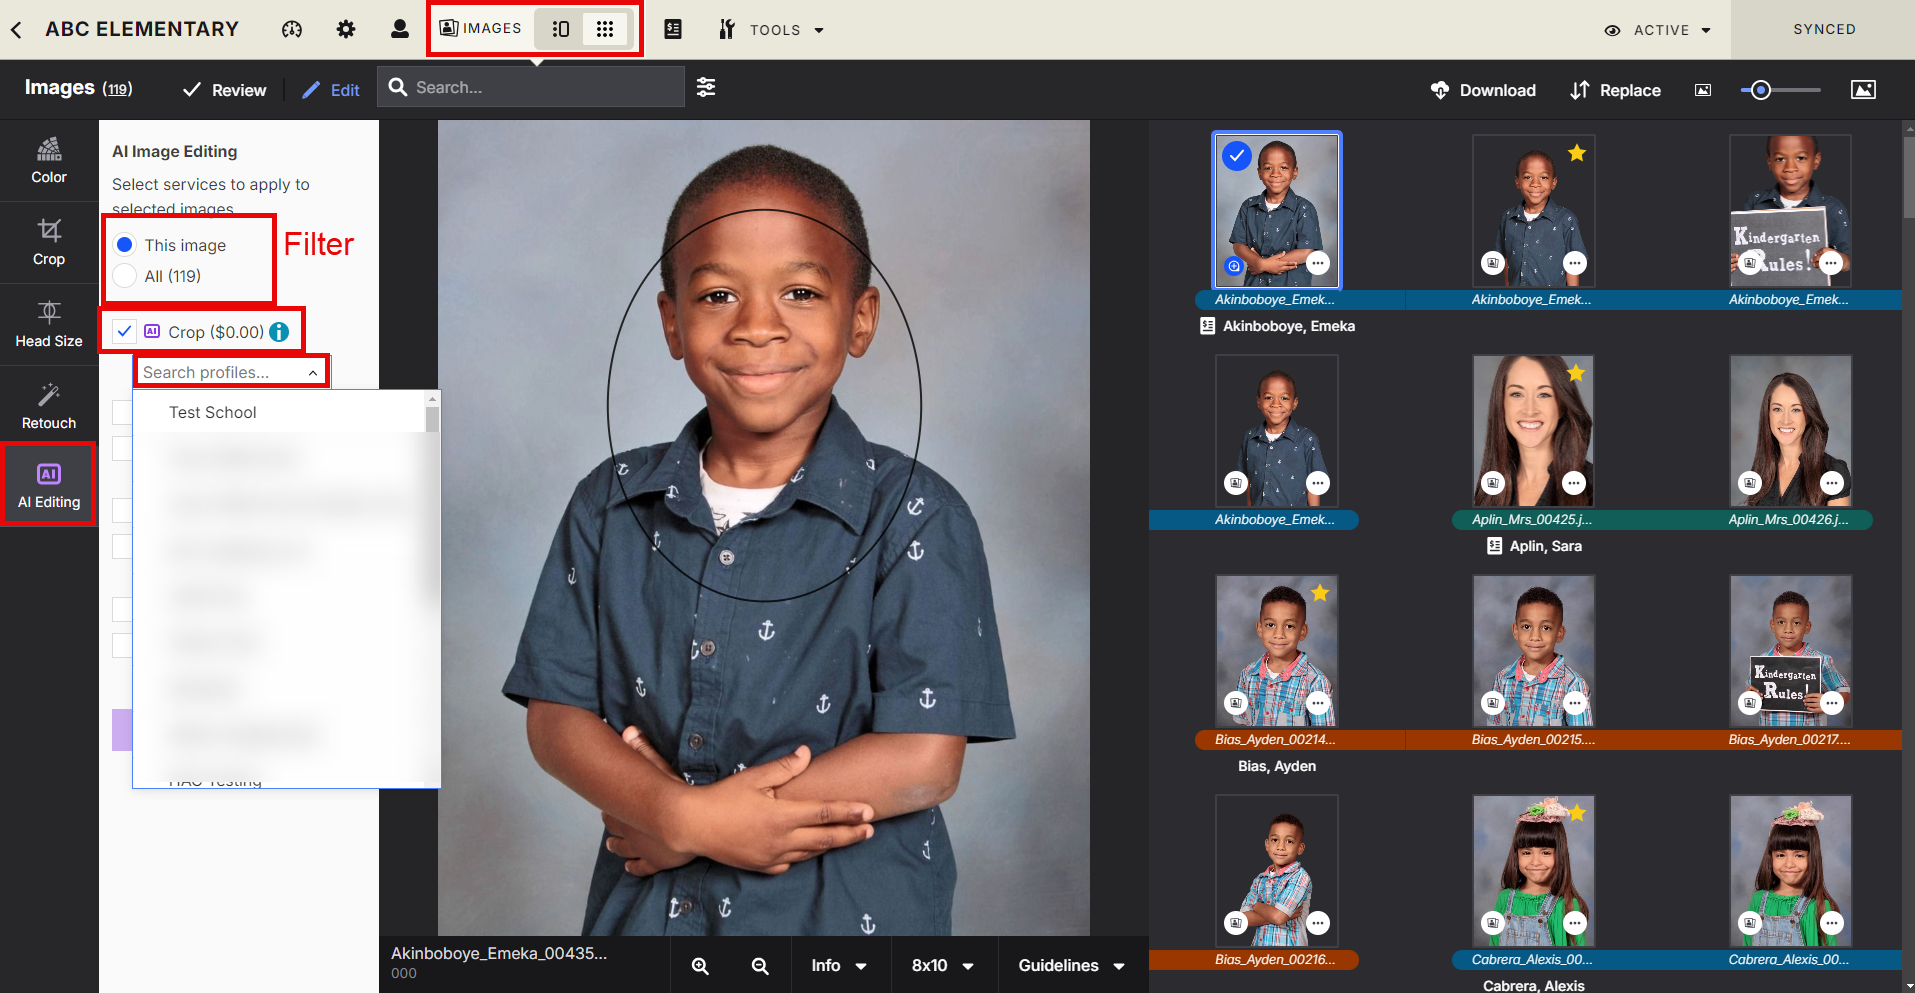
Using the AI Crop
In the Job select the Images tab
Click Edit
Filter which images you want to use the crop on
Under AI Editing, click Crop
Select the Profile from the drop down
Click Apply