
Job Settings: Creating a Welcome Message
Brief Overview
The Welcome Message HTML feature lets you customize the message customers see when they open their job or online gallery. By using simple HTML formatting, you can create a more engaging message that highlights important information and directs customers to the resources they need.
Whether you're reminding customers about ordering deadlines, providing support information, or adding your studio's branding, a well-designed Welcome Message helps create a better online experience.
Overview & Objective
In this article, you'll learn how to customize your Welcome Message using basic HTML formatting.
You can use HTML to:
Add headings and paragraphs
Insert line breaks and spacing
Change text colors
Create clickable email links
Create clickable website links
Make important information easier for customers to find
Using simple formatting improves readability and helps key information stand out during the ordering process.rs.
Setup / Configuration
To edit your Welcome Message:
Open the appropriate Job.
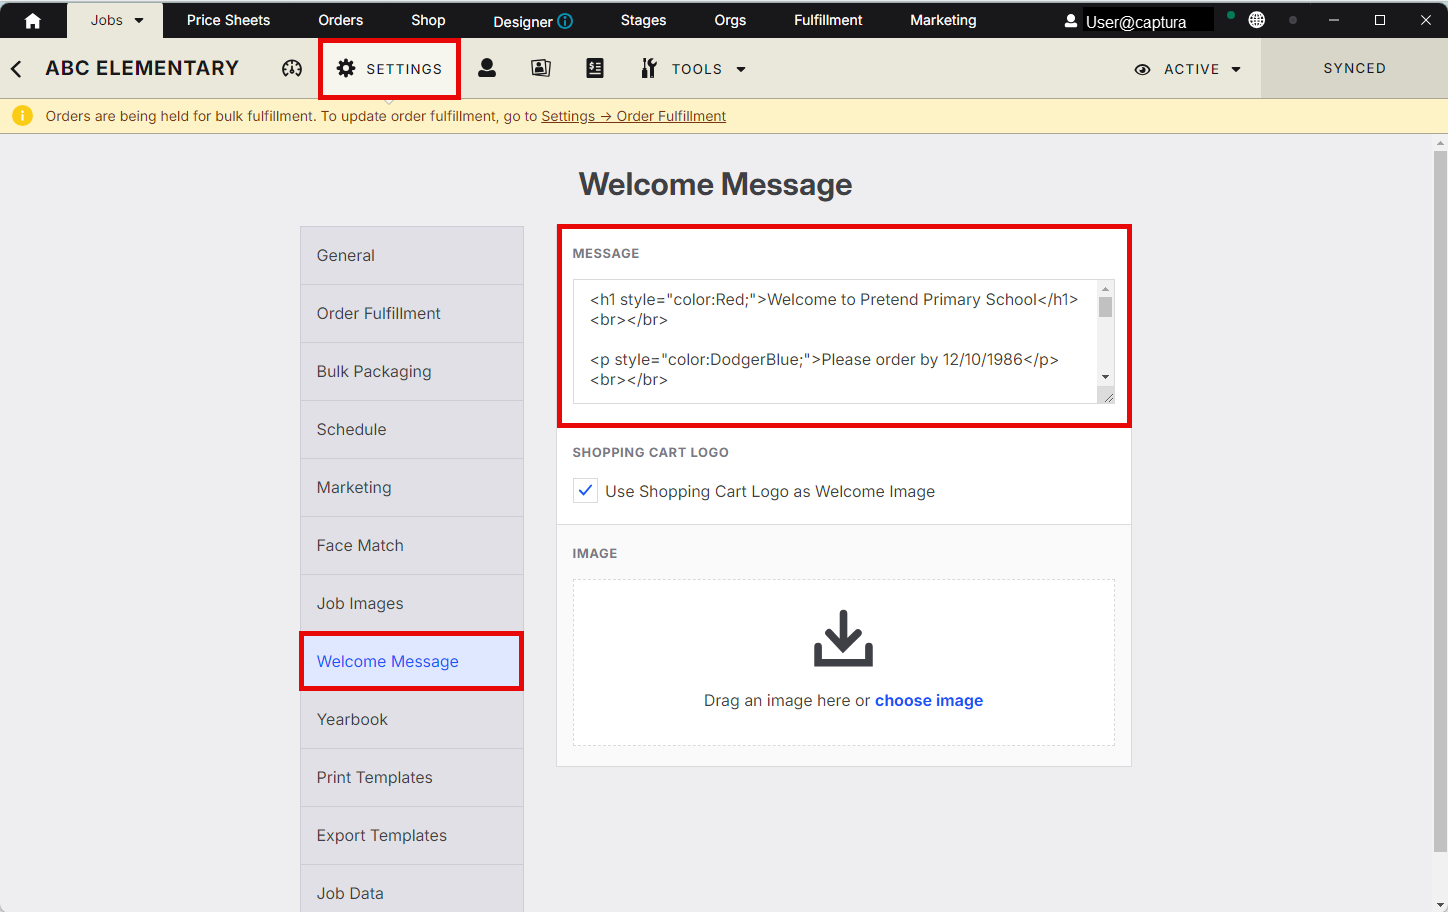
Navigate to Job Settings.
Locate the Welcome Message HTML section.
Enter or paste your HTML code into the editor.
Save your changes.
Preview the message before making the job available to customers.
💡 PRO TIP: Preview your Welcome Message after making changes to confirm the formatting appears correctly on both desktop and mobile devices.
Step-by-Step Instructions
Add a Line Break
Use the following code to create spacing between lines:
<br></br>
Add a Colored Heading
Example of a red heading:
<h1 style="color:Red;">Welcome to Pretend Primary School</h1>
Result:
Welcome to Pretend Primary School
Add a Colored Paragraph
Example of blue text:
<p style="color:DodgerBlue;">Please order by 12/10/1986</p>
Result:
Please order by 12/10/1986
Add an Email Support Link
Create a clickable email button:
<a href="mailto:support@blueprint.com" style="color:red;">
Send email
</a>
Result:
Send email
Add a Website Hyperlink
Create a clickable website link:
<a href="https://onboarding.imagequix.com/en/articles/8763505-job-settings-welcome-message" style="color:red;">
Click here
</a>
Result:
Click here
Create a Full Customer Support Message
Example:
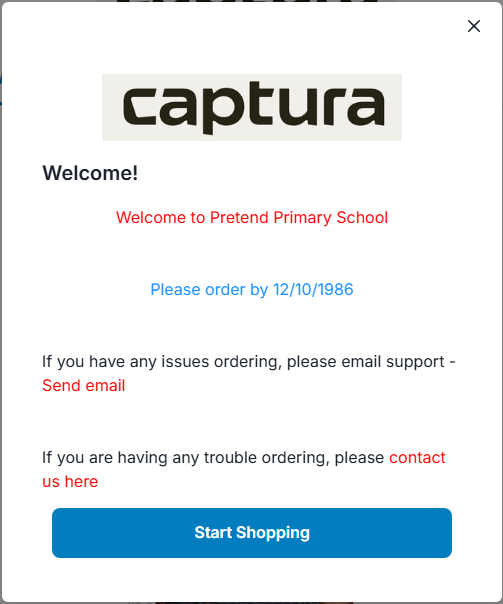
<h1 style="color:Red;">Welcome to Pretend Primary School</h1>
<br></br>

<p style="color:DodgerBlue;">Please order by 12/10/1986</p>
<br></br>

<p>
If you have any issues ordering, please email support -
<a href="mailto:support@blueprint.com" style="color:red;">
Send email
</a>
</p>

<br></br>

<p>
If you are having any trouble ordering, please
<a href="https://onboarding.imagequix.com/" style="color:red;">
contact us here
</a>
</p>
Advanced Options / Additional Rules
HTML is case-sensitive in some environments, so consistent formatting is recommended.
You can combine multiple formatting styles within the same Welcome Message.
Hyperlinks must include:
mailto:for email linkshttps://for website links
Inline styling using
style="color:..."allows you to customize text colors.Excessive HTML formatting may impact readability, so keep messaging clean and simple.
Common Questions
Q: Why is my formatting not displaying correctly?
A:
Check that all HTML tags are properly closed. Missing tags such as </p> or </a> are the most common cause of formatting issues.
Q: Can I add multiple colors to the same message?
A:
Yes. You can apply different colors to headings, paragraphs, and hyperlinks using inline style formatting.
Q: Why is my hyperlink not clickable?
A:
Make sure your hyperlink includes the full URL beginning with https:// or uses mailto: for email links.
Q: Can I preview my Welcome Message before customers see it?
A:
Yes. After saving your changes, preview the Welcome Message to confirm formatting and links display correctly.