Designer - Print products
Brief Overview
The Print Designer Tool allows you to create fully customized print products for your catalog. With powerful layer controls, image editing tools, text mapping, and barcode/QR generation, you can design templates that dynamically merge subject data, job images, and external assets at ordering time.
Overview & Objective
In this article, you’ll learn how to create new print products, design templates, and configure product attributes that flow into your price sheets. You’ll also learn how to use the Designer’s tools—such as layers, text mapping, barcodes, and canvas editing—to build professional, reusable designs.
This feature is essential for studios that produce ID cards, prints, composites, digital designs and other templated products requiring subject data or dynamic images.
Examples of Designs:
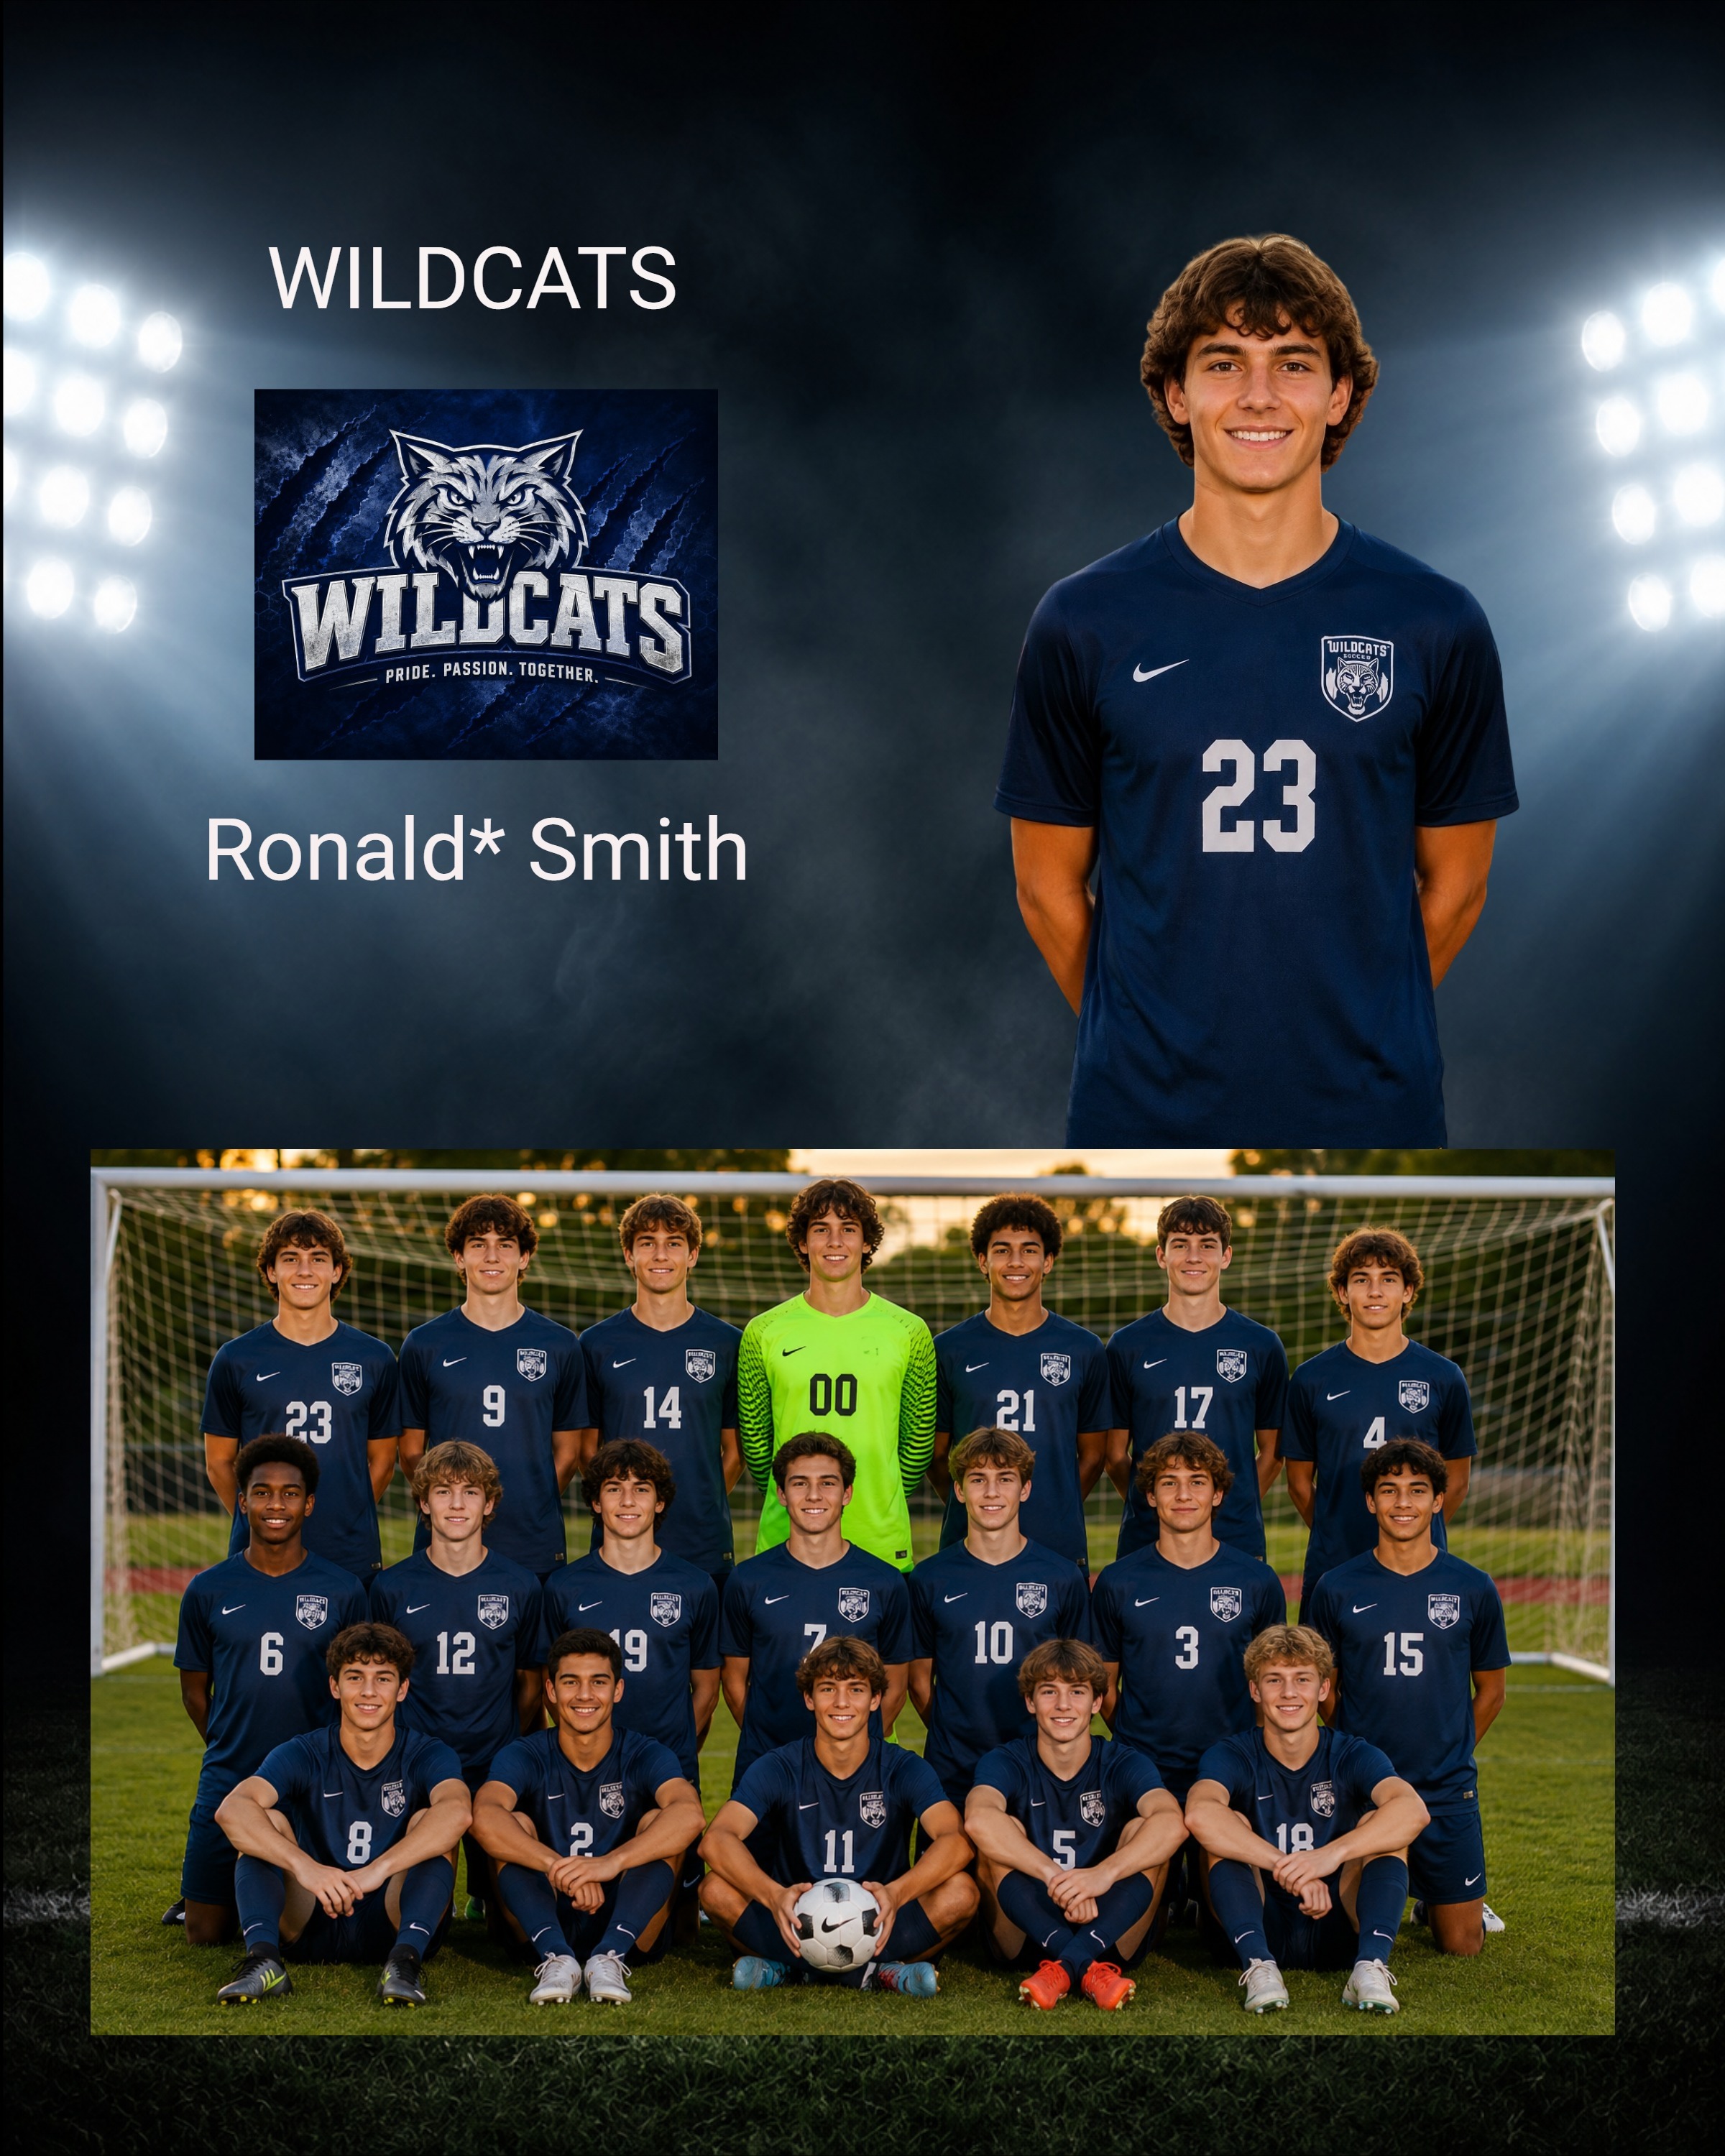
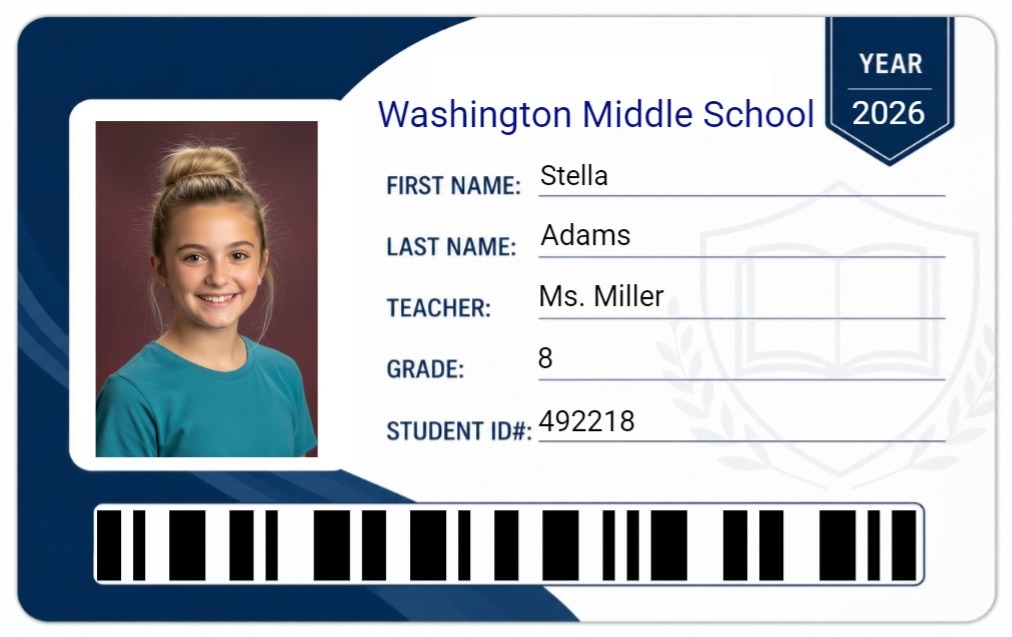
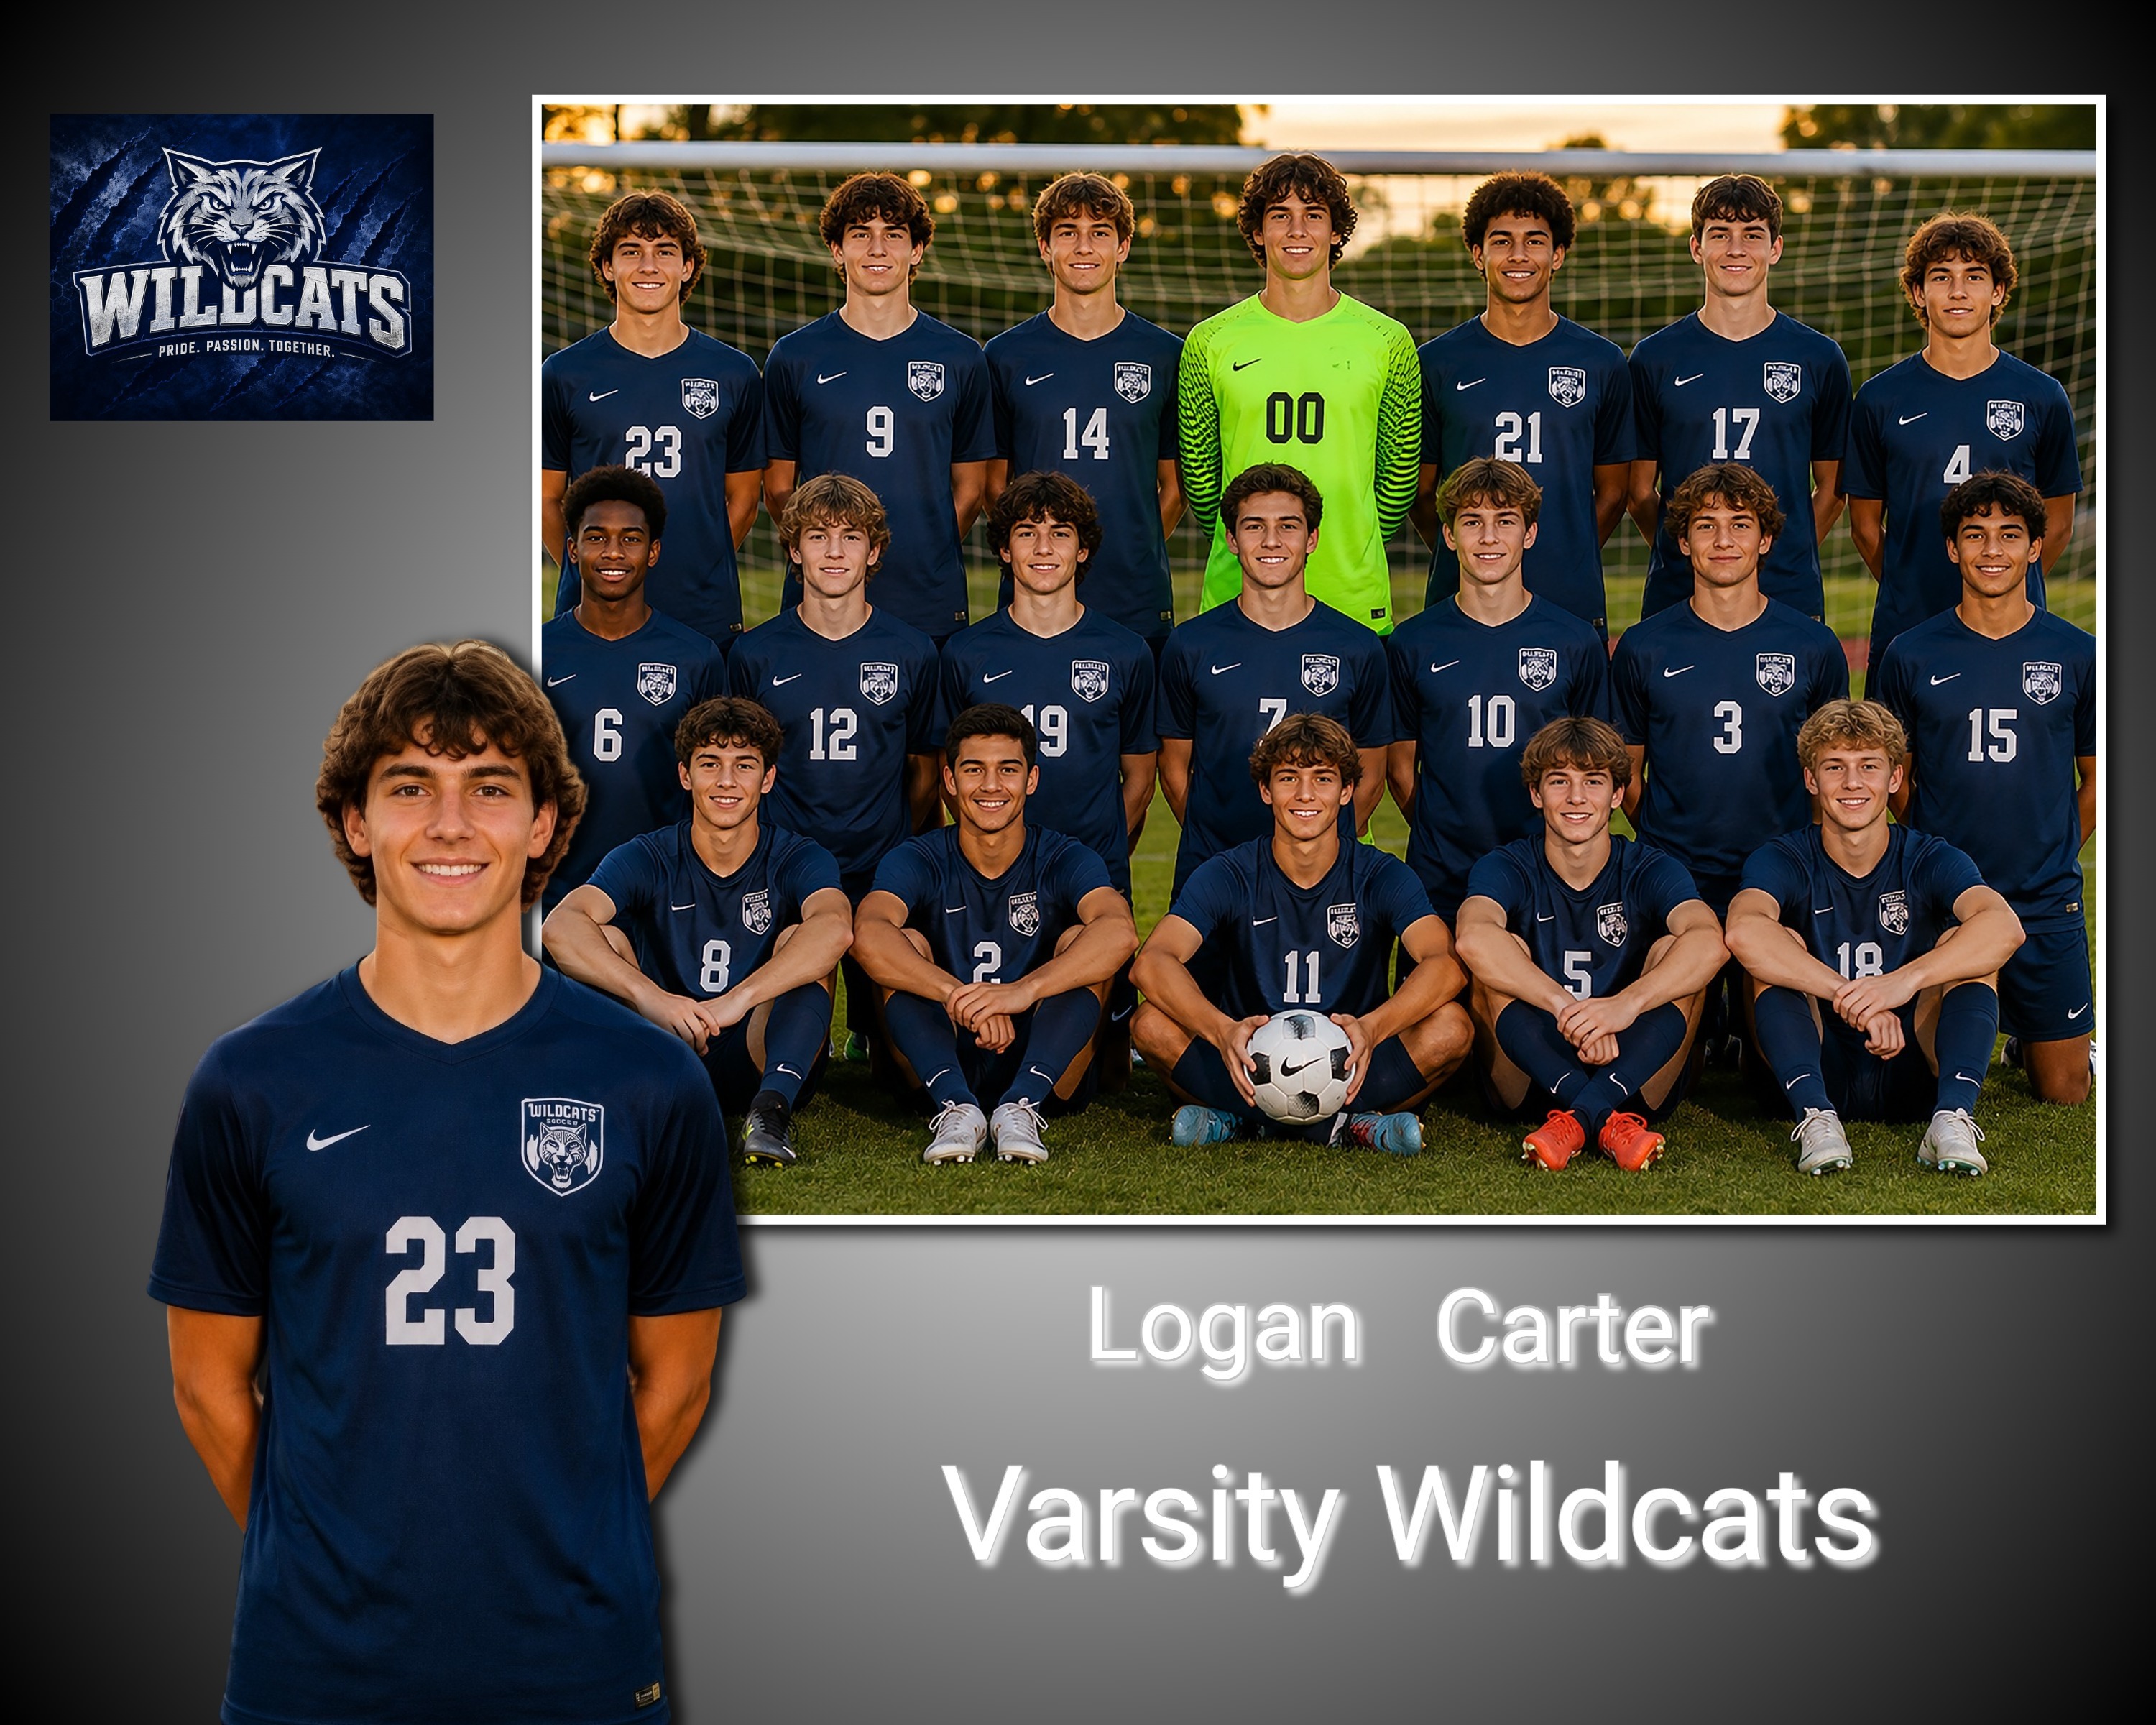
Getting started
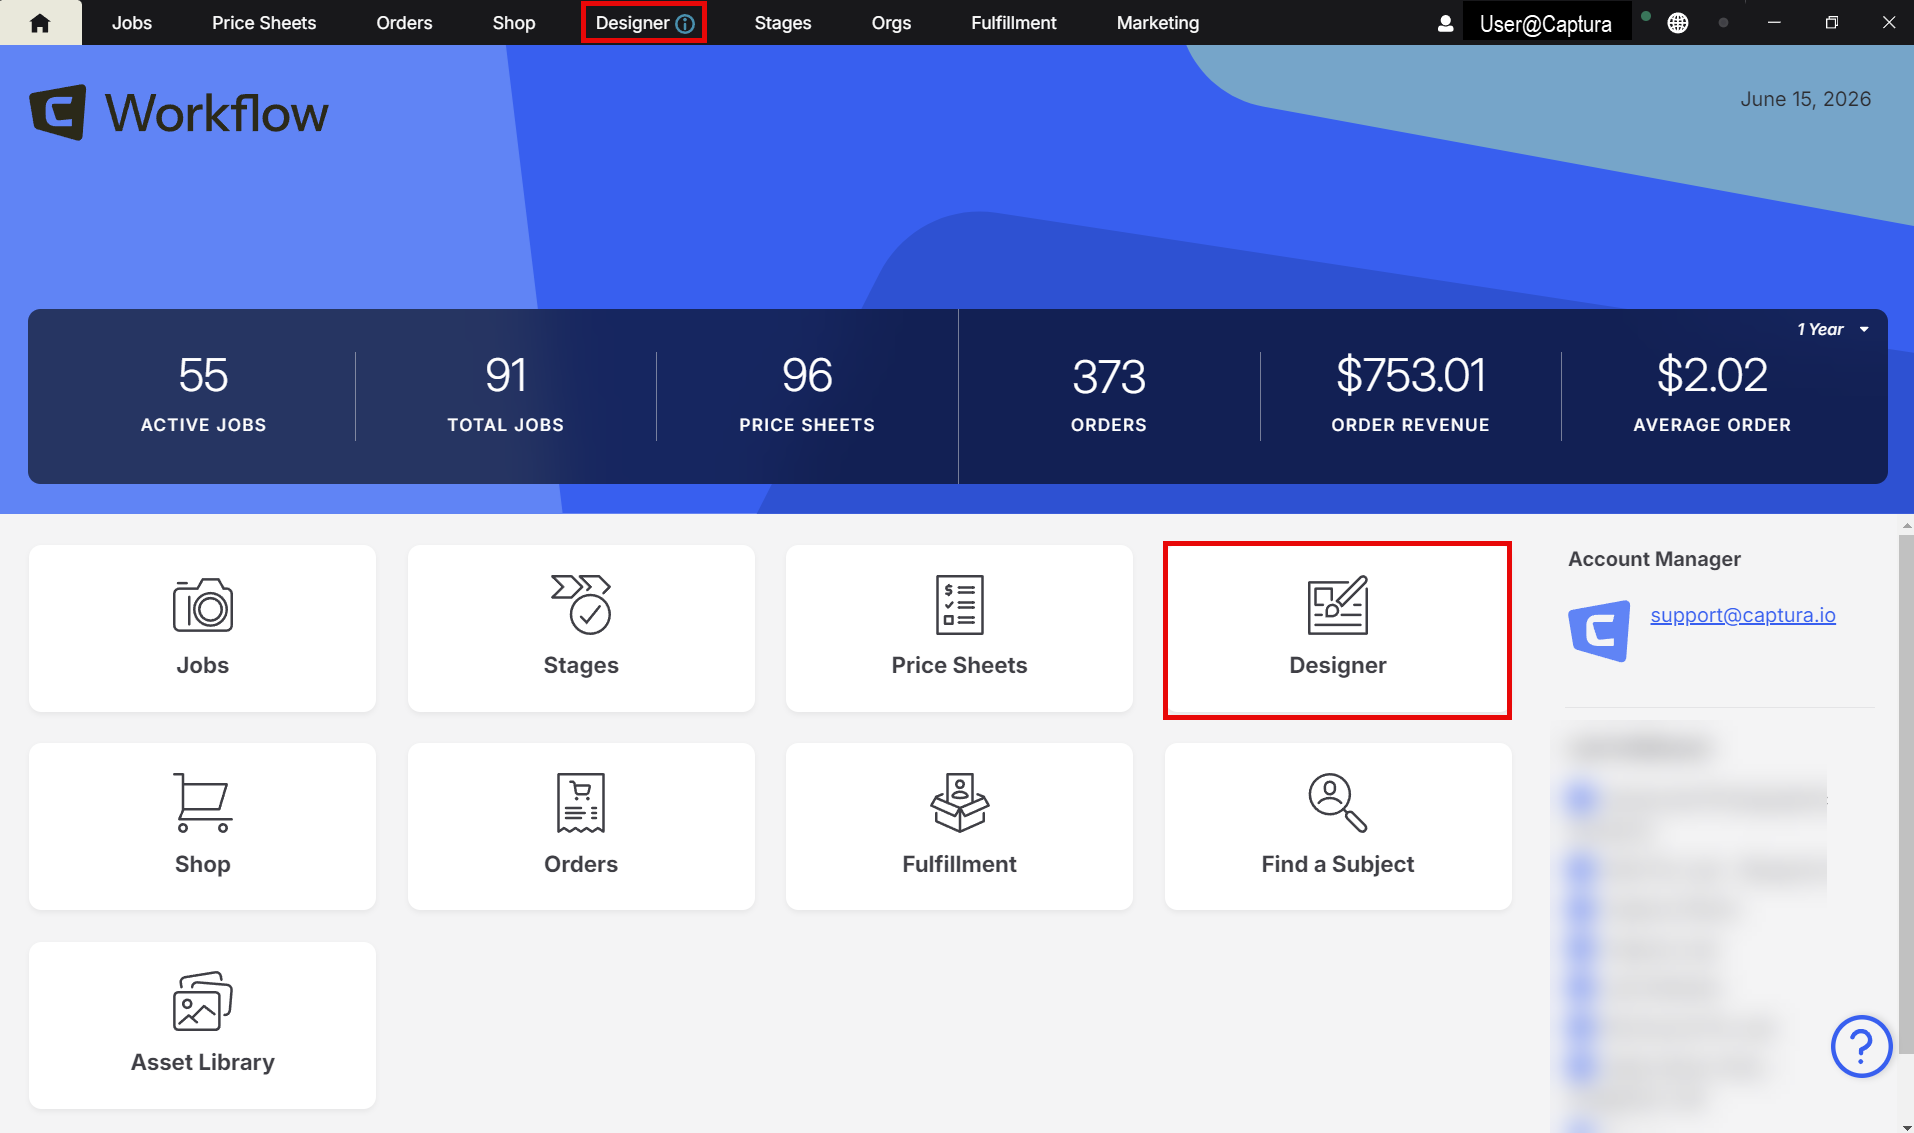
Navigate from your Home page → Designer
Setup / Configuration
Designer Layout
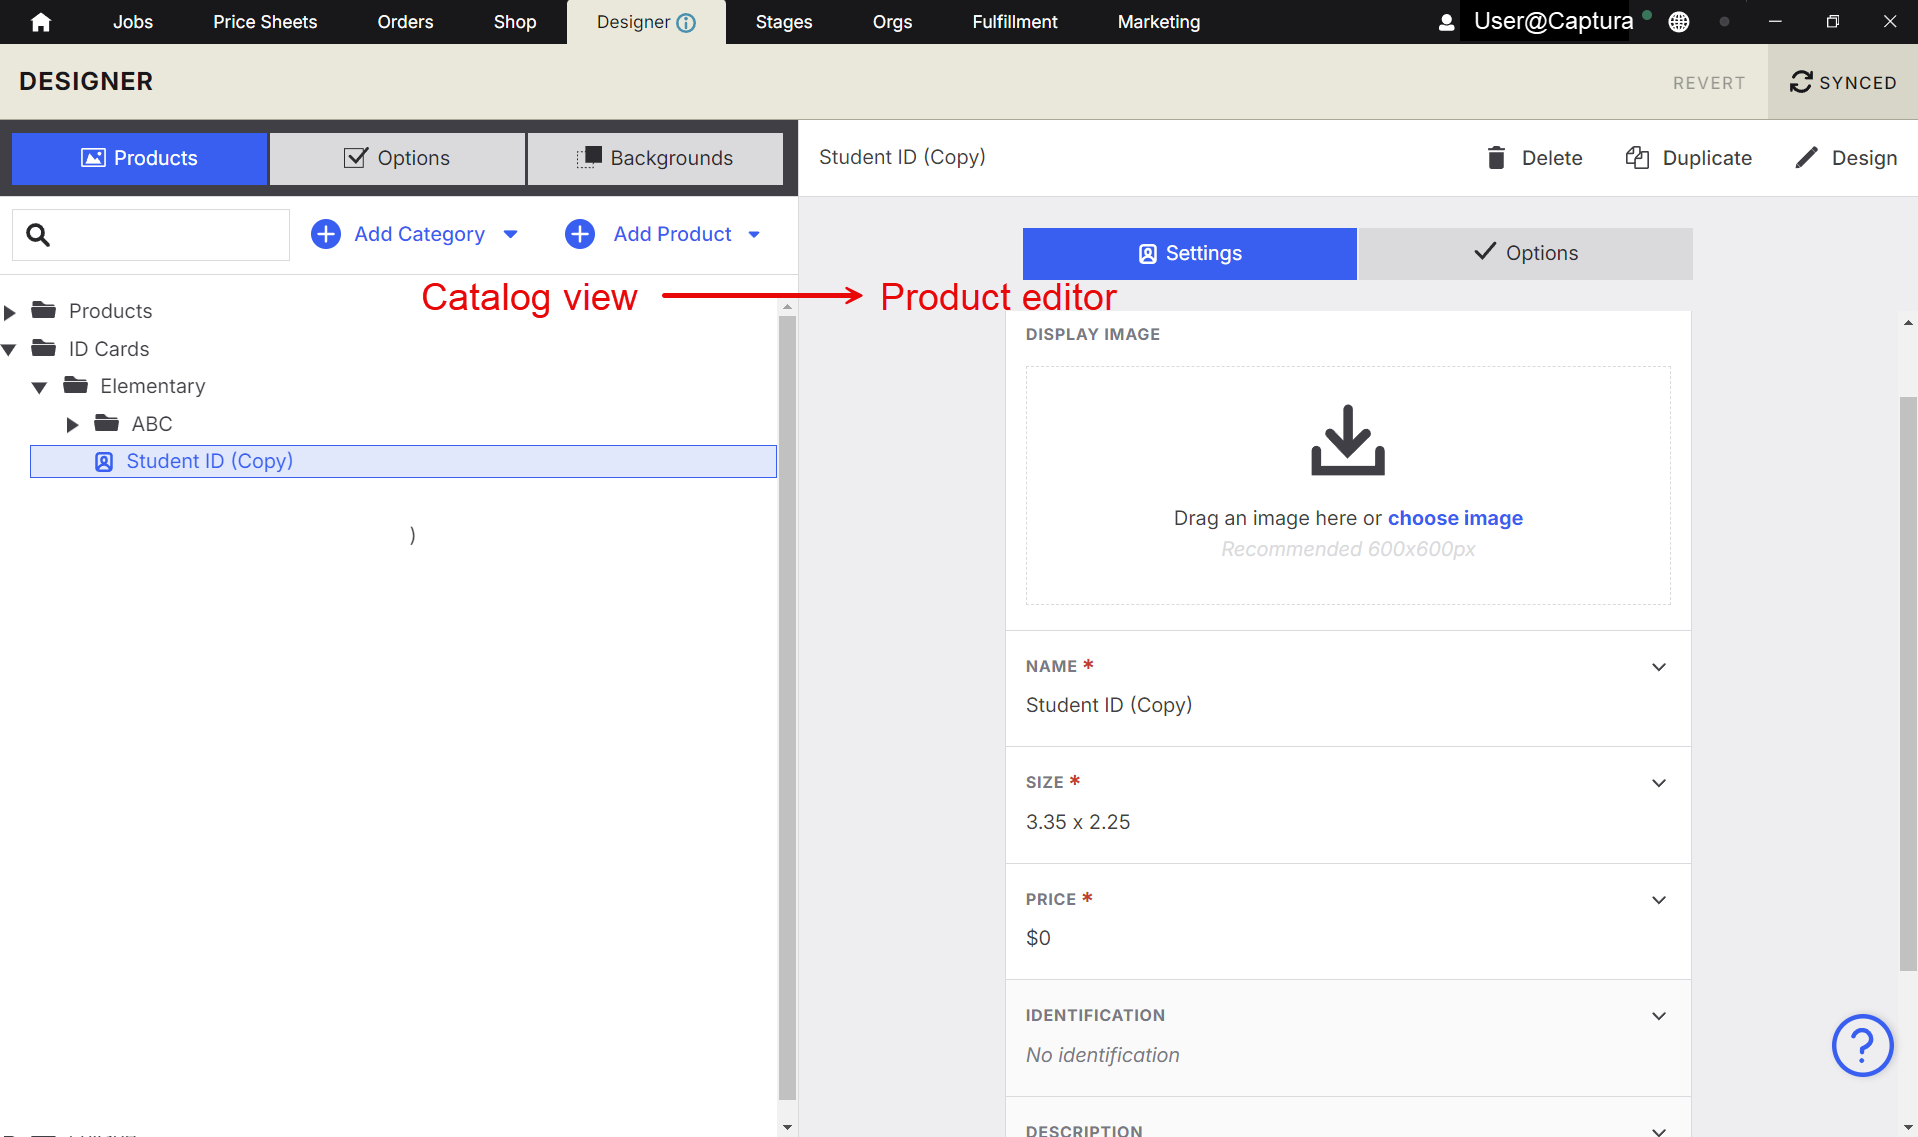
The Designer tab is split into two main panels:
Catalog View
Navigate your catalog, create new products, and select existing ones.Product Editor
Edit the attributes and design of new or existing catalog items.
Default Attributes
When you create a product in Designer, attributes such as Name, Display Image, and Price become the default values when the product is added to a price sheet. These can be overridden later on the price sheet.
Why Create a Print Product
A print product is ideal when:
It requires at least one image before fulfillment
You want to build a custom template using subject data + external assets
You want to attach product or image options to the item
💡 PRO TIP:
Sync frequently. If you make a change you don’t like, revert before syncing to return to your last saved version.
Step-by-Step Instructions
1. Create a New Print Product
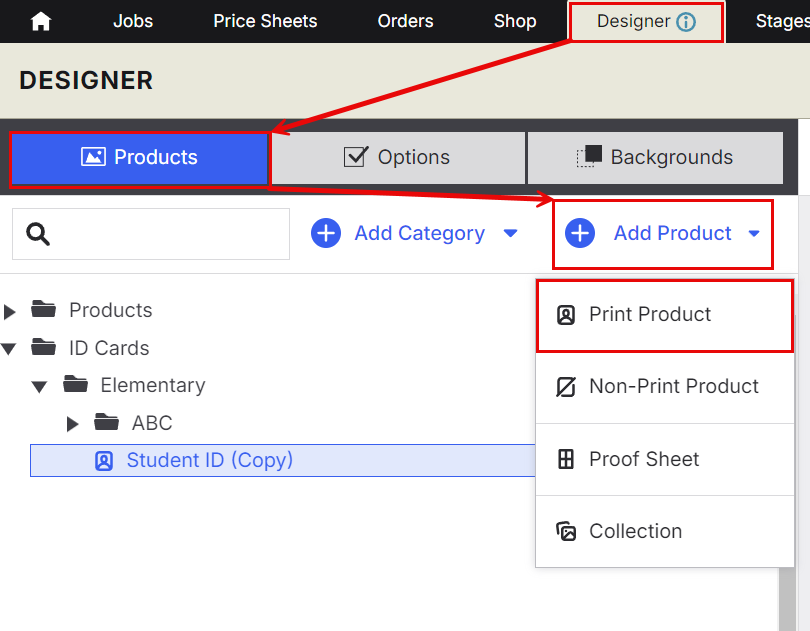
In Designer, click Add Product → Print Product.
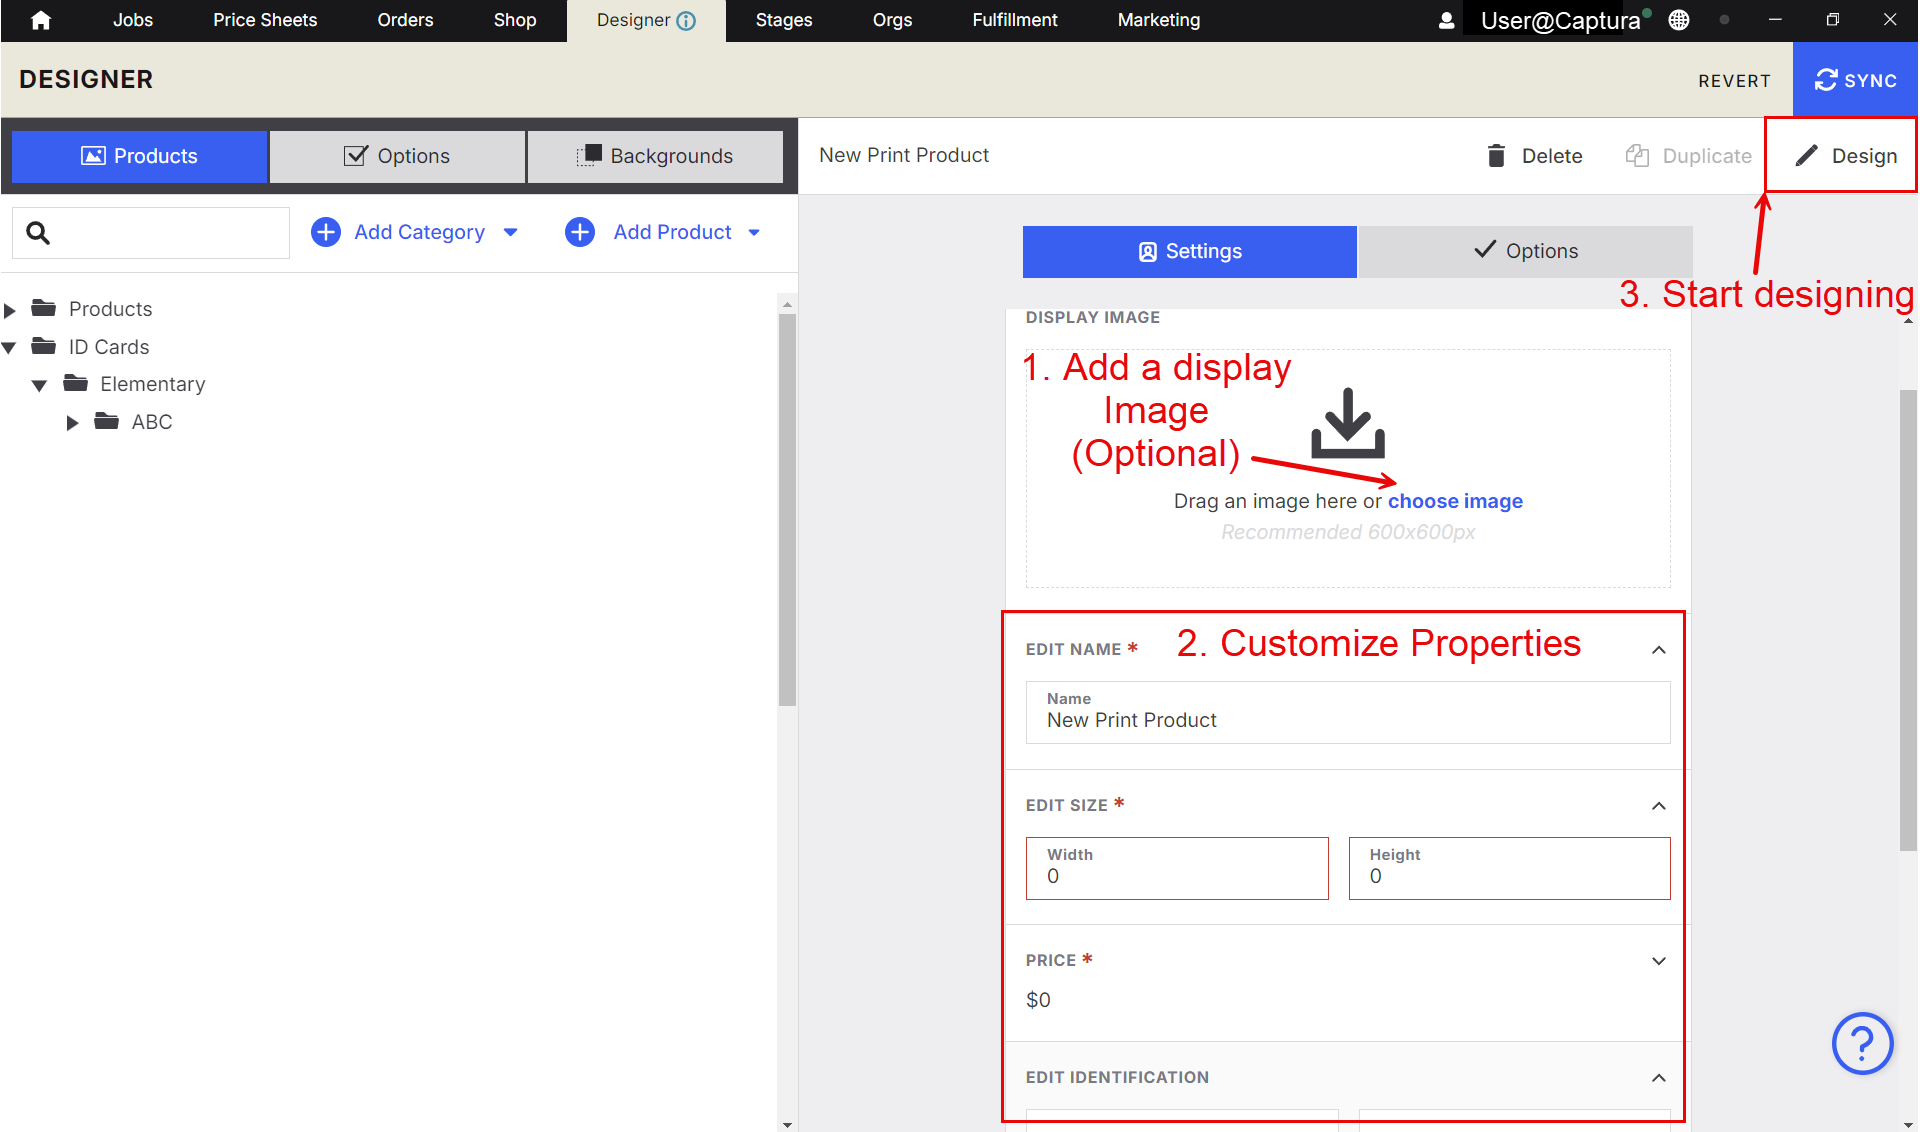
Configure your product attributes:
Display Image (you can add this later using a test print of your design)
Name
Size (required before syncing)
Price
SKU (for PLIC Lab / Riplynx fulfillment)
Billing Code
Description
Print Rotation
Useful for designing in landscape but printing in portrait.
Click Design (top-right) to open the Print Designer.
2. Getting Started in the Designer
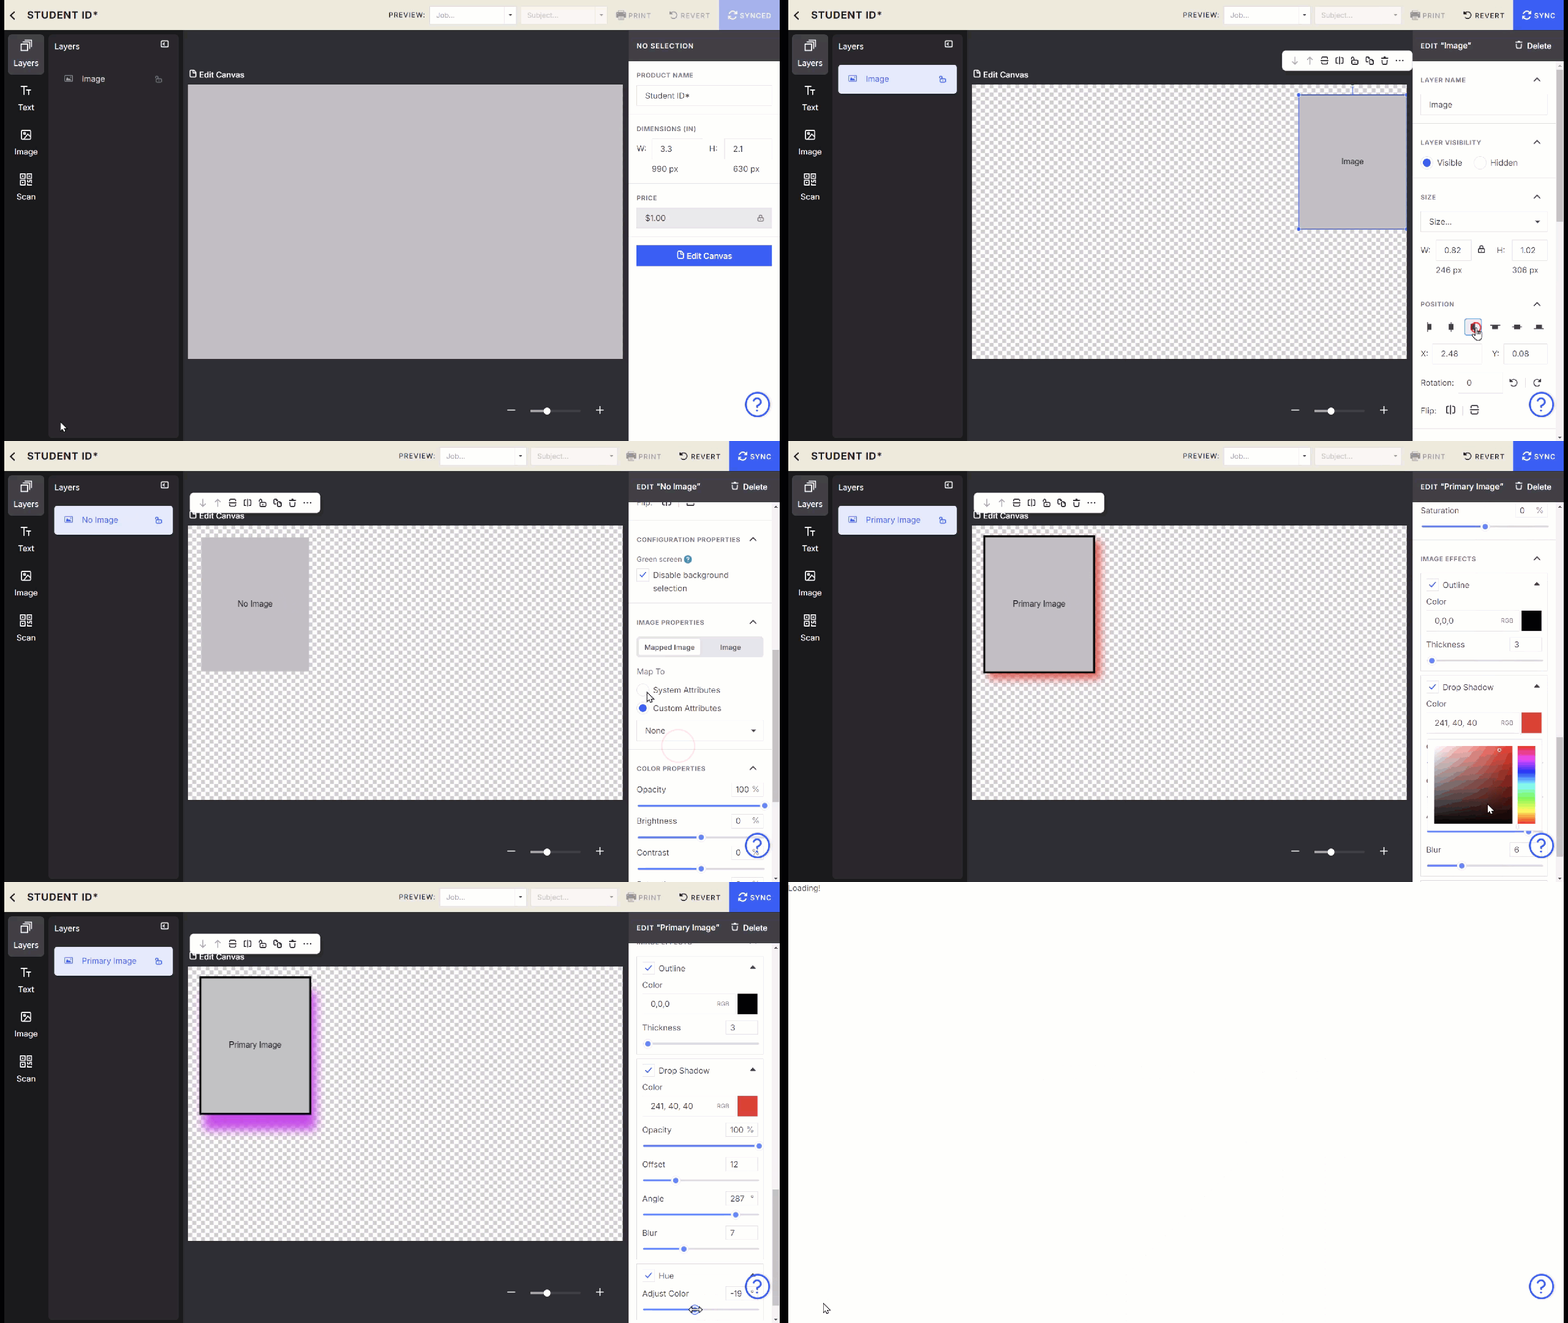
When the design loads, an image node is automatically added.
Resize the image node so you can see the canvas.
Select the image node from the canvas or the Layers panel.
In the right-hand panel, adjust:
Node size (manually or by dragging)
Layer visibility
Positioning (alignment icons)
Rotation & flip
Background selection (disable if using PNGs and you don’t want customers choosing backgrounds)
Image mapping (e.g., map to Primary Image)
You can also:
Upload a new image
Add color properties
Apply image effects
3. Editing the Canvas
Click Edit Canvas to adjust:
Canvas size
(Note: This changes the design area, not the product’s actual size.)Canvas background type
Solid color
Gradient
Image
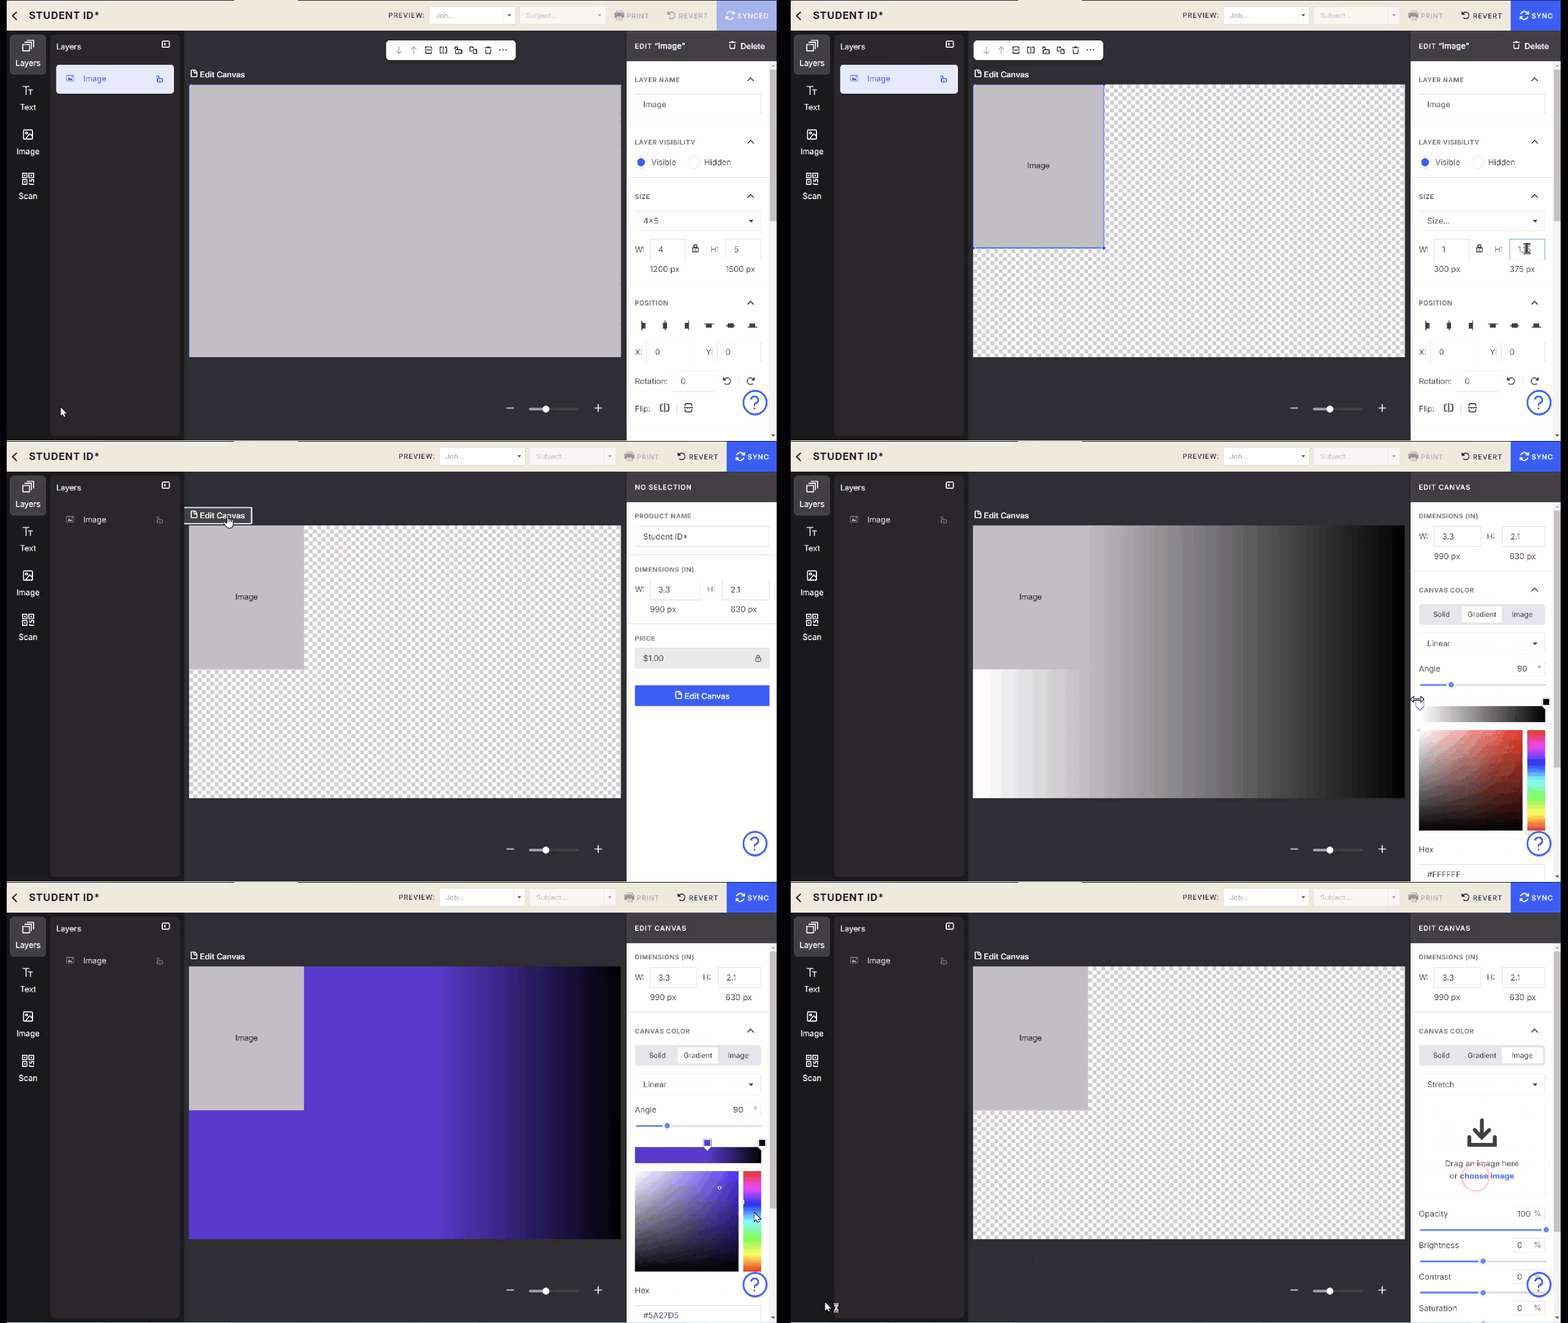
Tip: Sync after each major change. Revert before syncing to undo.
4. Using the Quick Select Toolbar
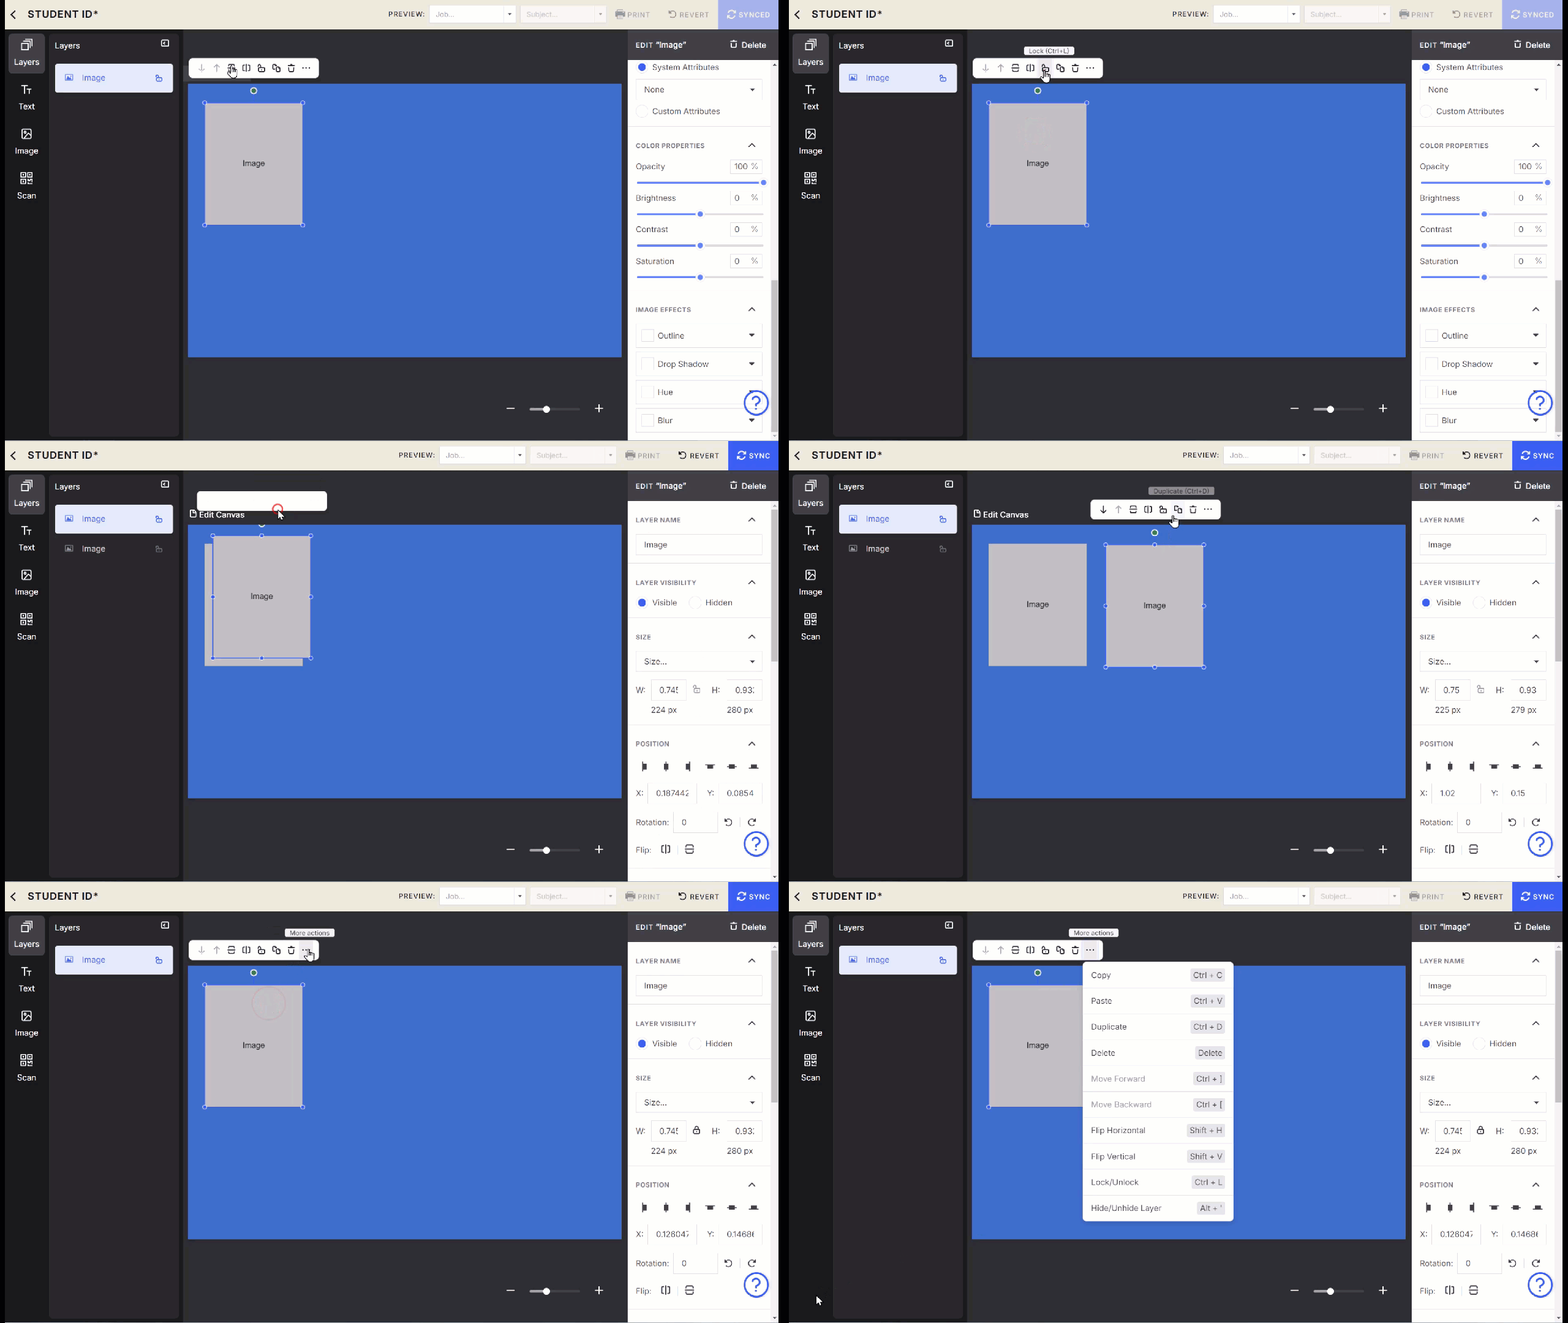
The toolbar above the canvas provides shortcuts for:
Alignment
Layer ordering
Rotation
Quick styling
Duplicating
5. Adding Text
Click Text in the left panel and choose:
Static Text
Dynamic Text (mapped to subject data)
Paragraph Text
Common uses:
School name → mapped to Organization
Student first/last name → mapped to subject data fields
You can customize:
Fonts
Colors
Stroke
Drop shadows
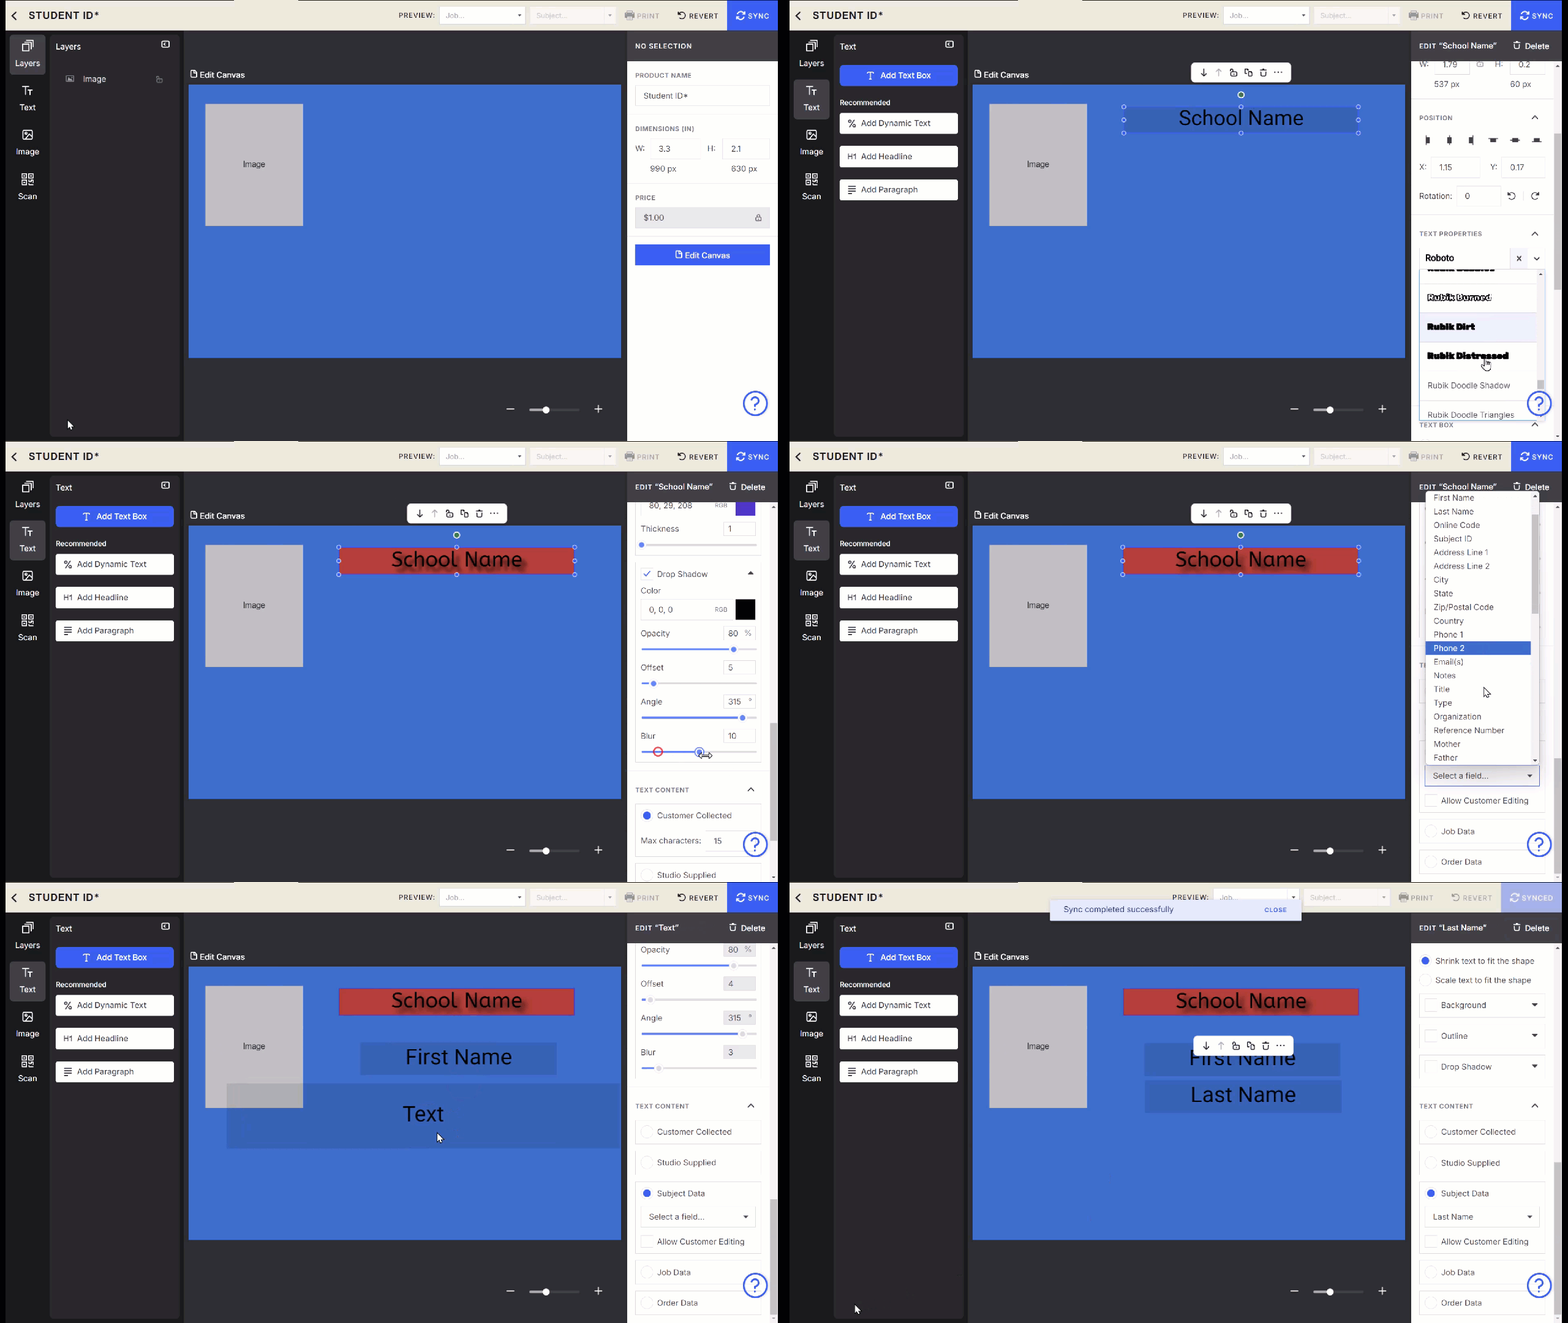
Quick Tip: Duplicate text boxes to maintain consistent sizing and styling.
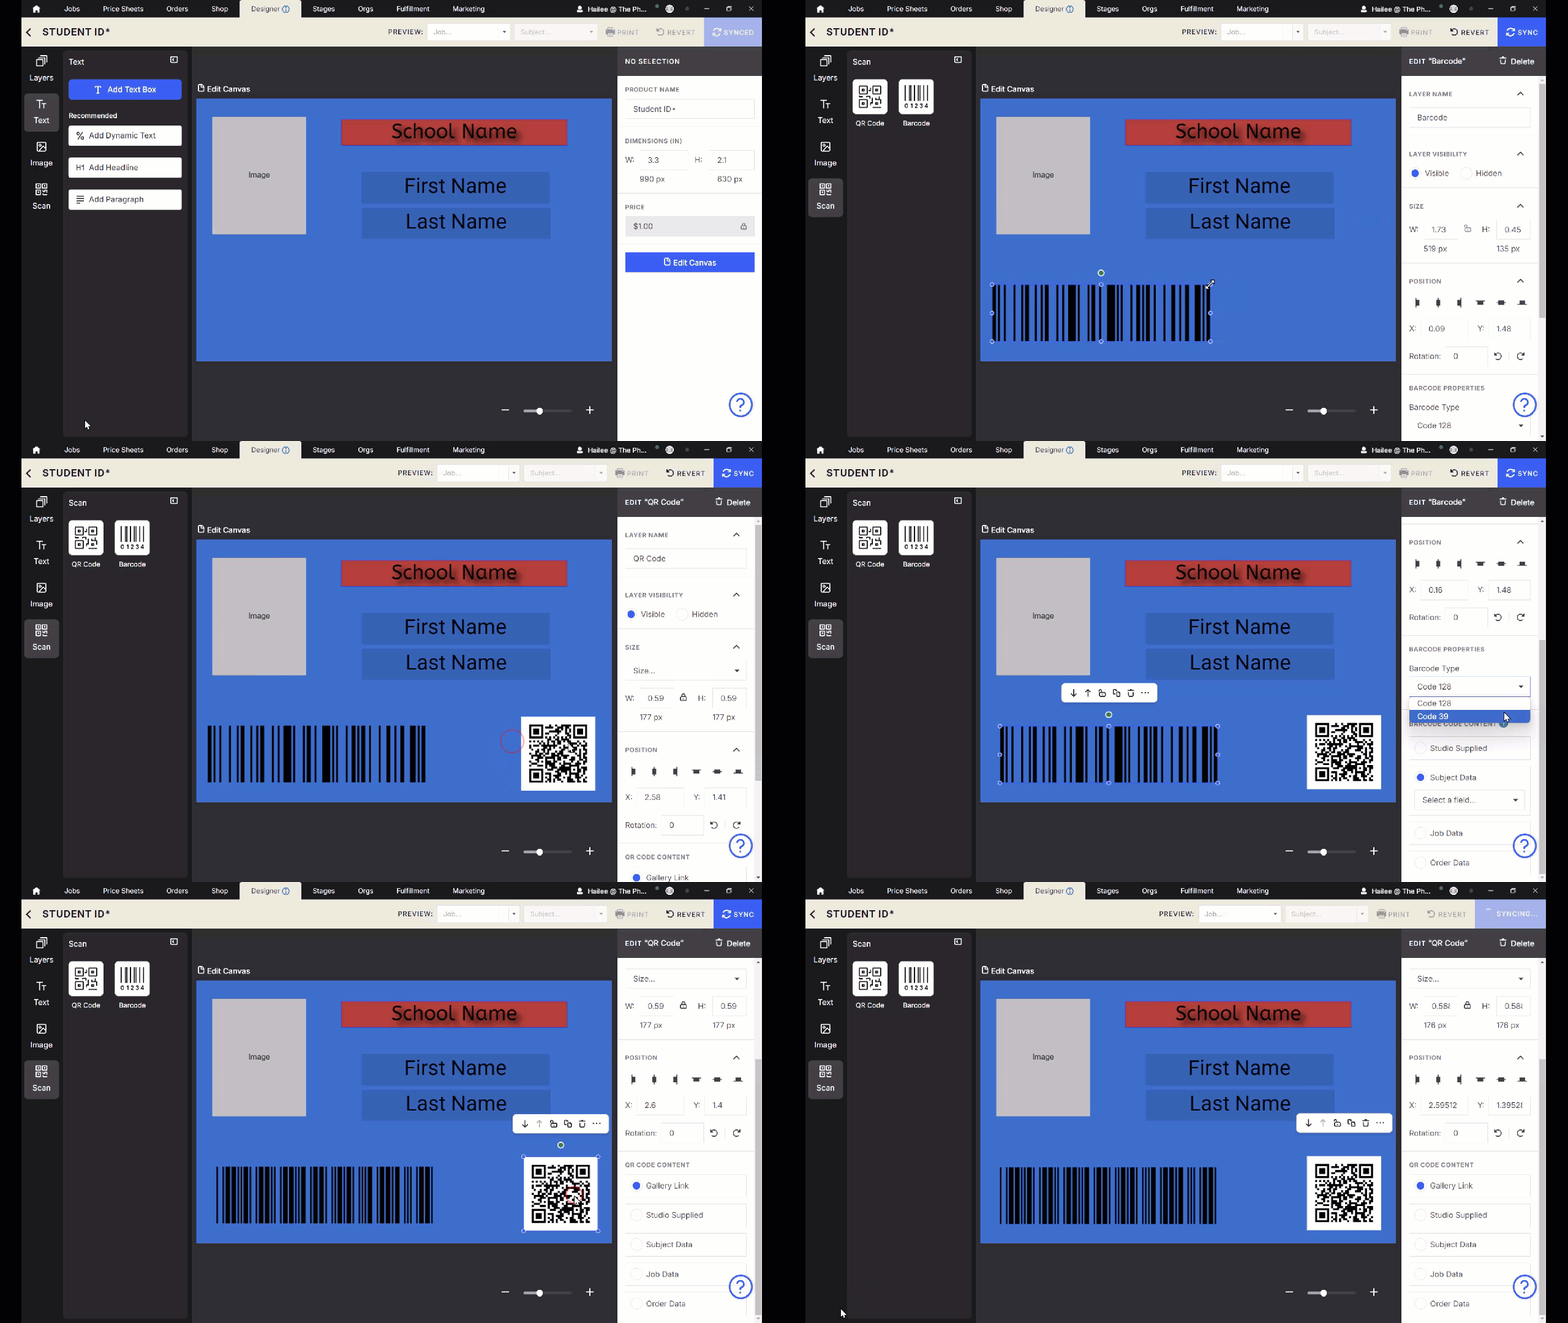
6. Adding a Barcode or QR Code
Click the Scan icon in the left panel.
Choose Barcode or QR Code.
In the right panel:
Select barcode style (Code 128 or Code 39)
Map the code to the data field it should pull from
7. Adding More Images & Managing Layers
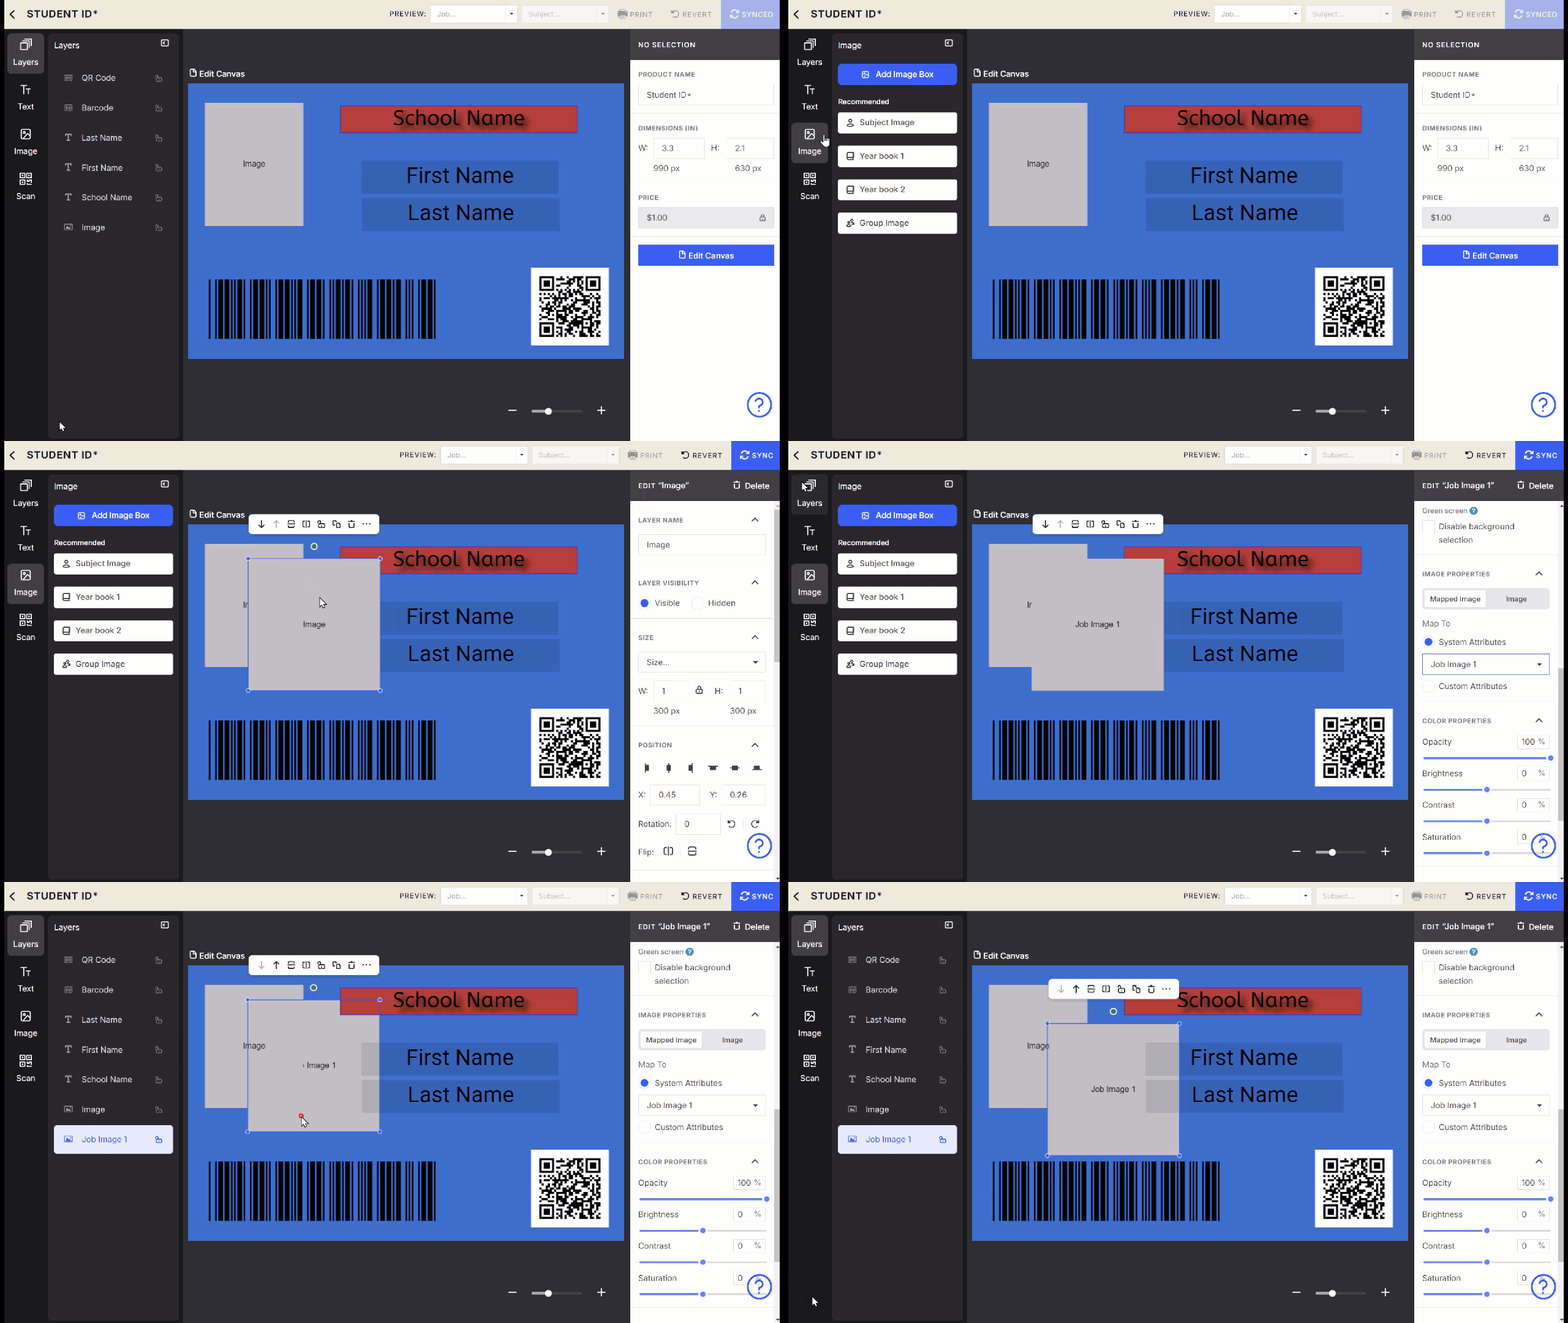
Add additional images as needed.
Use the Layers panel to move items forward or backward.
This is especially useful when placing decorative elements behind the main image or text.
8. Using Job Images
Job images allow you to dynamically pull in school or team logos directly into your design.
Learn More: Using Job Images in Your Designer Layouts
Preview and Finalize
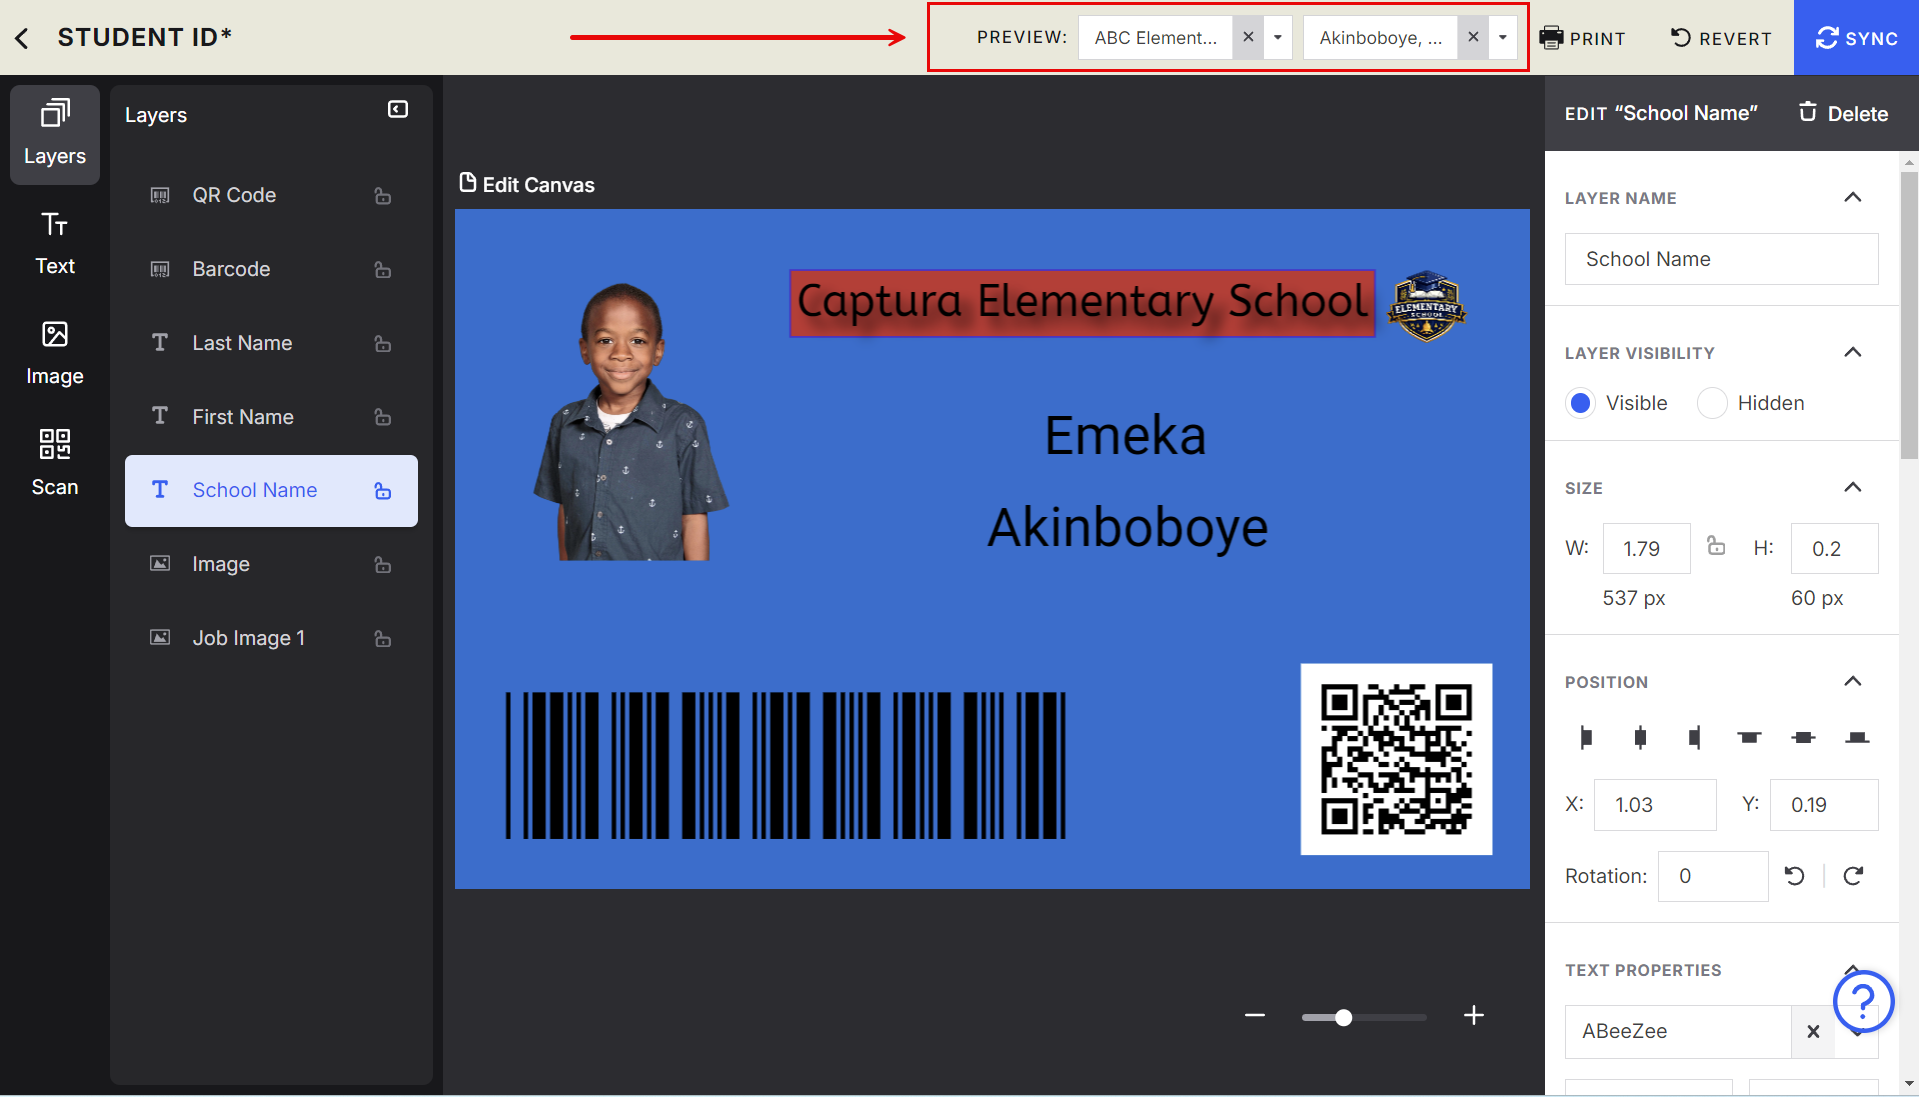
Click previews → Select a job and subject to check design before adding to your price sheet.
Advanced Options / Additional Rules
Image Mapping Rules
You can map images to specific system attributes (e.g., Primary Image, Image 2, Group,) or Custom Attributes.
Learn more: Creating Image AttributesConditional Layer Visibility
Hide or show layers based on data availability (e.g., only show Homeroom if the field exists) or Custom attributes. Learn more about Custom attributes here:Print Rotation Logic
Use rotation settings to design in one orientation but print in another.Canvas vs. Product Size
Canvas edits do not change the product’s actual dimensions—only the design area.
Common Questions
Q: Why can’t I sync my product?
A: Ensure the product has a Size set. Size is required before syncing.
Q: Why isn’t my mapped text or image showing in orders?
A: Check that the field is mapped to a valid subject data attribute and that the job contains data for that field.
Q: Can I reuse the same design across multiple jobs?
A: Yes. Use dynamic text and mapped images (like Organization, Year, Custom Data fields or Primary Image) so the design automatically pulls in job-specific data.
Q: Why is my PNG showing a background option to customers?
A: Disable Background Selection on the image node to prevent customers from choosing a background.