
Designer: Non-Print Product
Overview
Non‑Print Products are offerings that don’t require a printed design but can be sold alongside traditional photography items. These products are ideal for studios that offer physical add‑ons, digital services, or session‑based fees.
Before creating a Non‑Print Product, you must first build any Product Options you plan to attach (such as frame types, stands, or print material upgrades).
👉 Learn how to build Product Options: Designer: Product Options
Examples of Non‑Print Products
Frames
Session Fees
Digital Packages
Service Fees
Add‑On Products
Getting Started
Navigation Path
Home → Designer → Products → + Add Product → Non‑Print Product
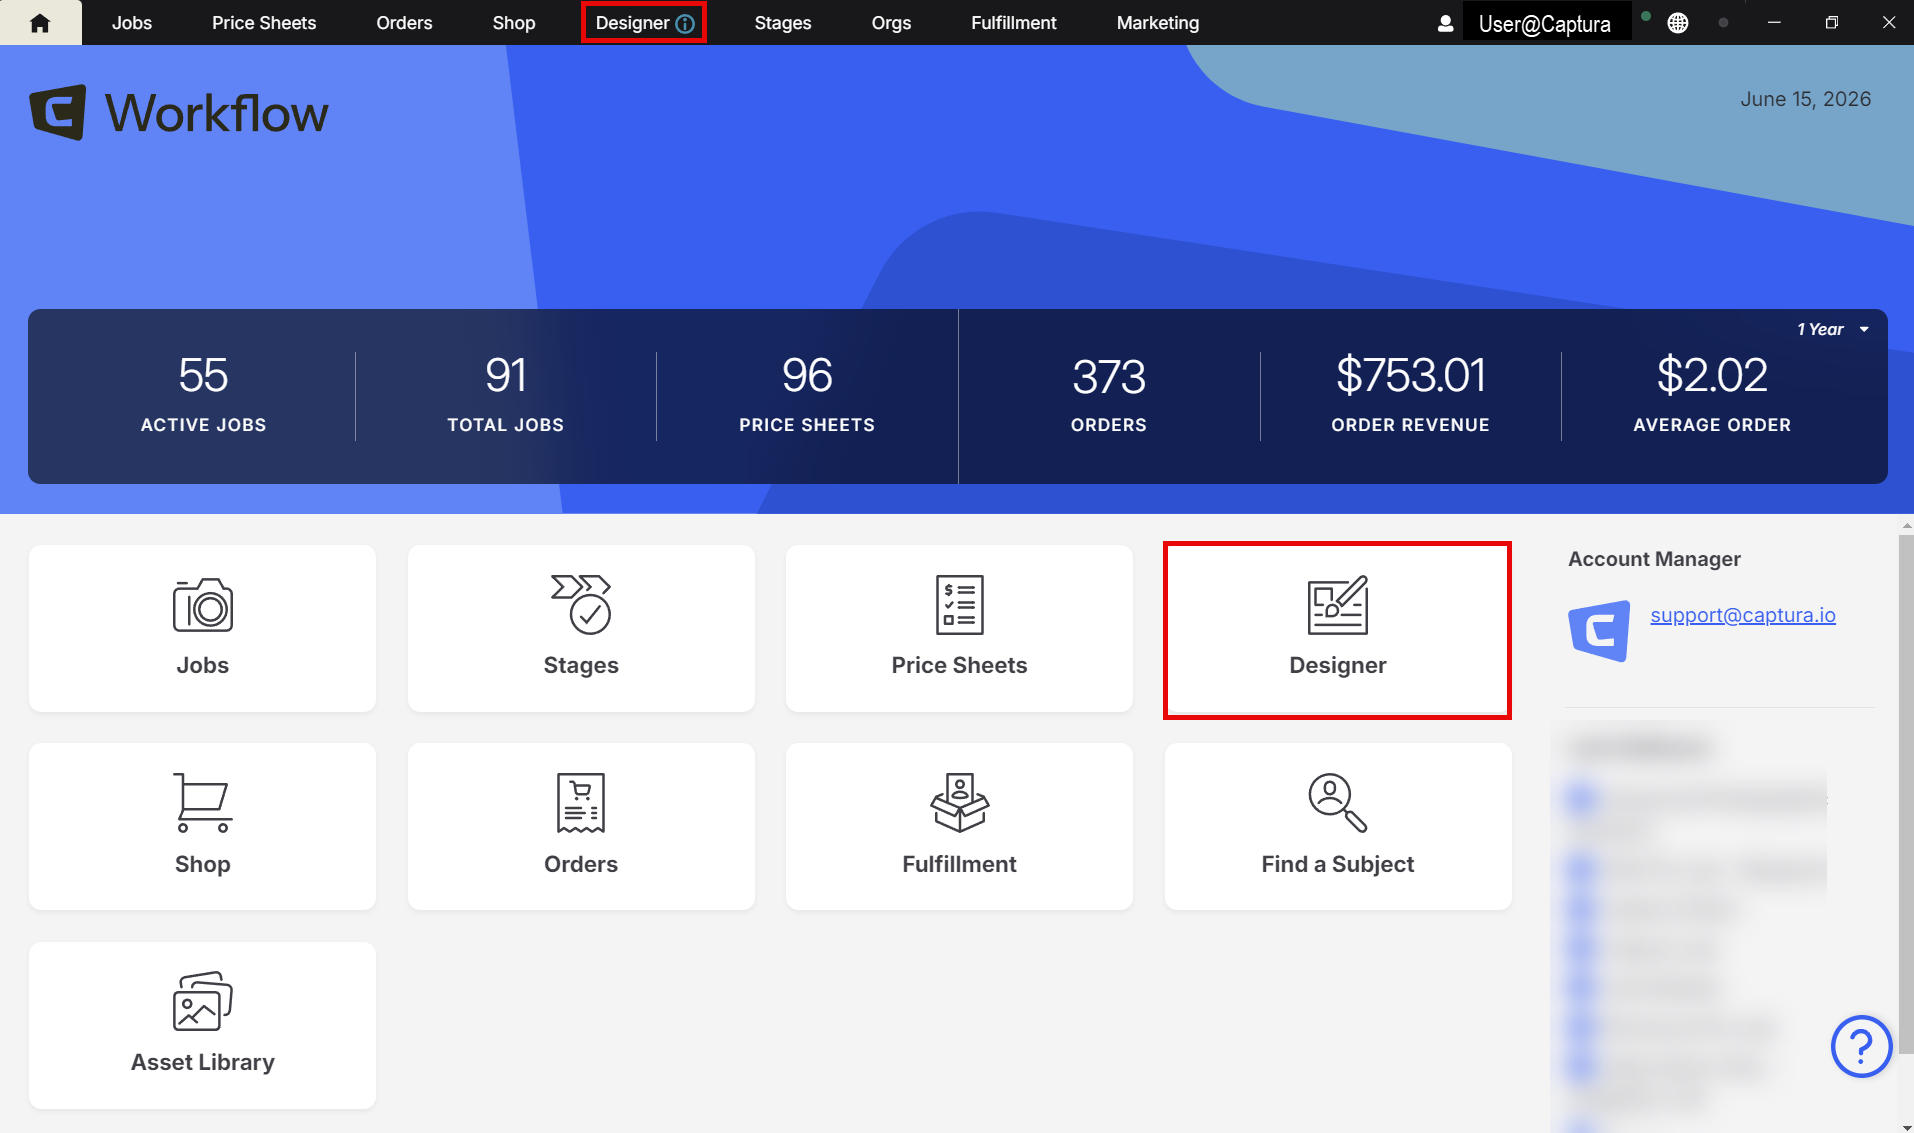
Step‑by‑Step Instructions
1. Create a New Non‑Print Product
From the Home page, click Designer.
Select Products.
Click + Add Product.
Choose Non‑Print Product.
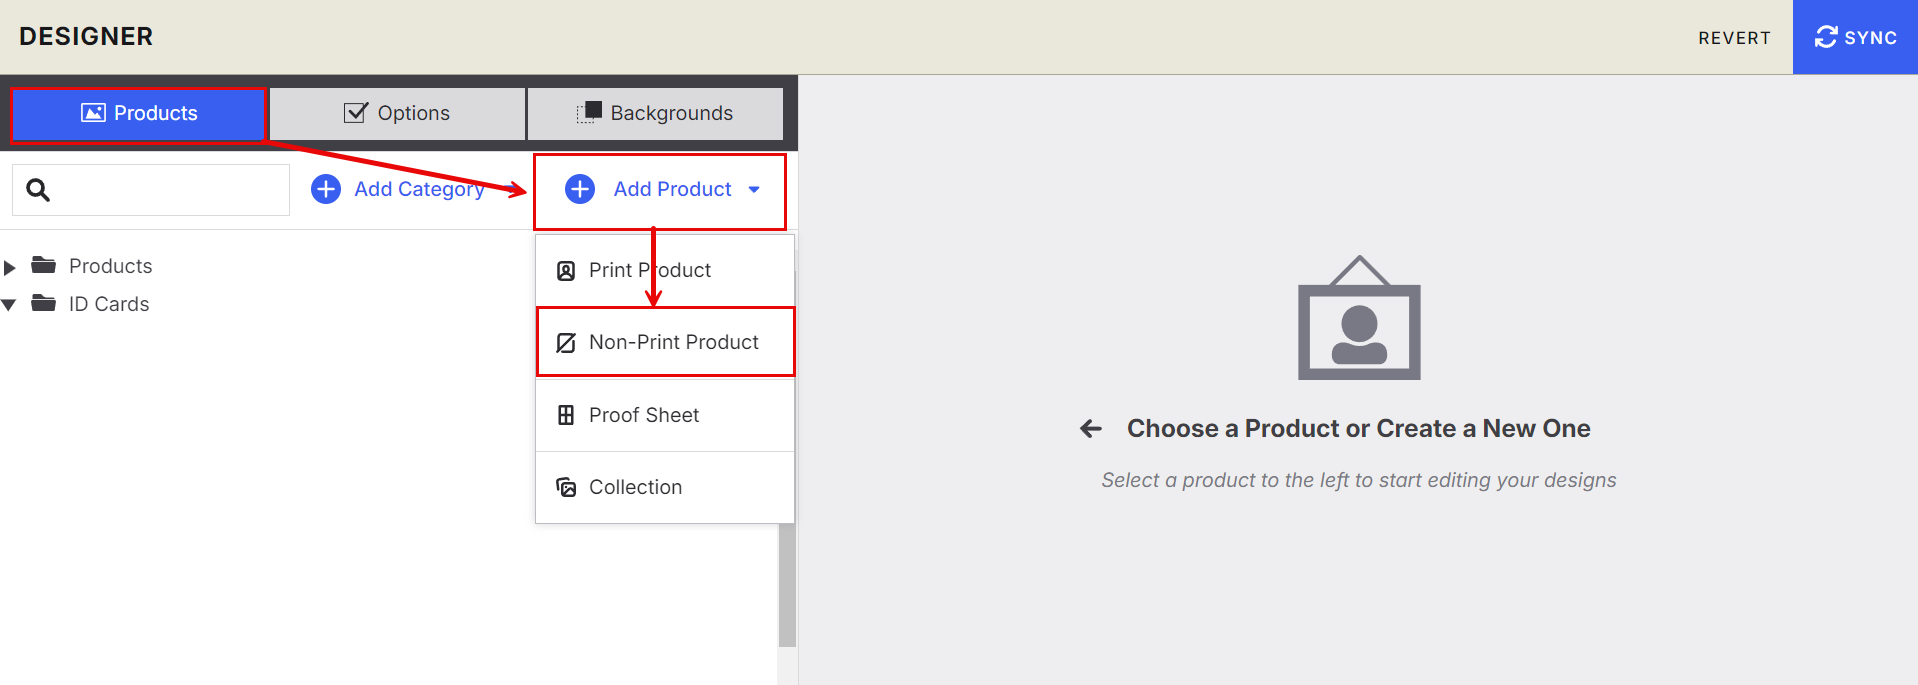
2. Configure Product Settings
In the Settings panel, add the following details:
Name*
Price*
SKU (optional)
Description (optional)
Fields marked with \* are required before syncing.
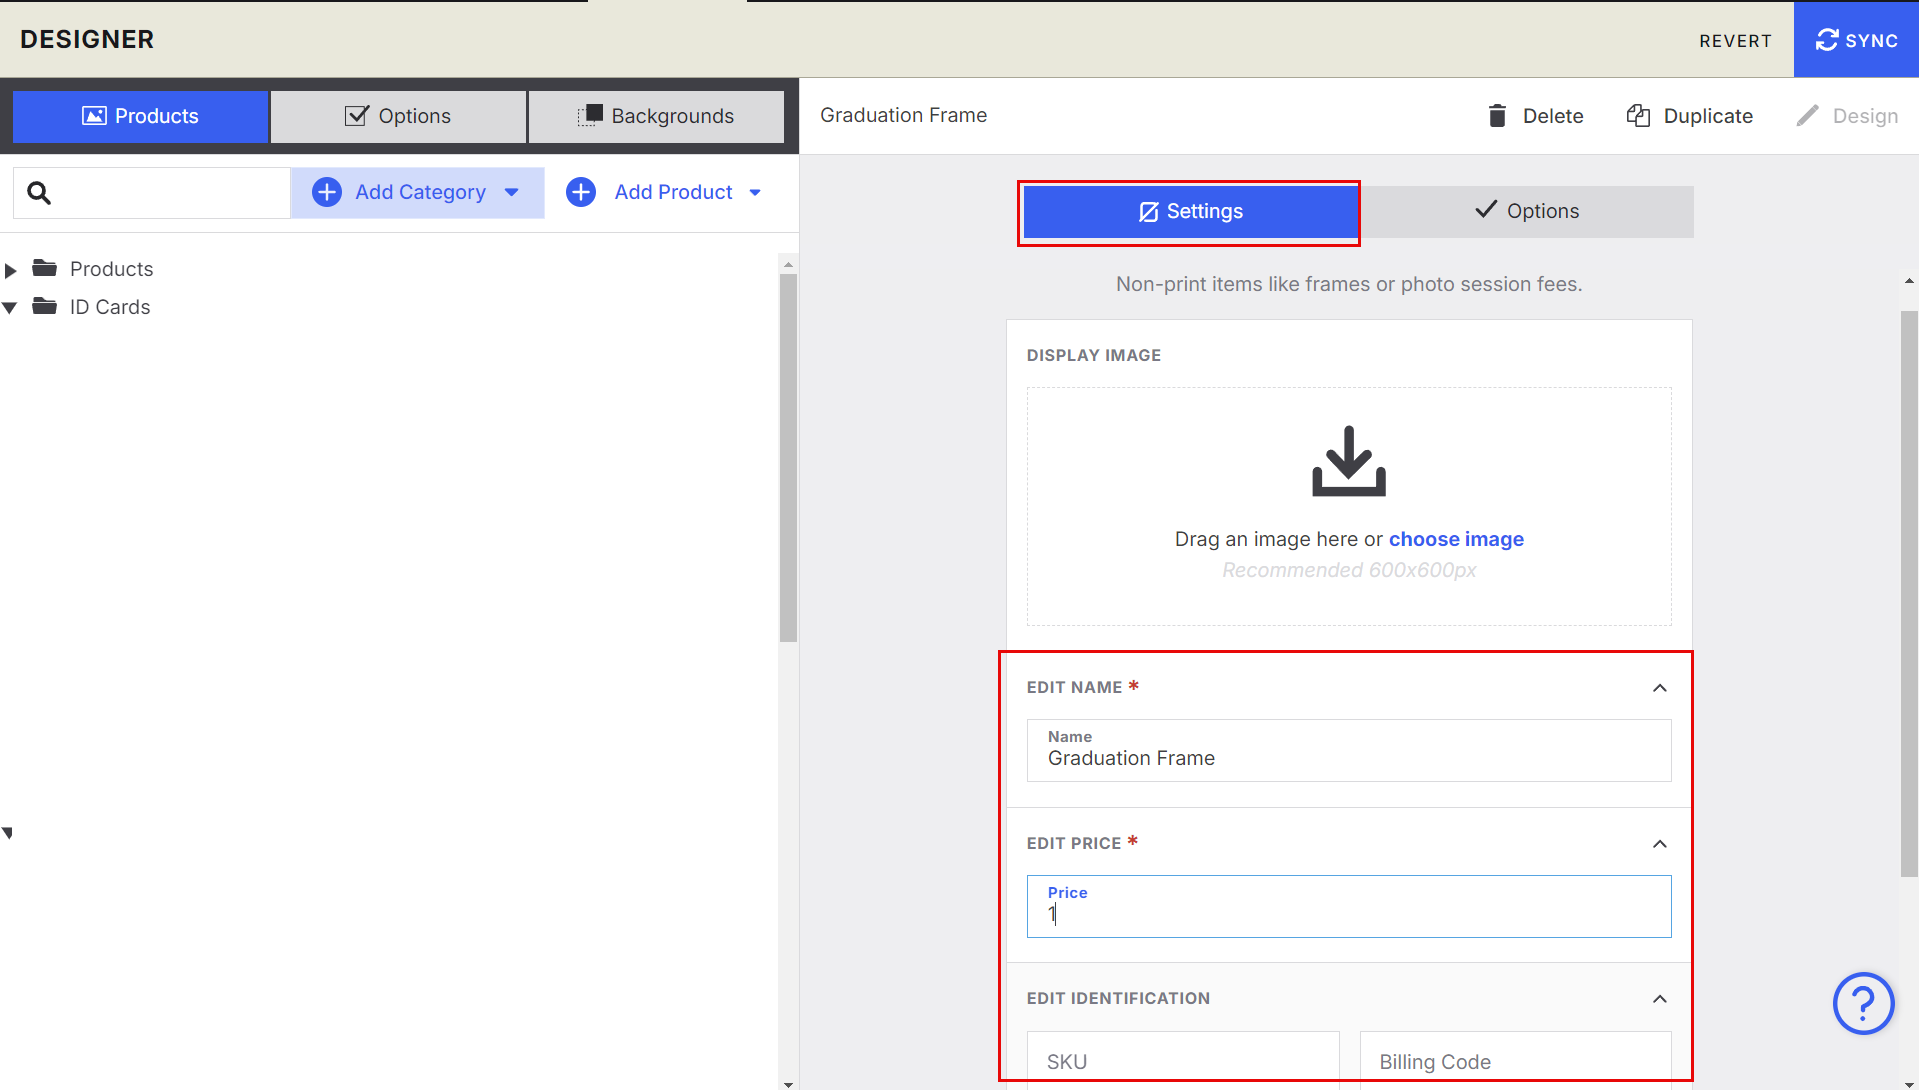
3. Add Product Options
If your Non‑Print Product requires customer selections (e.g., frame type, stand type, material choice):
Click the Options tab.
Select + Add Product Options.
Navigate to the folder where your option was created.
Select the option you want to attach.
Click Add.
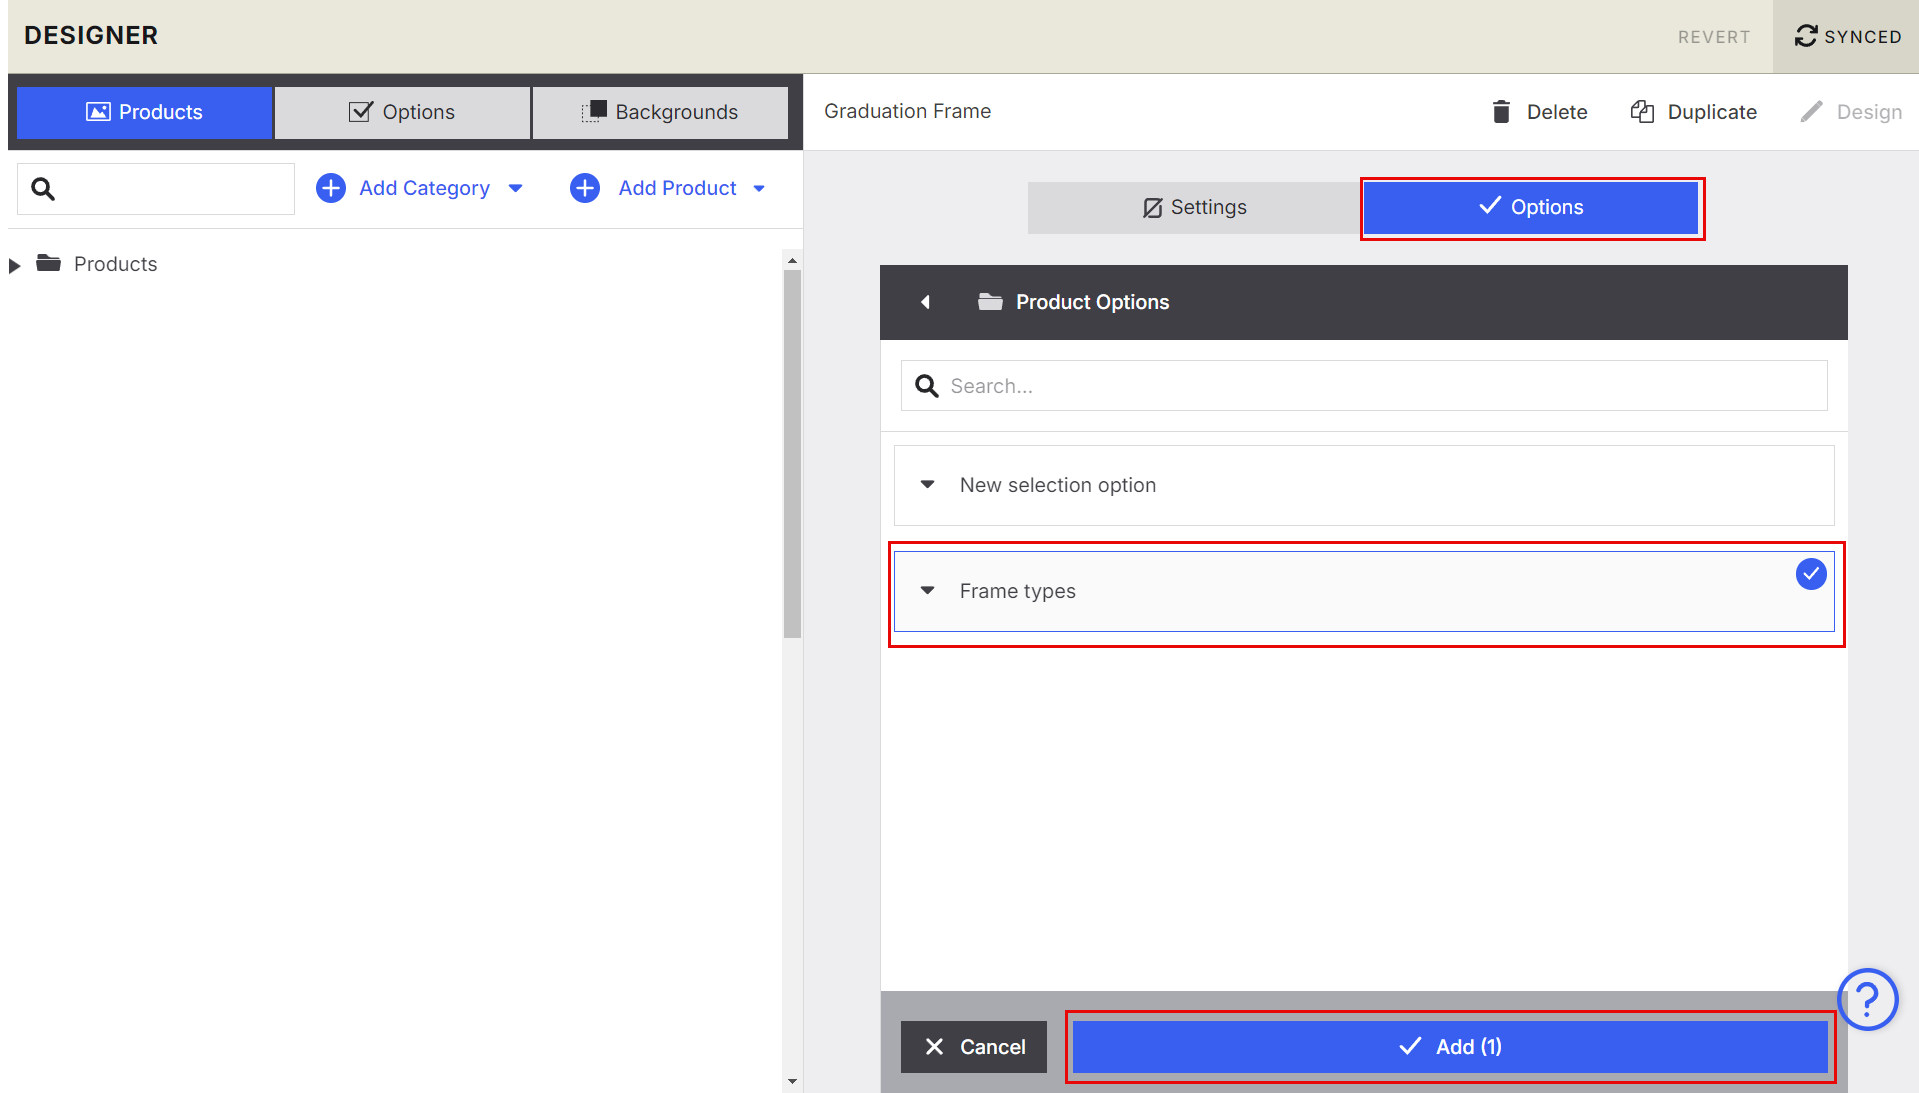
4. Sync Your Product
Click Sync to save your Non‑Print Product and make it available for use in your catalog and price sheets.