
Getting Started with Captura Workflow Preferences
Your Preferences are where you customize how Captura Workflow works for your studio. From studio information and user management to printing, shopping, and integrations, these settings help you create a smoother experience for both your team and your customers.
Taking a few minutes to configure your preferences now will help your studio stay organized, reduce manual work, and keep everyone working from the same information.
Opening Preferences
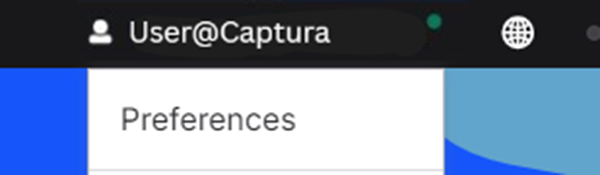
From the Workflow homepage, click Name @ Studio in the top-right corner, then select Preferences.
Managing Preferences
Preferences are grouped into sections, making it easy to find the settings you need. Below is an overview of each section and how it supports your studio.
My Studio
The My Studio section stores the key details about your business that Workflow uses throughout the system. Some of this information is customer-facing, so it's a good idea to review it regularly and keep everything up to date.
Section | Details |
|---|---|
Studio Name | Your studio's name. |
Address | Your studio's physical address. This must be completed if you're shipping Bulk Orders to your studio. |
Main Contact | The contact information customers should use if they need assistance. |
Order Emails | The email address used to send customer receipts. A copy of every receipt is also sent to this address for your records. |
Studio Website | Your studio's website URL. |
Tip: Keeping your studio information current helps provide a more consistent experience for your customers throughout their ordering journey.
Membership
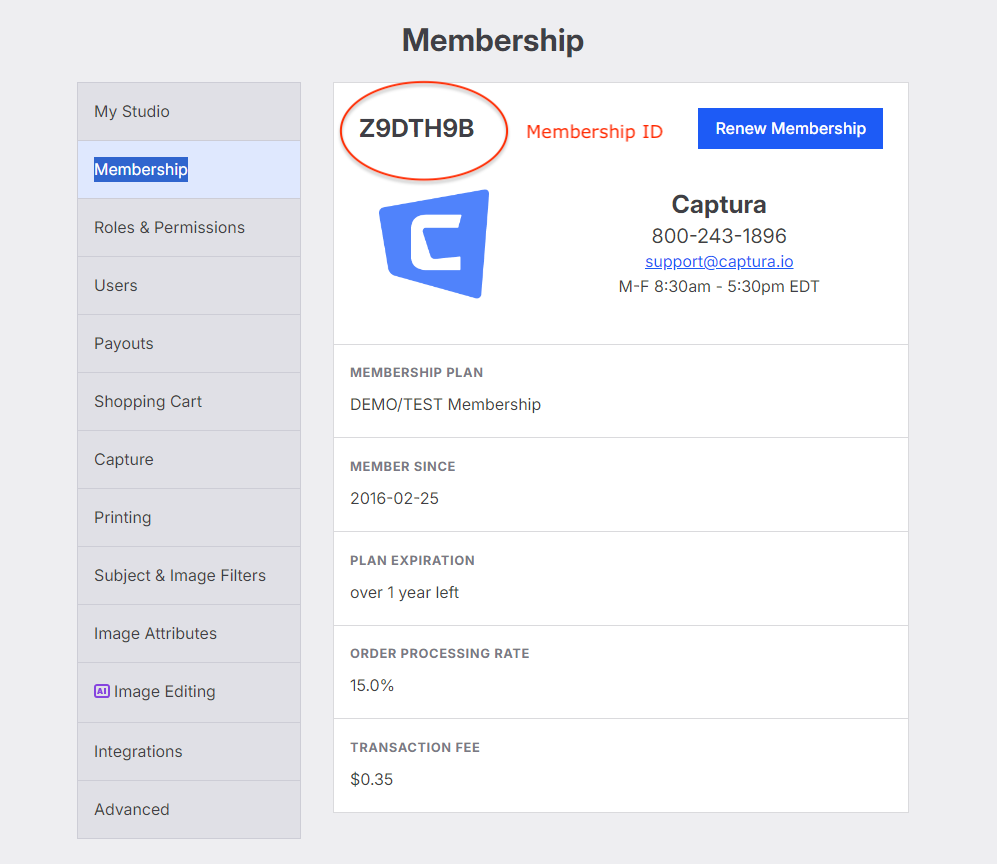
You can review your Captura Membership details at any time, including your membership status, renewal date, and current rates.
You'll also find your Membership ID, which our Product Support team may ask for if you contact us for assistance.
Tip: Having your Membership ID ready can help us get you the support you need more quickly.
Roles & Permissions
Roles and Permissions let you control what each team member can access in Workflow.
Whether you're creating accounts for photographers, customer service, production staff, or managers, assigning the right permissions helps protect your studio's data while giving everyone access to the tools they need.
Learn more about creating Roles and Permissions: Getting Started with Users, Roles & Permissions
Users
There is no additional charge for adding users to Workflow.
We recommend giving every team member their own account rather than sharing logins. Individual accounts help keep an accurate history of user activity and reduce the risk of syncing issues that can occur when multiple people use the same account.
Learn more about adding users: Recommended Roles and their permissions
Payouts
The Payouts section connects Workflow with your Stripe account so you can manage your studio's payments in one place.
From here you can:
View your Stripe Express Dashboard
Review your current balance
Initiate an Instant Payout (where available)
Update your Statement Descriptor, which is the business name shown on your customers' bank statements
To enable Instant Payouts, please contact the Captura Support Team at support@captura.io.
Before requesting Instant Payouts, we recommend reviewing your Stripe eligibility requirements and Stripe's documentation for payout timing.
Please check your eligibility (Here)
For more information, please see Stripes information page (Here)
Learn more about when payments are processed in Stripe (Here)
Section | Details |
|---|---|
My Connect Account | Opens your Stripe Express Dashboard where you can review payout information. |
Current Balance | Displays your available Stripe balance within Workflow. |
Initiate Instant Payout | Available for eligible U.S. customers using supported debit cards. |
Statement Descriptor | Controls how your studio name appears on customers' bank statements. |
Shopping Cart
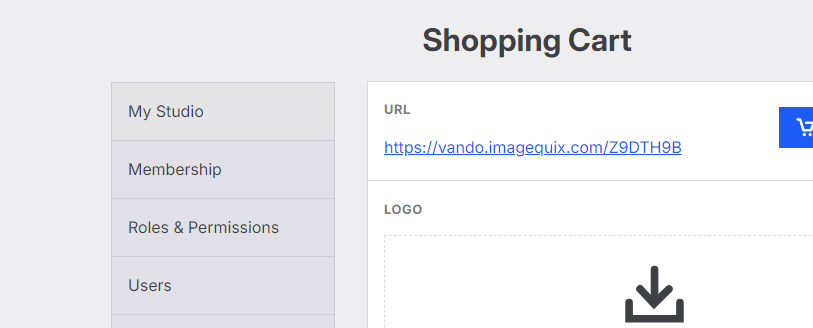
The Shopping Cart section lets you customize your studio's online ordering experience.
Here you can:
Upload your studio logo
Display your studio contact information
Configure account-level Shopping Cart settings
Add your Gallery Link so customers can access their galleries directly from your website
Additional Settings
Some Workflow preferences are managed locally on each device. These settings help customize how Workflow behaves for photographers, production staff, and other team members.
Important: Settings configured through Smart Tag apply to all jobs on that device only. If your team uses multiple computers, these preferences should be reviewed on each device.
Note: Tethered Workflow is available as part of the Smart Workflow add-on.
General
Customize how Workflow automatically handles image sizing and cropping.
You can configure:
Automatic head sizing and aspect ratios for Subject Jobs
Automatic aspect ratios for Standard Jobs
All automatic edits are non-destructive, so your original images remain unchanged.
Primary Image Selection
Choose whether Workflow automatically marks the First or Last image captured for each subject as the starred image.
This can help streamline image review after picture day.
Barcode Scan Field
Choose which subject data field Workflow uses when matching information collected from barcode-scanned camera slate cards.
Subject Data Preview
Control which subject information is visible while working in a job.
You can choose:
Up to 2 fields to display in the Subject List
Up to 5 fields photographers can view while capturing subject information during a photo shoot
Camera Hot Folder
Select a folder for Workflow to monitor for newly added images.
When enabled, Workflow automatically imports images placed in this folder, helping streamline image ingestion during production.
Head Size Guidelines
Customize the appearance of the head size guidelines displayed during image review.
Guidelines can be configured separately for each supported aspect ratio.
Printing
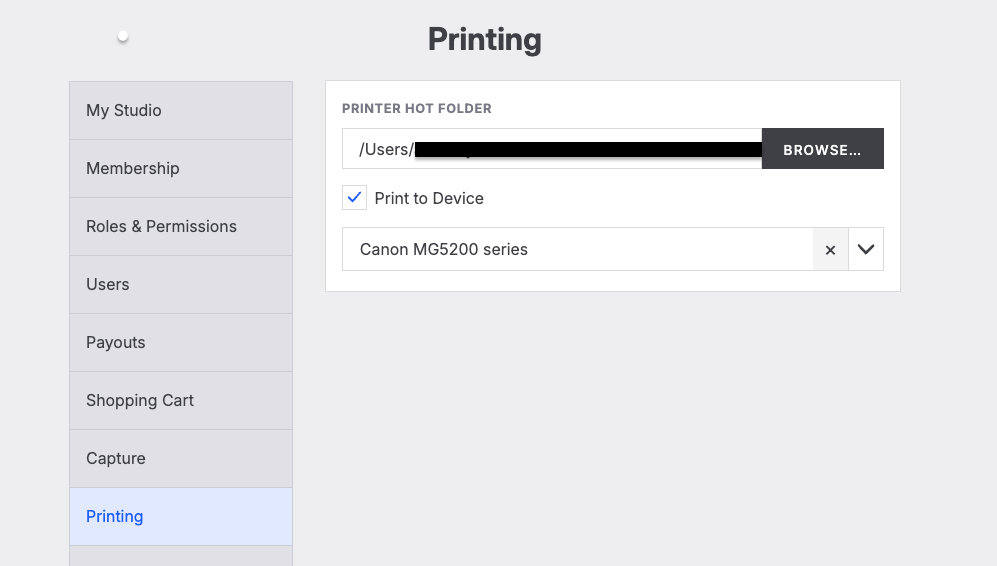
Configure printing preferences by selecting either:
A Printer Hot Folder
A Direct Print Device
Workflow can automatically send rendered designs to supported printers as new images become available.
Important: If a Printer Hot Folder isn't configured, Workflow will prompt you to choose a printer or export as a PDF or JPG each time you print, even if Print to Device is enabled.
Subject & Image Filters
Manage any saved Subject or Image Filters on your device.
From here you can rename or delete previously saved filters that were created while working in jobs.
Integrations
Connect Workflow with your PhotoLynx PLIC account for a more connected workflow between systems.
Learn more in our integration article collection: Integrations
Advanced
The Advanced section contains tools that can help with troubleshooting, maintenance, and device management.
Section | Details |
|---|---|
Logs | Download or send application logs to the Captura Workflow Product Team when requested by Support. |
Reset Table Column Widths | Restores all Workflow table columns to their default widths. |
Offline Job Storage | Automatically removes locally stored offline job data after a period of inactivity. This only affects jobs without local changes. We recommend using a shorter storage period for Customer Support teams that regularly switch between multiple jobs. |
Offline Print Template Storage | Clears the local print template cache so Workflow downloads the latest versions of your My Designs the next time a job is opened. |
Available Versions | Choose between the stable Fall Seasonal Release or the Latest Versions release channel to access new features and enhancements. Version selection is a local device setting. |
Recommendation: We recommend staying on the Fall Seasonal Release unless your team has been advised to switch to Latest Versions. If you're unsure which version is right for your studio, our Support Team is happy to help.
What's Next?
Now that your preferences are configured, you're ready to continue setting up Workflow for your studio.
Next, we recommend:
Creating Roles and Permissions for your team: Getting Started with Users, Roles & Permissions
Adding your studio users: Recommended Roles and their permissions
Configuring your Shopping Cart: Getting Started with Shopping Cart Templates
Creating your first Job: Getting Started with Jobs
Taking the time to configure these settings now helps your studio get the most out of Captura Workflow and creates a smoother experience for both your staff and your customers.